
Uncategorized
First Steps in gRPC Bindings for React Native 
Albert Brand 22 Feb, 2017


When using React Native, lists are created using the FlatList component. A FlatList is constructed using one or more repeatable list items, one item per row. In this blog I’ll demonstrate how TypeScript can help to create FlatLists with generic list items.
This is a technique where we can reduce boilerplate, but still have readable and customisable FlatLists.
Let’s dive right into the basics of a FlatList by creating a list of StarWars characters.
const starWarsData: StarWars[] = [
  {id: '1', character: 'Luke Skywalker', hairColor: 'Blond'},
  {id: '2', character: 'Leia Organa', hairColor: 'Brown'}
];
const StarWarsListItem = ({item}: {item: StarWars}) => (
    <TouchableOpacity style={styles.item} onPress={() => onPressListItem(item)}>
      <View style={styles.textContainer}>
        <Text>Character: {item.character}</Text>
        <Text>Hair color: {item.hairColor}</Text>
      </View>
    </TouchableOpacity>
  );
return (
    <View style={styles.container}>
      <View style={styles.headerContainer}>
        <Text style={styles.headerLabel}>Star Wars Characters</Text>
      </View>
      <FlatList
        data={starWarsData}
        keyExtractor={(item) => item.id}
        renderItem={StarWarsListItem}
      />
    </View>
);
This code will generate a list of characters from StarWars, like shown here. 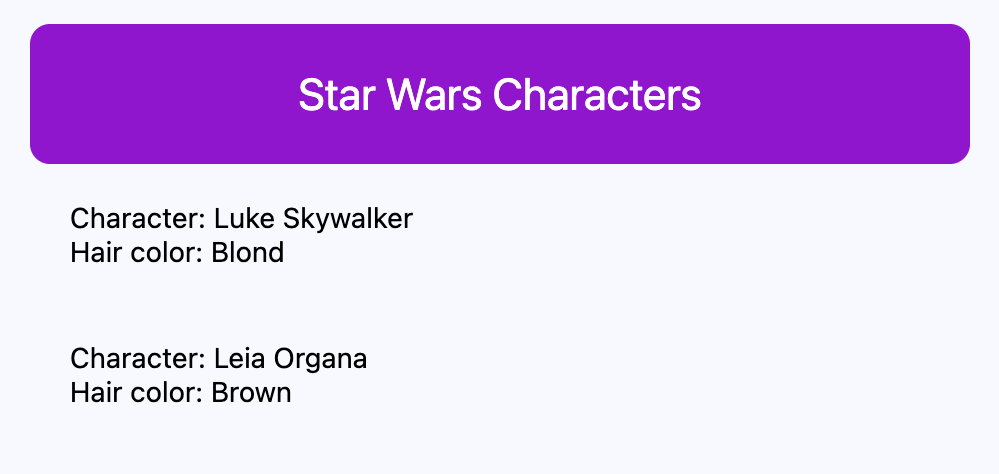
When creating multiple FlatLists that look the same, we don’t want to write the duplicate code every time. In the example above we see that the purple header is created in each StarWarsListItem. Also a TouchableOpacity is created to make each Item clickable, which is redundant. By making a FlatList abstraction with a generic renderItem, we remove these redundant parts and create a more efficient component. Let’s dive into the generic part by creating the FlatList abstraction.
type Props<ItemT> = {
  data?: ItemT[];
  onPressListItem: (item: ItemT) => void;
  renderDetails: React.FC<{item: ItemT}>;
  keyExtractor: (item: ItemT) => string;
  headerTitle: string;
};
const GenericList = <ItemT,>({
  data,
  onPressListItem,
  keyExtractor,
  headerTitle,
  renderDetails: RenderDetailsComponent
}: Props<ItemT>) => {
  const renderItem = ({item}: {item: ItemT}) => (
    <TouchableOpacity style={styles.item} onPress={() => onPressListItem(item)}>
      <View style={styles.textContainer}>
        <RenderDetailsComponent item={item} />
      </View>
    </TouchableOpacity>
  );
  return (
    <FlatList
      data={data}
      keyExtractor={keyExtractor}
      renderItem={renderItem}
      ListHeaderComponent={
        <View style={styles.container}>
          <View style={styles.headerContainer}>
            <Text style={styles.headerLabel}>{headerTitle}</Text>
          </View>
        </View>
      }
      ItemSeparatorComponent={() => <View style={styles.listSeparator} />}
    />
  );
};
The GenericList component receives props declared in the Props type. When looking at the renderDetails type, we see the following declaration: React.FC<{item: ItemT}>.
This declaration tells TypeScript that it should only accept functional components that have the prop item with the generic type ItemT. This generic type ItemT should be the same type as the type that is passed as an array with the dataprop. This is the data that is used for rendering the list of rows.
Furthermore the <ItemT,> trailing comma syntax is needed because we use a functional component using an arrow function. Else TypeScript will show the following error:
Parsing error: JSX element ‘ItemT’ has no corresponding closing tag
The following code shows how to create the StarWars FlatList, using the GenericList component we just shown.
const starWarsData: StarWars[] = [
  {id: '1', character: 'Luke Skywalker', hairColor: 'Blond'},
  {id: '2', character: 'Leia Organa', hairColor: 'Brown'}
];
const StarWarsListItem = ({item}: {item: StarWars}) => (
  <>
    <Text>Character: {item.character}</Text>
    <Text>Hair color: {item.hairColor}</Text>
  </>
);
<GenericList
  data={starWarsData}
  headerTitle="StarWars characters"
  renderDetails={StarWarsListItem}
  onPressListItem={(item: StarWars) => console.log(item)}
  keyExtractor={(item) => item.id}
/>
The advantage of this technique is high flexibility in how to present rows in a FlatList, while replicated code is hidden by the GenericList component. Eventually this will benefit in testability, maintenance and developer experience.
We can also use the GenericList with different data, as shown in the following code example.
const onPressListItem = (item: Fruit | StarWars) => console.log(item);
const StarWarsListItem = ({item}: {item: StarWars}) => (
  <>
    <Text>Character: {item.character}</Text>
    <Text>Hair color: {item.hairColor}</Text>
  </>
);
const FruitListItem = ({item}: {item: Fruit}) => <Text>{item.title}</Text>;
return (
  <>
    <GenericList
      data={starWarsData}
      headerTitle="StarWars characters"
      renderDetails={StarWarsListItem}
      onPressListItem={(item: StarWars) => console.log(item)}
      keyExtractor={(item) => item.id}
    />
    <GenericList
      data={fruitData}
      headerTitle="Fruits"
      renderDetails={FruitListItem}
      onPressListItem={onPressListItem}
      keyExtractor={(item) => item.id}
    />
  </>
);
This will create two lists, which are using a different data type and still are flexible in how to data is presented in each row  The following (embedded) CodeSandbox will show the
 GenericList component using react-native-web. Clicking on a ListItem will result in a log in the console. Thanks for reading my blog!
