
This article focuses on setting up a continuous integration pipeline for a Django project, but the information here can be extended to other Python projects, too. Django is a Python framework that is described as the “web framework for perfectionists with deadlines.” It is considered a great tool for creating Minimal Viable Products (MVPs) because it is easy to set up an application with a database and to run tests. It delivers high quality code and has excellent documentation. These features also benefit your users because it promises the fast shipping of new features.
Here are the steps we will take:
- Create a Django app
- Create tests for the app
- Dockerize the app
- Configure CircleCI
- Run locally
- Push to GitHub
- Add a badge
- Explore optimization with caching
Prerequisites
In order to go through this tutorial, you will need to have the following installed:
Create a Django app
Django Girls offers a great tutorial on the Django framework. We’ll start off with a blog application that is the result of completing the Django Girls tutorial and setup CircleCI for it. For the database, we’ll use a flat file: .sqlite.
To get the blog app, clone this repo by typing this line into your terminal:
git clone https://github.com/NdagiStanley/django_girls_complete.git
Then, enter the directory by running:
cd django_girls_complete
After I completed the tutorial from Django Girls, I made additional changes to the application’s codebase. Since these changes are not directly related to setting up CI for the project, I will just add links to the file changes in GitHub. The changes include:
- Updating the templates in the
blog/templates/blogdirectory andsettings.py. - Adding a
.gitignorefile. - Adding a
.editorconfigfile. - Adding files to Dockerize the app. More on this later.
To see the original, run:
git checkout original
To get the codebase after my changes, run:
git checkout 1.1.0
From now on I will take us step by step through setting up our continuous integration pipeline. The folder structure of our app looks like this (I simply run tree from my terminal to get this):
.
├── Dockerfile
├── LICENSE
├── README.md
├── blog
│   ├── __init__.py
│   ├── admin.py
│   ├── apps.py
│   ├── forms.py
│   ├── migrations
│   │   ├── 0001_initial.py
│   │   └── __init__.py
│   ├── models.py
│   ├── static
│   │   └── css
│   │       └── blog.css
│   ├── templates
│   │   └── blog
│   │       ├── base.html
│   │       ├── post_detail.html
│   │       ├── post_edit.html
│   │       └── post_list.html
│   ├── tests.py
│   ├── urls.py
│   └── views.py
├── docker-compose.yml
├── init.sh
├── manage.py
├── mysite
│   ├── __init__.py
│   ├── settings.py
│   ├── urls.py
│   └── wsgi.py
└── requirements.txt

7 directories, 26 files
Creating tests for the app
Our CI pipeline needs to have tests so that we can ensure that our automated build is A-Okay before any new commit is merged. Writing tests with Django is extensively documented here.
First, replace the code in blog/tests.py with:
from django.contrib.auth.models import User
from django.test import TestCase
from django.utils import timezone

from .models import Post
from .forms import PostForm

class PostTestCase(TestCase):
    def setUp(self):
        self.user1 = User.objects.create_user(username="admin")
        Post.objects.create(author=self.user1,
                            title="Test",
                            text="We are testing this",
                            created_date=timezone.now(),
                            published_date=timezone.now())

    def test_post_is_posted(self):
        """Posts are created"""
        post1 = Post.objects.get(title="Test")
        self.assertEqual(post1.text, "We are testing this")

    def test_valid_form_data(self):
        form = PostForm({
            'title': "Just testing",
            'text': "Repeated tests make the app foul-proof",
        })
        self.assertTrue(form.is_valid())
        post1 = form.save(commit=False)
        post1.author = self.user1
        post1.save()
        self.assertEqual(post1.title, "Just testing")
        self.assertEqual(post1.text, "Repeated tests make the app foul-proof")

    def test_blank_form_data(self):
        form = PostForm({})
        self.assertFalse(form.is_valid())
        self.assertEqual(form.errors, {
            'title': ['This field is required.'],
            'text': ['This field is required.'],
        })
What we’ve added is a PostTestCase class extending from django.test.TestCase with four methods:
- In the
setUpmethod, defined asdef setUp(self), we create one user,self.user, and a post by that user. - The
test_post_is_postedmethod confirms that the text of the post titled Test is We are testing this. - The
test_valid_form_datamethod confirms that the form saves correctly: a title and text is filled on the form to create a post, the post is saved, and its title and text confirmed to be correct. - The
test_blank_form_datamethod confirms that the form will throw an error when neither title nor text is filled.
Second, run the following command:
python manage.py test
Note: This command builds a test suite out of all of the test cases, extending TestCase in any file whose name begins with test and then runs that test suite.
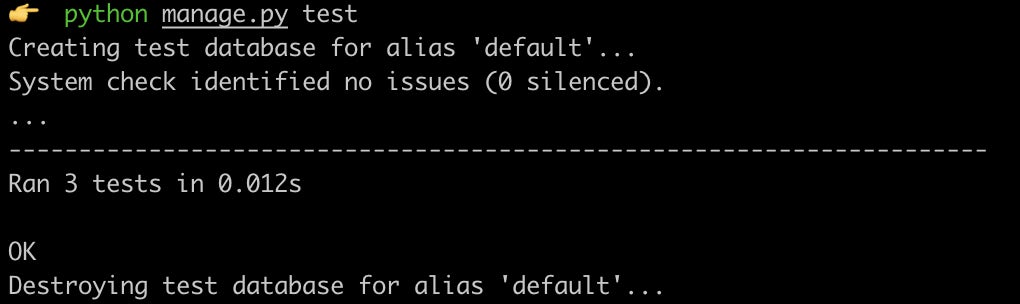
The tests are passing! A breath of fresh air.
To start with the codebase after the tests have been added, run:
git checkout tests
Dockerize the app
Next up is Dockerizing the app. What does that even mean?
To Dockerize an app means to develop, deploy, and run an application in a container using Docker. This involves three key files:
-
.dockerignorefile: A.dockerignorefile is to Docker what a.gitignorefile is to Git. The files and/or folders listed therein will be ignored in the Docker context and will not be found within a Docker image. See our.dockerignorefile here. -
Dockerfilefile: Defines the steps to create a Docker image. See ourDockerfilehere. -
docker-compose.ymlfile: Whether you are running one service or multiple services, Docker compose removes the need to type out a longdocker runcommand and allows you to run one line,docker-compose up, to spin up containers in the context of the file. See ourdocker-compose.ymlfile here.
I also added an initialization script to be used when running the Dockerfile. See our init.sh file here.
CircleCI configuration
For us to integrate CircelCI into our project, we need to add a configuration file for a Python app. Create a .circleci folder in the project’s root and add a config.yml file. Copy these lines into it:
version: 2
jobs:
  build:
    docker:
      - image: circleci/python:3.6
    steps:
      - checkout
      - restore_cache:
          key: deps1-{{ .Branch }}-{{ checksum "requirements.txt" }}
      - run:
          command: |
            python3 -m venv venv
            . venv/bin/activate
            pip install -r requirements.txt
      - save_cache:
          key: deps1-{{ .Branch }}-{{ checksum "requirements.txt" }}
          paths:
            - "venv"
      - run:
          name: Running tests
          command: |
            . venv/bin/activate
            python3 manage.py test
      - store_artifacts:
          path: test-reports/
          destination: python_app
If this is your very first time doing this, you’ll notice four steps that may not be apparent:
checkout: This command fetches your source code over SSH to the configured path (the working directory, by default).restore_cache: This command restores a previously saved cache.save_cache: This command generates and saves a cache of a file, multiple files, or folders. In our case, we save a cache of the installed Python packages obtained after runningpip install ….store_artifacts: This command stores logs, binaries, etc. so that they are accessible by the app in later runs.
Running the CircleCI build locally
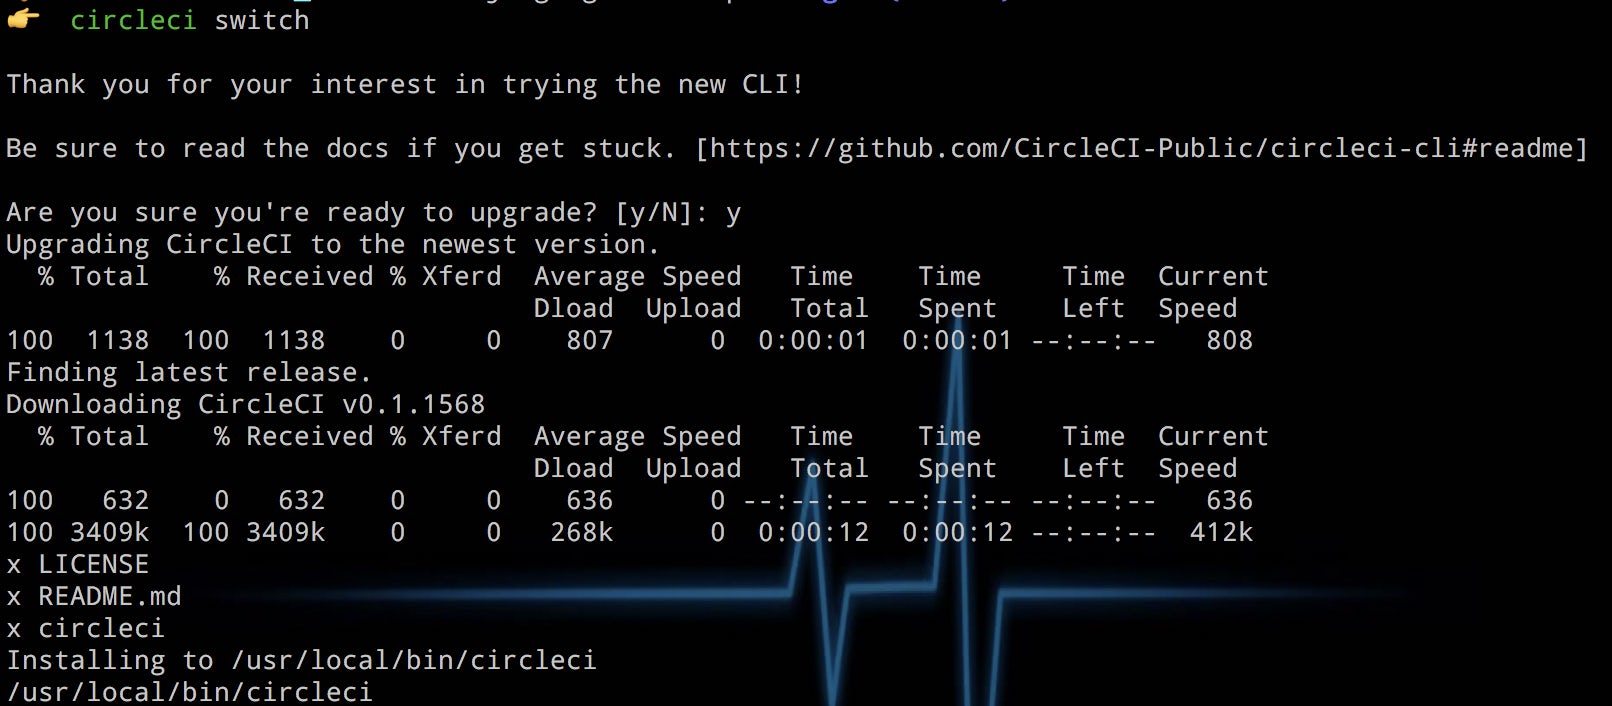
I advocate that one installs the CircleCI CLI tool to run the build locally before pushing it to GitHub and running it on CircleCI. Running the build locally keeps you from having to commit code to your online repository to confirm that the build is passing. It quickens the development cycle.
You can install the CLI using Homebrew by running:
brew install circleci
Then, start by running the circleci switch command:
You then run circleci config validate to validate that your config file is written correctly and circleci build to build the app:
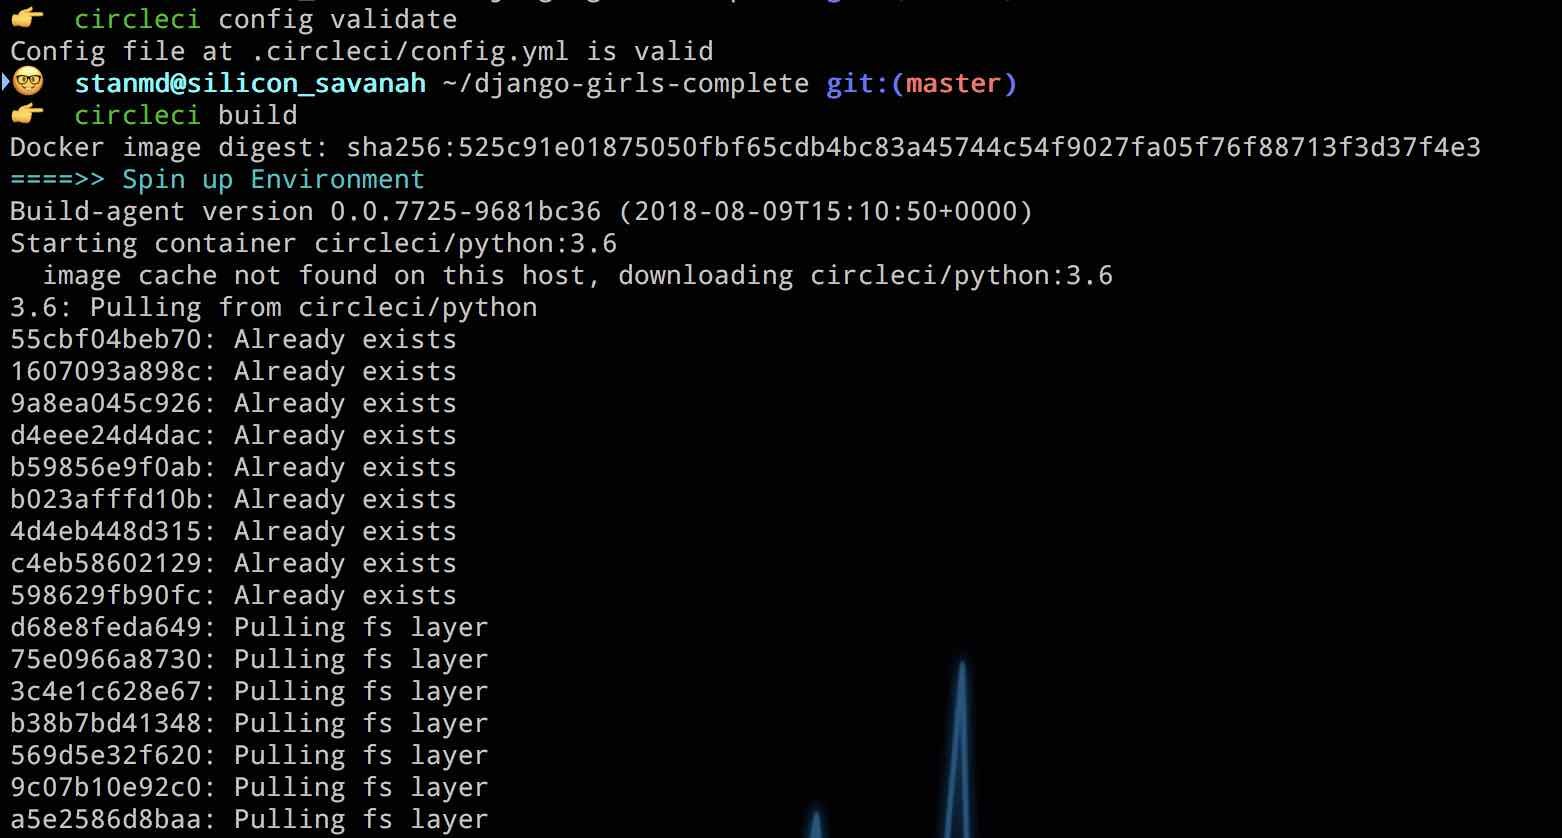
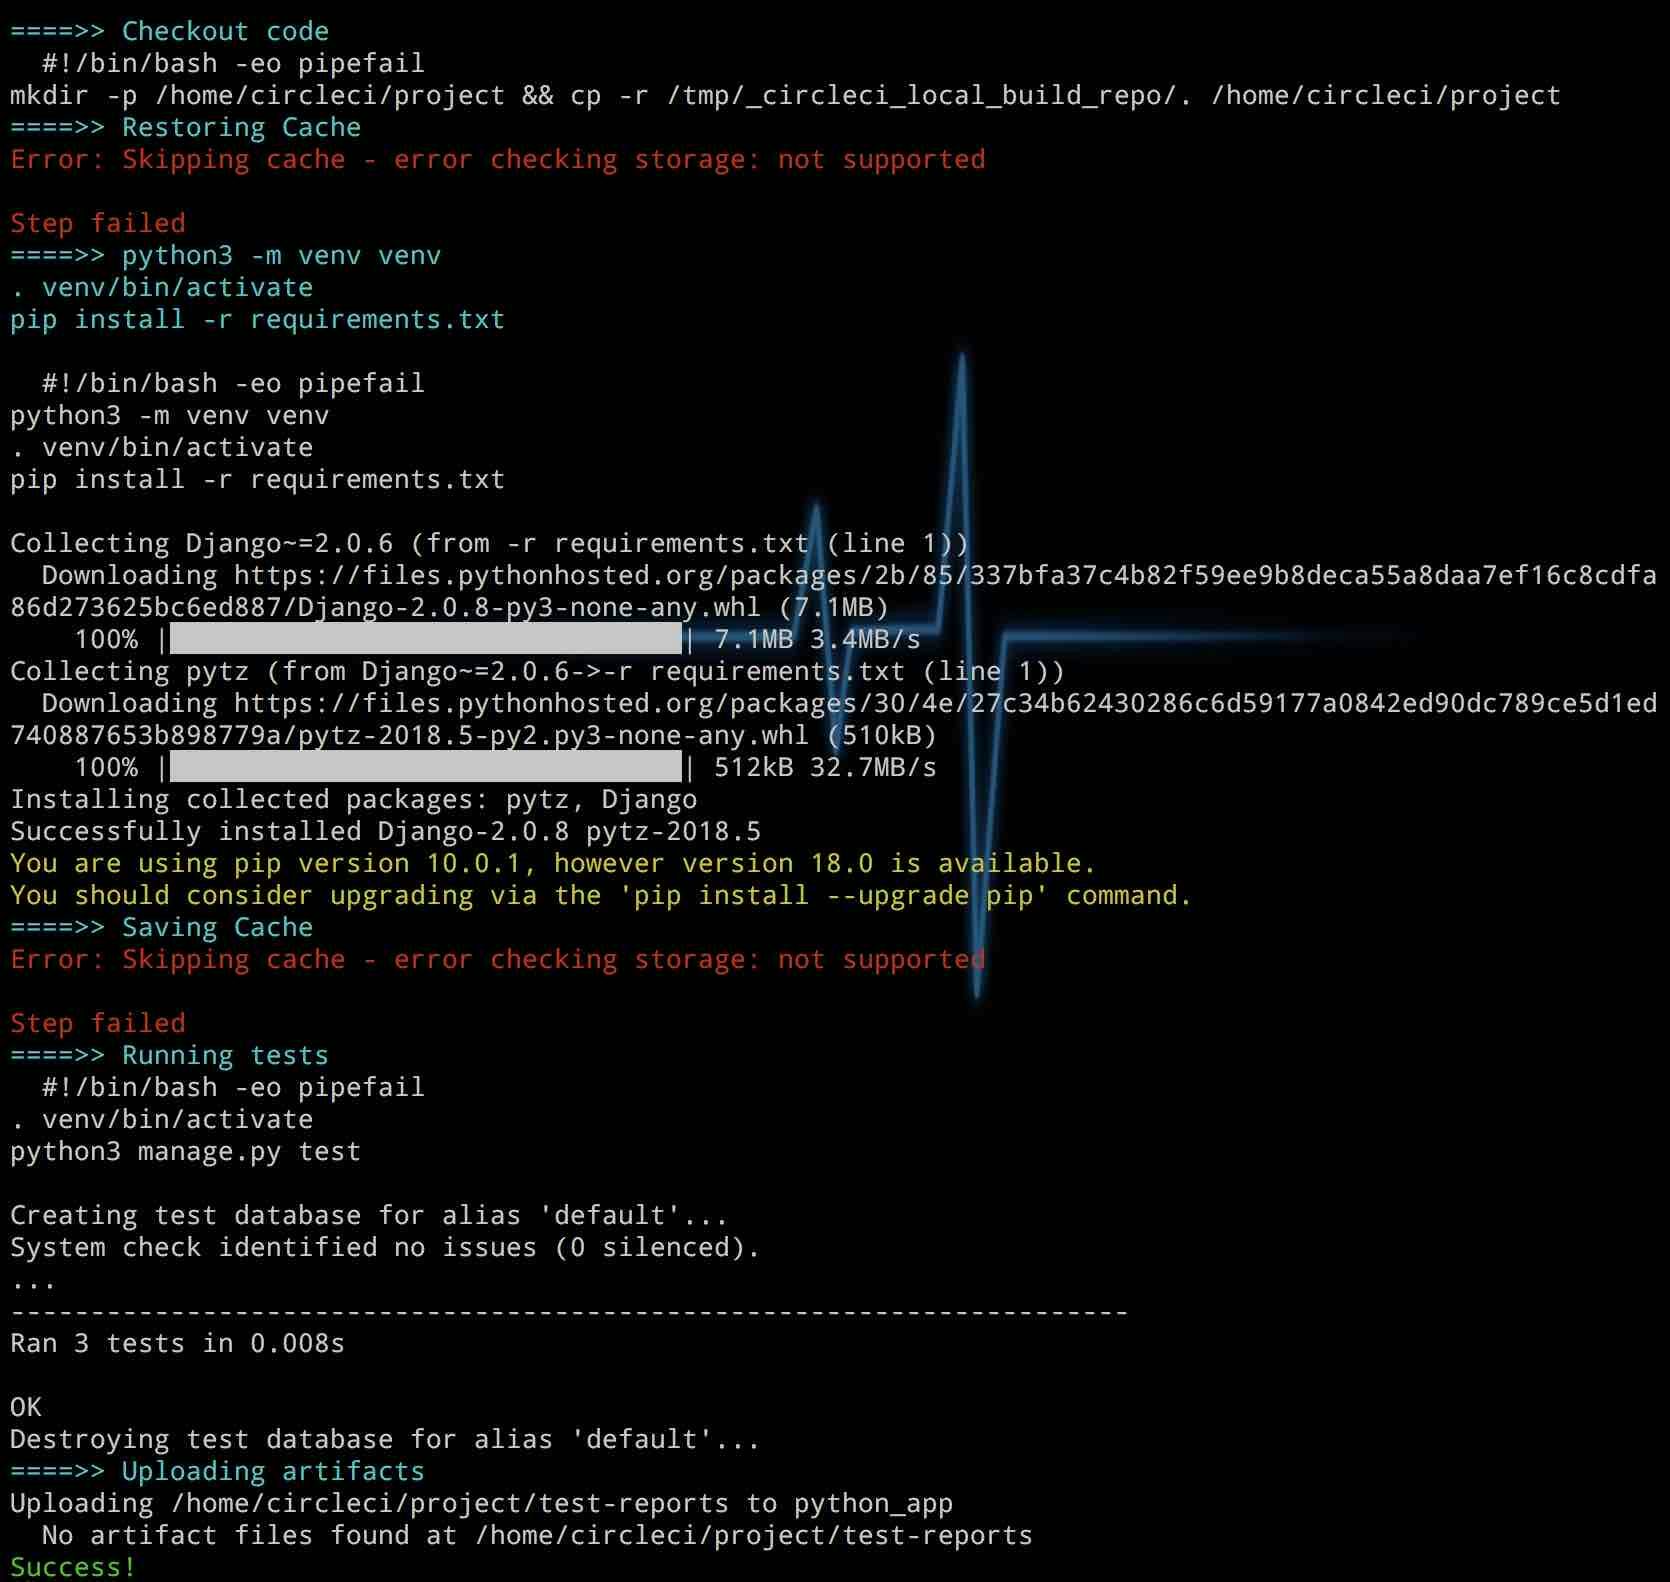
The output from the commands concludes with Success! The local build ran successfully. With this check, we can now push the code to GitHub.
To start with the codebase after the tests have been added, run:
git checkout circleci
Connecting a project to CircleCI
All we need now is to connect CircleCI to our code on GitHub and we will have the CI pipeline working like a charm: push code change, run test, merge if passing. Open GitHub in your browser and create a new repository. If you don’t have a GitHub account, you can create one here. After creating your repo, push your project to GitHub.
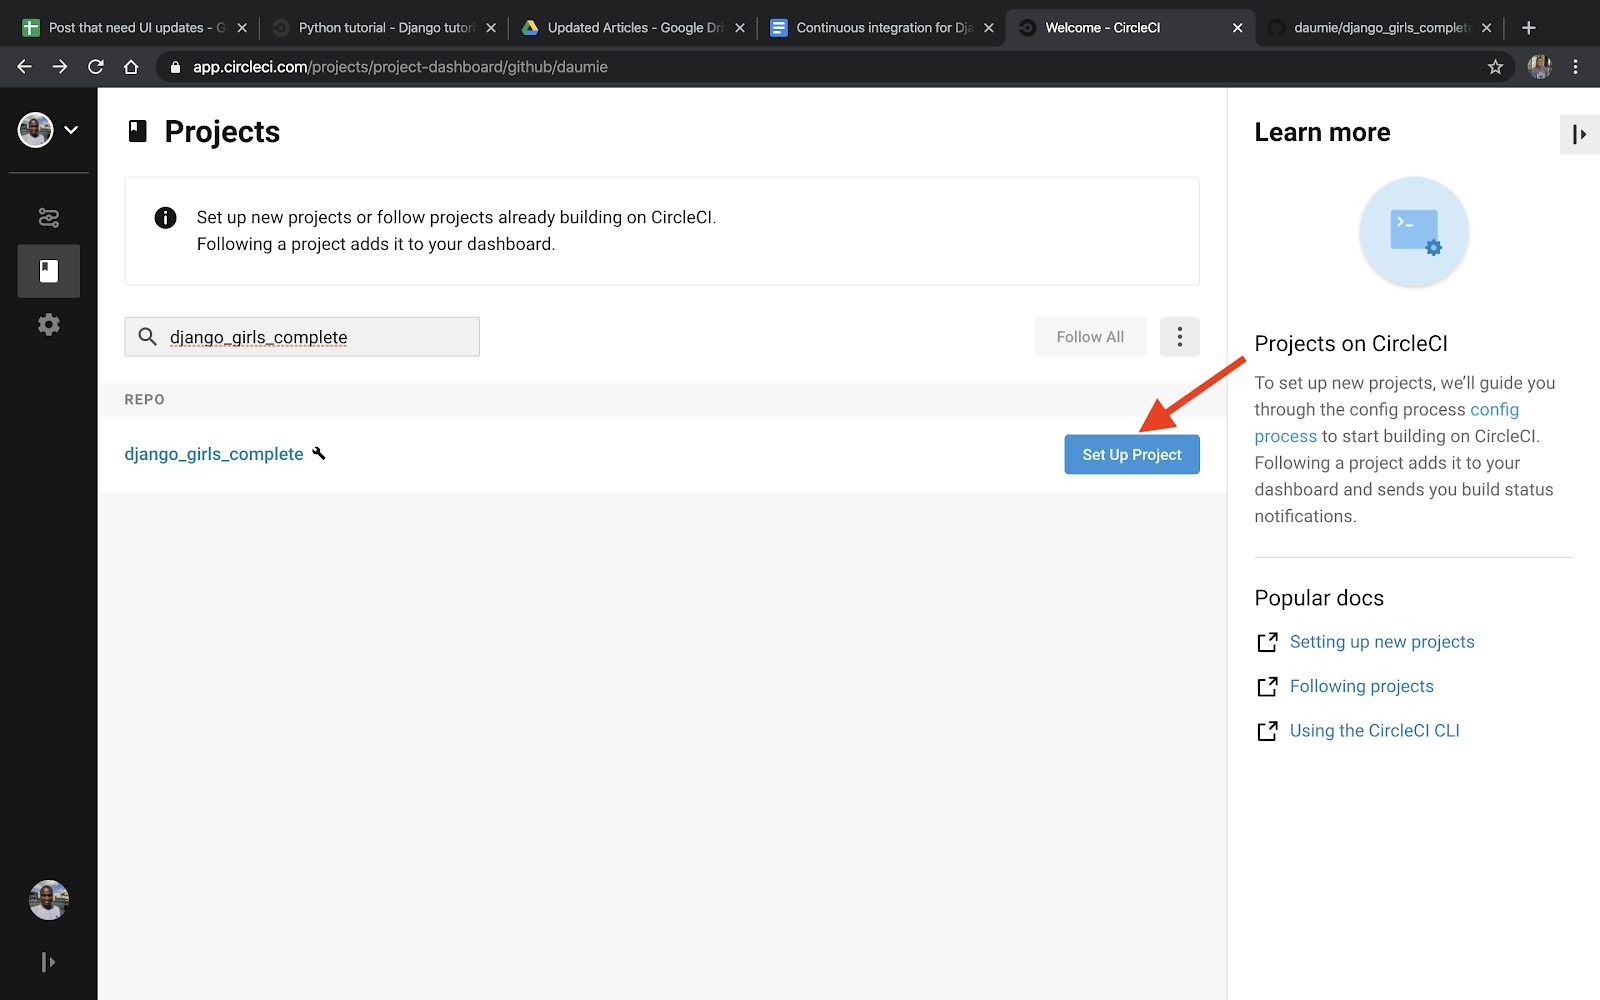
Then, log into CircleCI to view the dashboard. If you don’t have an account, you can sign up for a free one here. On your dashboard page, click Add Projects and then click on the project name you are using. In my case, the name is django_girls_complete.
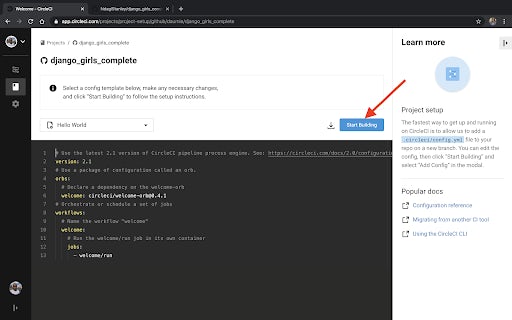
Next, click on Start Building to choose which configuration file to use.
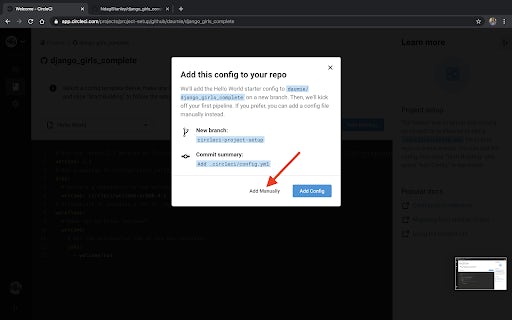
Since we already have a config file, click Add Manually to run the job.
A successful run will look like this:
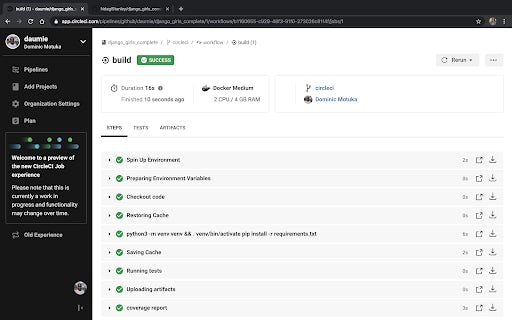
There you have it! That’s how to set up CI for Django projects. Type this into your terminal to run the application:
docker compose up
The app will be live at <0.0.0.0:8000>.
Adding a badge
You can have a number of integrations within your codebase. Having badges in your README is a best-practice that allows you to show others how the state of these integration services stand. It help others by letting them know how the state of these services stand. To get your badge, navigate to: https://circleci.com/gh/<Username>/<Project>/edit#badges. In my case it is: https://circleci.com/gh/NdagiStanley/django_girls_complete/edit#badges.
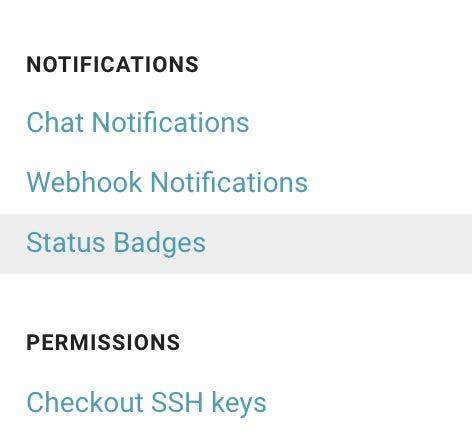
Click the cog icon next to the name of the project:
Then, in the side menu, click Status Badges:
Copy the embedded code:
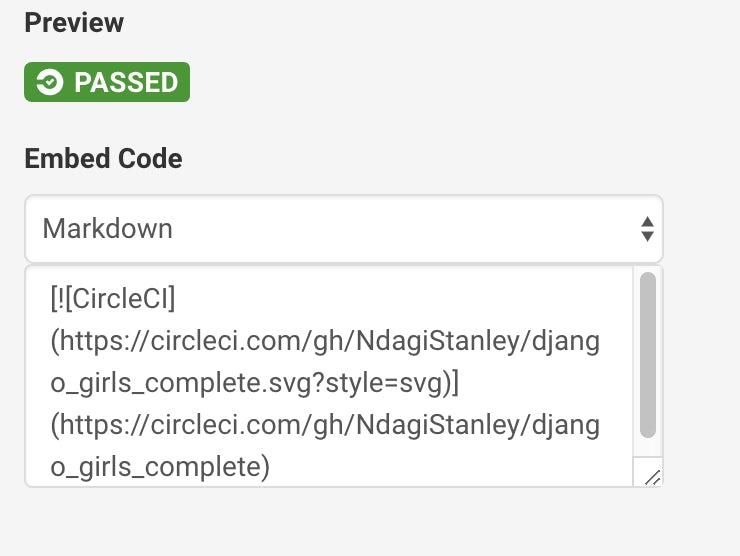
And, finally, paste it into your README, preferably close to the top, after the brief introduction of the repository. From the README, you’ll be able to see the build status of the most recent job in the default branch.
Exploring caching
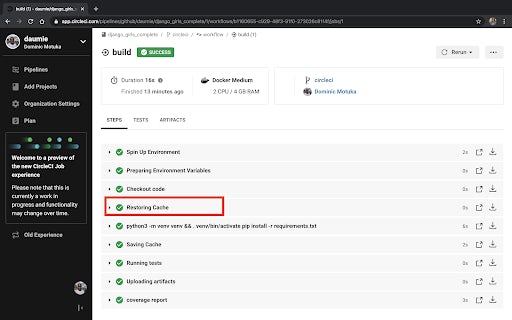
In the screenshot showing the local CircleCI CLI run, you may have noticed the text in red: Error: Skipping cache - error checking storage: not supported. Cache is not supported when running the CircleCI build locally.
For a CircleI job (a single run of the commands in a config file) to be faster, caching is implemented. More on this here. In our setup, we included steps for caching. For our learning, I ran the CircleCI job with and without caching to show us the advantage. Observe:
Starting from the lowest build, the extreme right tells us the time it took to run the job: 00:11 (11 seconds), 7 seconds, and so forth.
Caching is beneficial for us in overlooking the pip install -r requirements.txt command if the requirements.txt file is not modified. Of course, the first job just sets up the cache. It is no wonder that it took 11 seconds. We can assume that consecutive commits to GitHub without changing the requirements.txt file will run in the range of 7 seconds. In the third job, I removed caching, and the time got returned to the range of the first: 11 seconds. On the fourth run, I restored caching resulting in a 20 second run. Finally, a rerun of that same job lasted 7 seconds, taking advantage of the cache again.
The seconds here might seem few and insignificant but with scale, the lost seconds can turn to minutes, even hours.
Conclusion
If you have followed the above instructions, you are well on your way of mastering continuous integration for your Django project(s). We started by creating a Django app and writing tests for it. Then we Dockerized the app so that we could build it in an isolated container. Doing this is beneficial because it results in only one dependency needed to run the app on any machine: Docker. The other dependencies for the app are all installed in the Docker container. We then went ahead and covered some best-practices in using CircleCI:
- Running the CI build locally with the CircleCI CLI
- Adding a badge and
- Utilizing caching for even faster builds.
Stanley is a Software Engineer and Technical Copywriter who has worn several hats, including technical team leadership and community engagement. He describes himself as a digerati (literate in the digital space).


