
In this tutorial, we’ll learn how to integrate CircleCI with Code Climate’s Quality tools. Integrating Quality as a part of a continuous integration (CI) pipeline has many benefits. These benefits include the ability to:
- Monitor code quality and syntax against set parameters, presenting issues in an easily understood and transparent format
- Display test coverage reports in a publicly accessible, transparent way
- Set test coverage thresholds that, when crossed, determine whether an issue in our pipeline is triggered and if so, halts our deployment process
- Set up GitHub status checks for coverage and code syntax on our open pull requests (PRs), protecting our deployments from failure
Prerequisites
For the purposes of this tutorial, there are a few things you’ll need to have or know before we begin. These are:
- A basic understanding of Node.js and npm with Node installed
- ESLint installed
- A CircleCI account
- A GitHub account
- A Code Climate account
I’m developing the application used as demonstration in the JavaScript language, but feel free to use any other Code Climate and CircleCI supported languages shown here and here.
Building the app locally
Here’s what our folder structure will end up looking like. To follow along, you can fork or clone the complete project from here.
.
├── .circleci
│   └── config.yml
├── src
│   └── index.js
├── test
│   └── string.js
├── .codeclimate.yml
├── .eslintrc.json
├── .gitignore
├── License
├── README.md
├── initialconfig.yml
├── package-lock.json
└── .package.json
Dependencies
The only global install we’ll need is Node.js, so make sure you have that installed. I’m running version 12.13.0. If you have nvm installed, you can download and switch to 12.13.0 using the following command:
nvm install 12.13.0
After that, let’s install our local project dependencies. Run the following command to initialize our package.json file:
npm init --yes
Install all our dependencies by running:
npm install chai mocha nyc eslint --save-dev
We’ll use:
- ESLint as our linting tool
- Mocha as our test framework
- chai as our assertion library for Mocha
- Istanbul for coverage reporting
  "devDependencies": {
    "chai": "^4.2.0",
    "eslint": "^6.6.0",
    "mocha": "^6.2.2",
    "nyc": "^14.1.1"
  }
To set up linting, run the following in your terminal at the root folder of our application:
eslint --init
Follow through with the steps to create your .eslintrc.json file.
Project code
Now that the setup is out of the way, let’s start work on our application. We’ll extend JavaScript’s String functionality by writing out additional prototype methods. In our src/index.js file, add in:
String.prototype.isQuestion = function isQuestion() {
  /* Returns true if the last letter of the input string a question mark.
   false otherwise
  */
  const questionable = new RegExp(/\?$/);
  return questionable.test(this);
};
String.prototype.hasVowels = function hasVowels() {
  // Returns true if a vowel exists in the input string. Returns false otherwise.
  const vowels = new RegExp('[aeiou]', 'i');
  return vowels.test(this);
};
String.prototype.toUpper = function toUpper() {
  /* Replace all lowercase letters in the input string with their uppercase
  * analogs by converting each letter's ASCII value to decimal then back to
  * ASCII
  */
  const upper = new RegExp('[a-z]', 'g');
  return this.replace(upper, function transform(letter) {
    return String.fromCharCode(letter.charCodeAt(0) - 32);
  });
};
String.prototype.toLower = function toLower() {
  const lower = new RegExp('[A-Z]', 'g');
  return this.replace(lower, function transform(letter) {
    return String.fromCharCode(letter.charCodeAt(0) + 32);
  });
};
Next, let’s write a few tests to make sure our methods work as expected. In our test/string.js file, add these lines:
const expect = require('chai').expect;
require('../src/index');
describe('String extension tests', function () {
  describe('isQuestion', function () {
    it('Should return true if given a question', function () {
      expect('To be or not to be, that is the question'.isQuestion()).to.equal(false);
      expect('Quis custodiet ipsos custodes?'.isQuestion()).to.equal(true);
    });
  });
  describe('hasVowels', () => {
    it('should return false if the string has no vowels', () => {
      expect('N VWLS'.hasVowels()).to.equal(false);
      expect('n vwls'.hasVowels()).to.equal(false);
      expect('@#$^&*%12345'.hasVowels()).to.equal(false);
      expect(' '.hasVowels()).to.equal(false);
    });
    it('should return true if the string has vowels', () => {
      expect('Has vowels'.hasVowels()).to.equal(true);
      expect('HAS VOWELS'.hasVowels()).to.equal(true);
      expect('H@s v0wels'.hasVowels()).to.equal(true);
      expect('@#$^&*% 12345 e'.hasVowels()).to.equal(true);
    });
    it('should return a boolean value', () => {
      expect(typeof ('1234'.hasVowels())).to.equal('boolean');
    });
  });
  describe('toUpper', () => {
    it('should return a string', () => {
      expect(typeof 'Lowercase'.toUpper()).to.equal('string');
    });
    it('should return the string passed in uppercase', () => {
      expect('lowercase'.toUpper()).to.equal('LOWERCASE');
      expect('LowerCase'.toUpper()).to.equal('LOWERCASE');
      expect('L0werCAs3& letters'.toUpper()).to.equal('L0WERCAS3& LETTERS');
      expect(''.toUpper()).to.equal('');
    });
  });
  describe('toLower', () => {
    it('should return a string', () => {
      expect(typeof 'Lowercase'.toLower()).to.equal('string');
    });
    it('should return the string passed in lowercase', () => {
      expect('LOWERCASE'.toLower()).to.equal('lowercase');
      expect('LowerCase'.toLower()).to.equal('lowercase');
      expect('L0werCAs3& letters'.toLower()).to.equal('l0wercas3& letters');
      expect(''.toLower()).to.equal('');
    });
  });
});
To run our tests, add the following to the scripts portion of our package.json file:
  "scripts": {
    "test": "mocha"
  },
From here on, we can run our tests by executing this command:
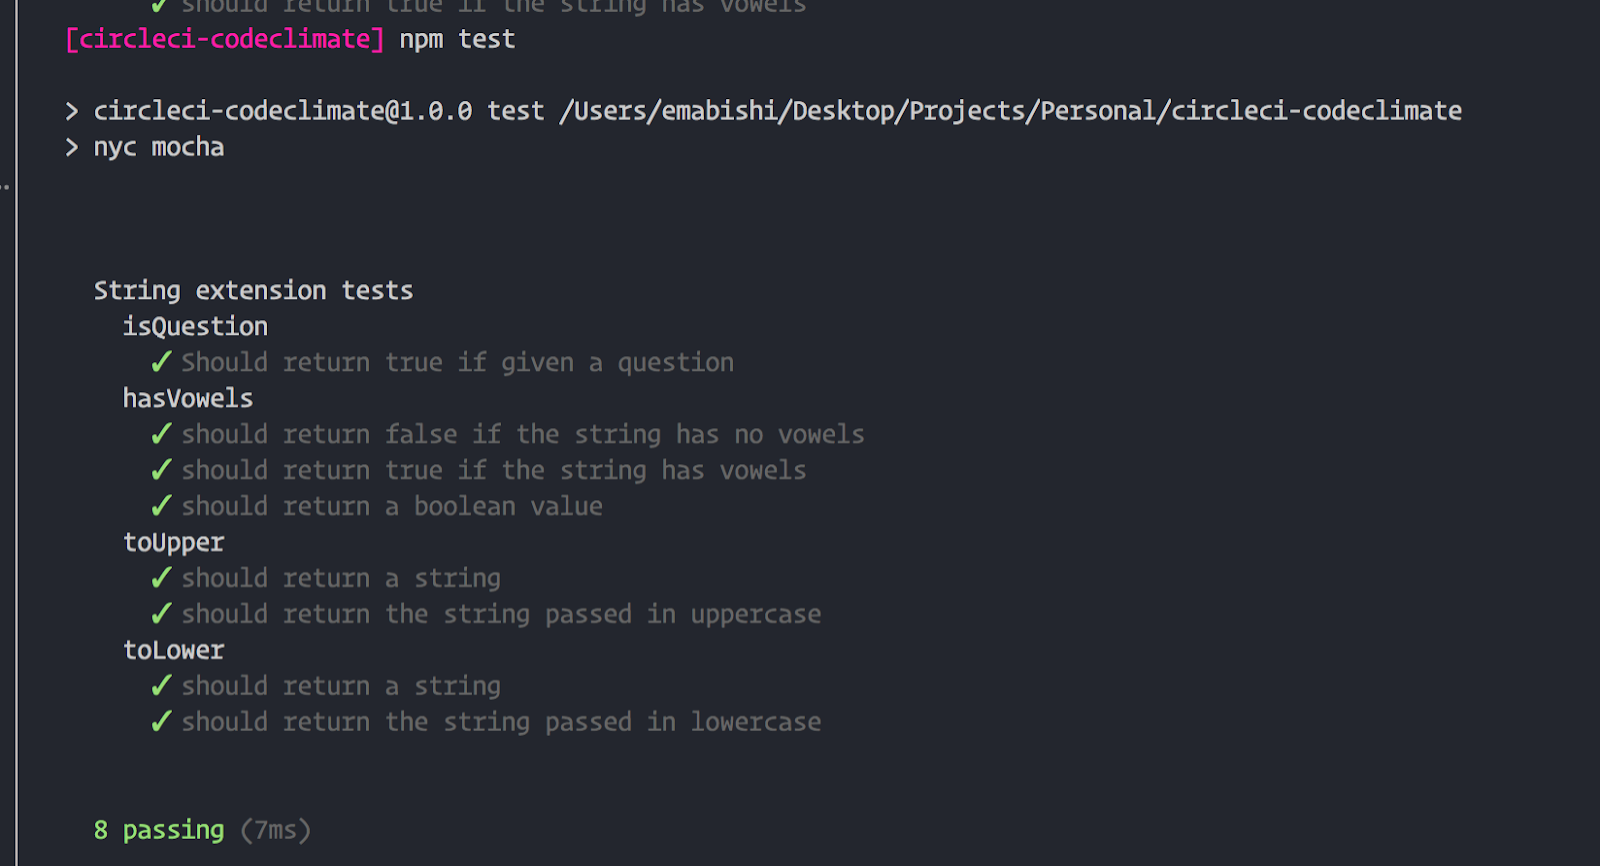
npm test
As you can see, all our tests are passing for now.
Coverage
Now, let’s set up coverage reporting via Istanbul. This is pretty easy. All we need to do is add another script command to our package.json file:
"scripts": {
    "test": "mocha",
    "cover": "nyc --reporter=lcov --reporter=text mocha"
  },
Now, running the command:
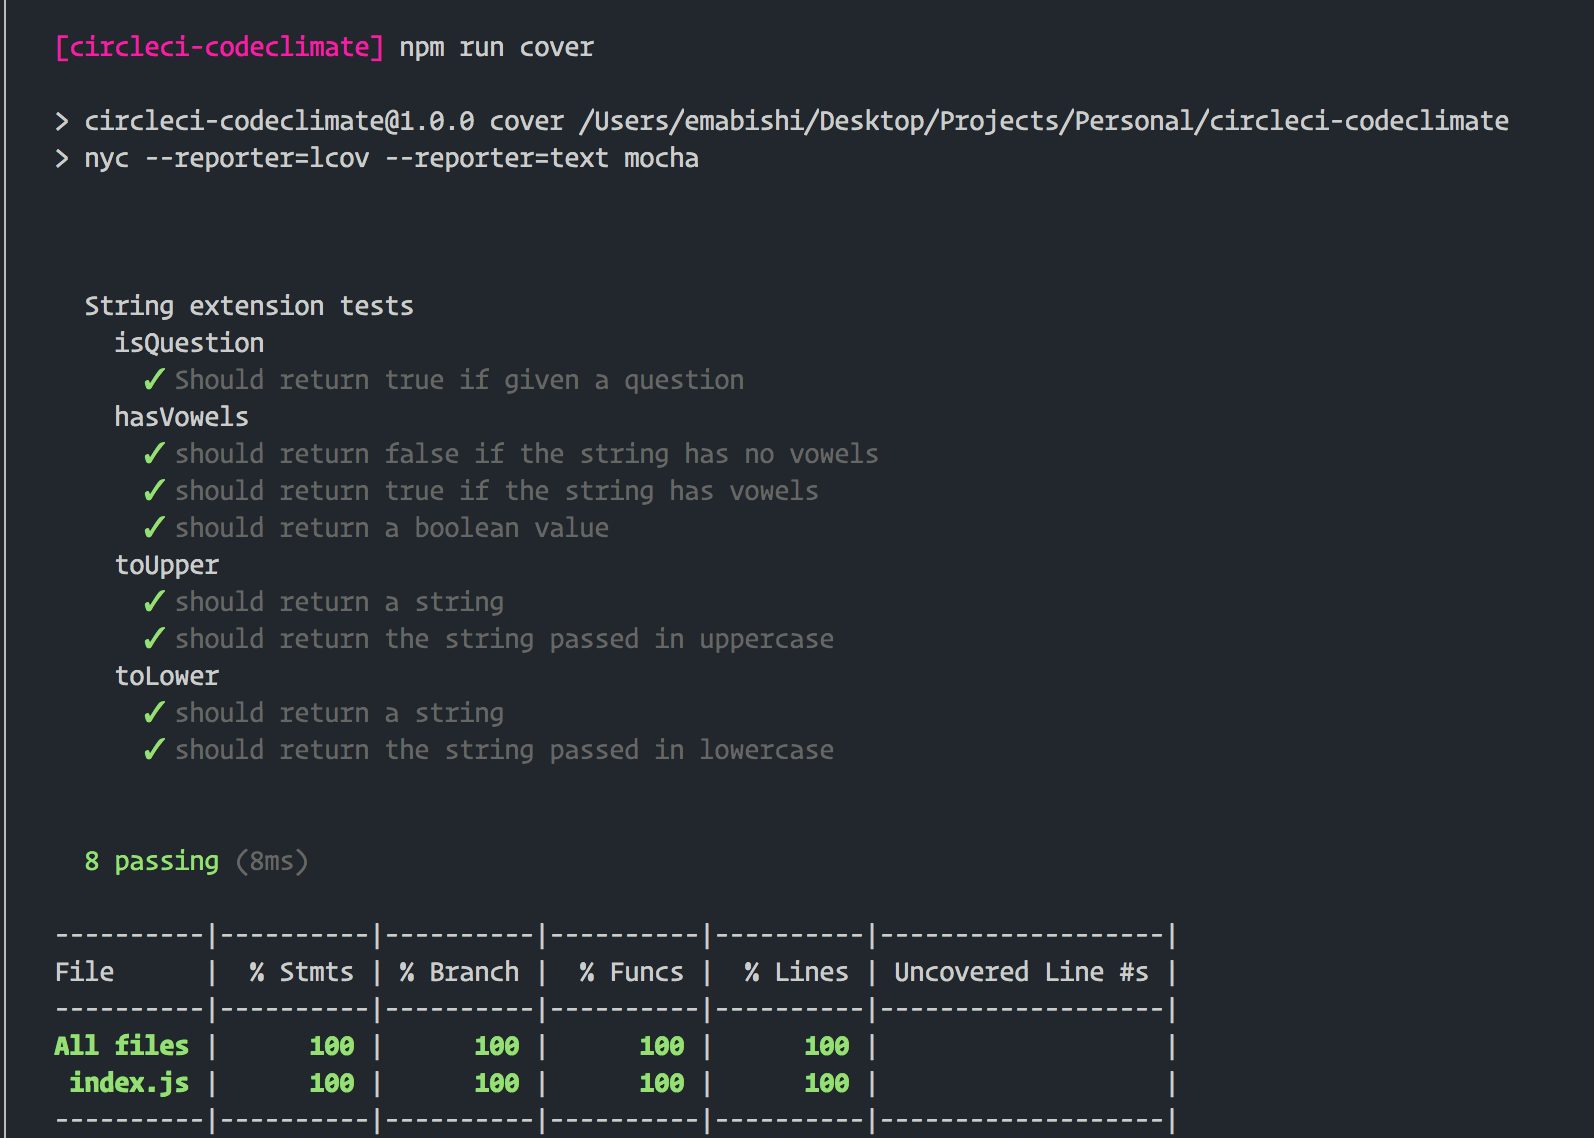
npm run cover
will both run our tests and generate a test coverage report which will be displayed in our terminal.
After executing the command, you’ll notice that two new folders, ./.nyc_output and ./coverage have been added into our folder structure.
The HTML version of our coverage report can be found by opening the file, ./.coverage/lcov-report/index.html. If you’re not into tables fear not 😀, the output format of the coverage reporter can be modified in several ways.
Continuous integration with CircleCI
Setting up on CircleCI
CircleCI uses the config.yml file in the ./.circleci folder at the root of our application as a blueprint to set up and run any builds. Let’s populate the file with some initial statements to make sure the build to run our tests will be configured correctly.
version: 2
jobs:
  build:
    working_directory: ~/repo
    docker:
      - image: circleci/node:12.13.0
    steps:
      - checkout
      # Download and cache dependencies
      - restore_cache:
          keys:
            - v1-dependencies-{{ checksum "package.json" }}
            # fallback to using the latest cache if no exact match is found
            - v1-dependencies-
      - run:
          name: Install dependencies
          command: npm install

      - save_cache:
          paths:
            - node_modules
          key: v1-dependencies-{{ checksum "package.json" }}
      - run:
          name: Run tests
          command: npm test
      - run:
          name: Generate coverage report
          command: npm run cover
      - store_artifacts: # Save tests results as artifacts
          path: test-results.xml
          prefix: tests
      - store_artifacts: # Save coverage reports as artifacts
          path: coverage
          prefix: coverage
All we’re doing here is instructing CircleCI to install our project’s dependencies, run our tests, and then generate our coverage report.
Pushing to GitHub
In order to get things running on CircleCI, we’re going to have to commit our work to GitHub. To start, let’s initialize our project as a git repository and commit all the work we’ve done so far.
Execute the following commands in your terminal at the root of our project.
git init
In our .gitignore file, let’s add,
# Coverage directory used by tools like istanbul
coverage
# nyc test coverage
.nyc_output
# Dependency directories
node_modules/
Then, run the following commands:
git add .
git commit -m "Add code, tests, coverage"
Create a repository for the project on GitHub, and then push our local copy to GitHub using the following commands:
git remote add origin <add-repo-url>
git push -u origin master
If you’re new to this, this tutorial by my friend Stan should help. Skip through to the Pushing to GitHub section for a quick how to.
Triggering the build
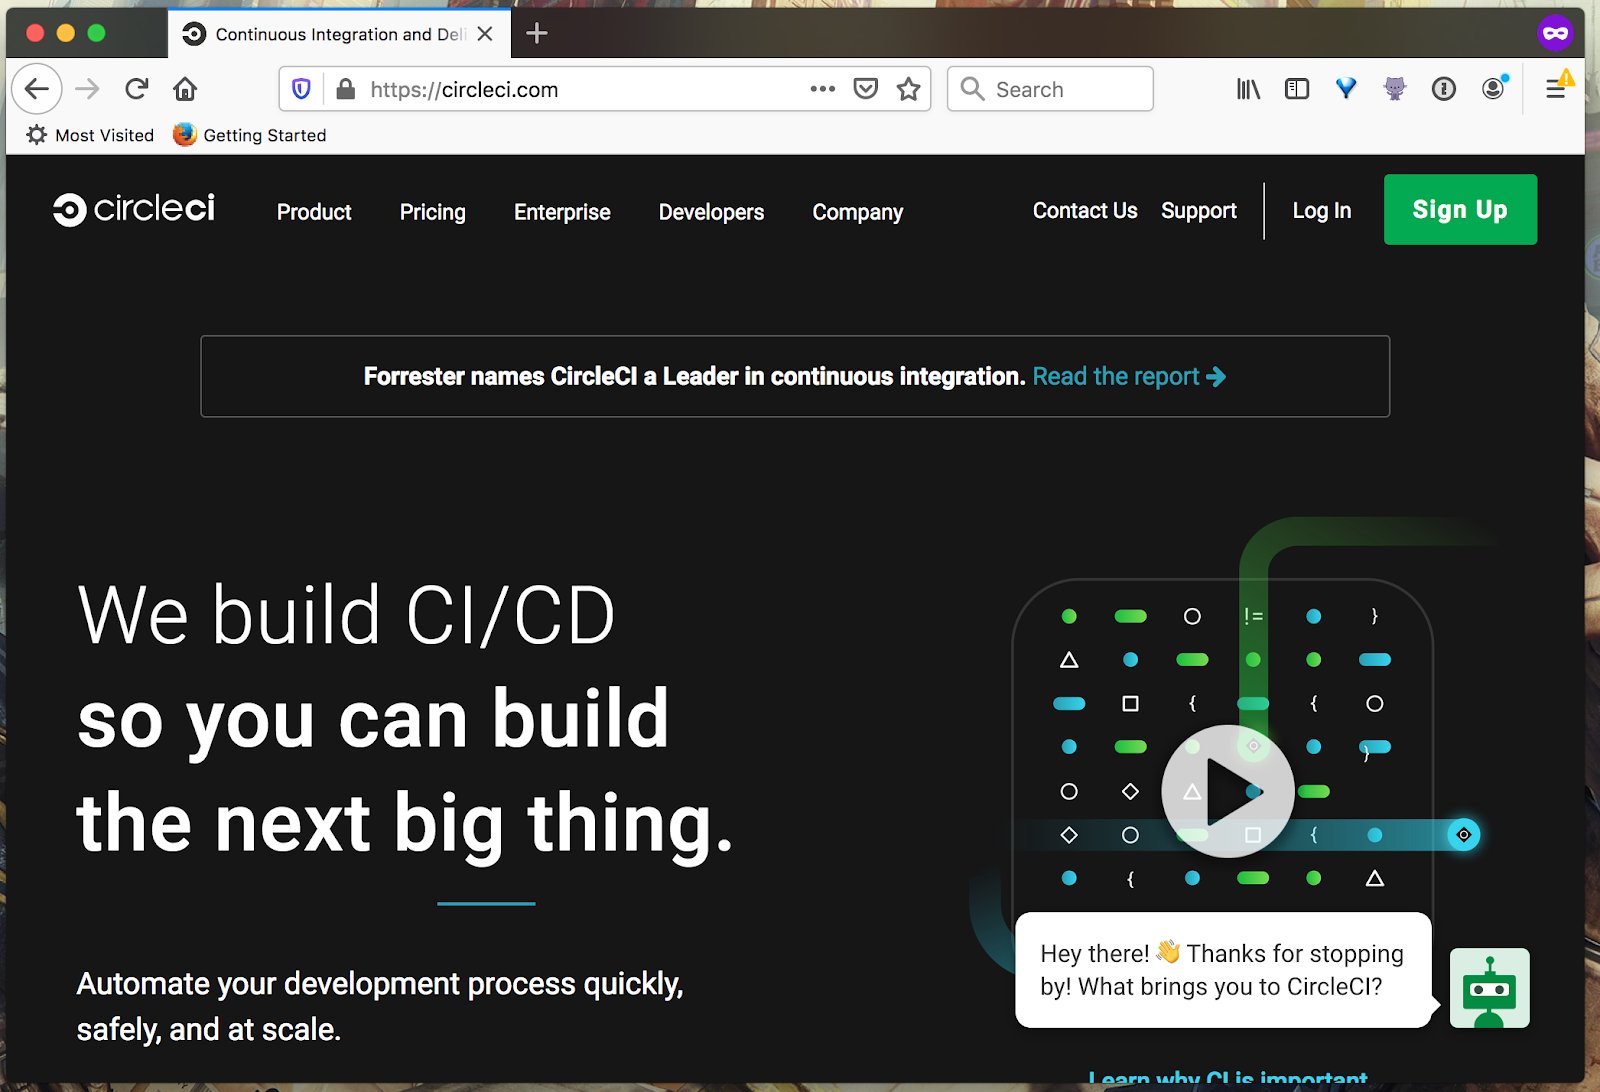
Sign up for CircleCI if you haven’t already.
Log in through GitHub or go to your dashboard if you already have an account. From there, navigate to the relevant organization in your dashboard, and then the ADD PROJECTS tab on the left side of the window as shown below.
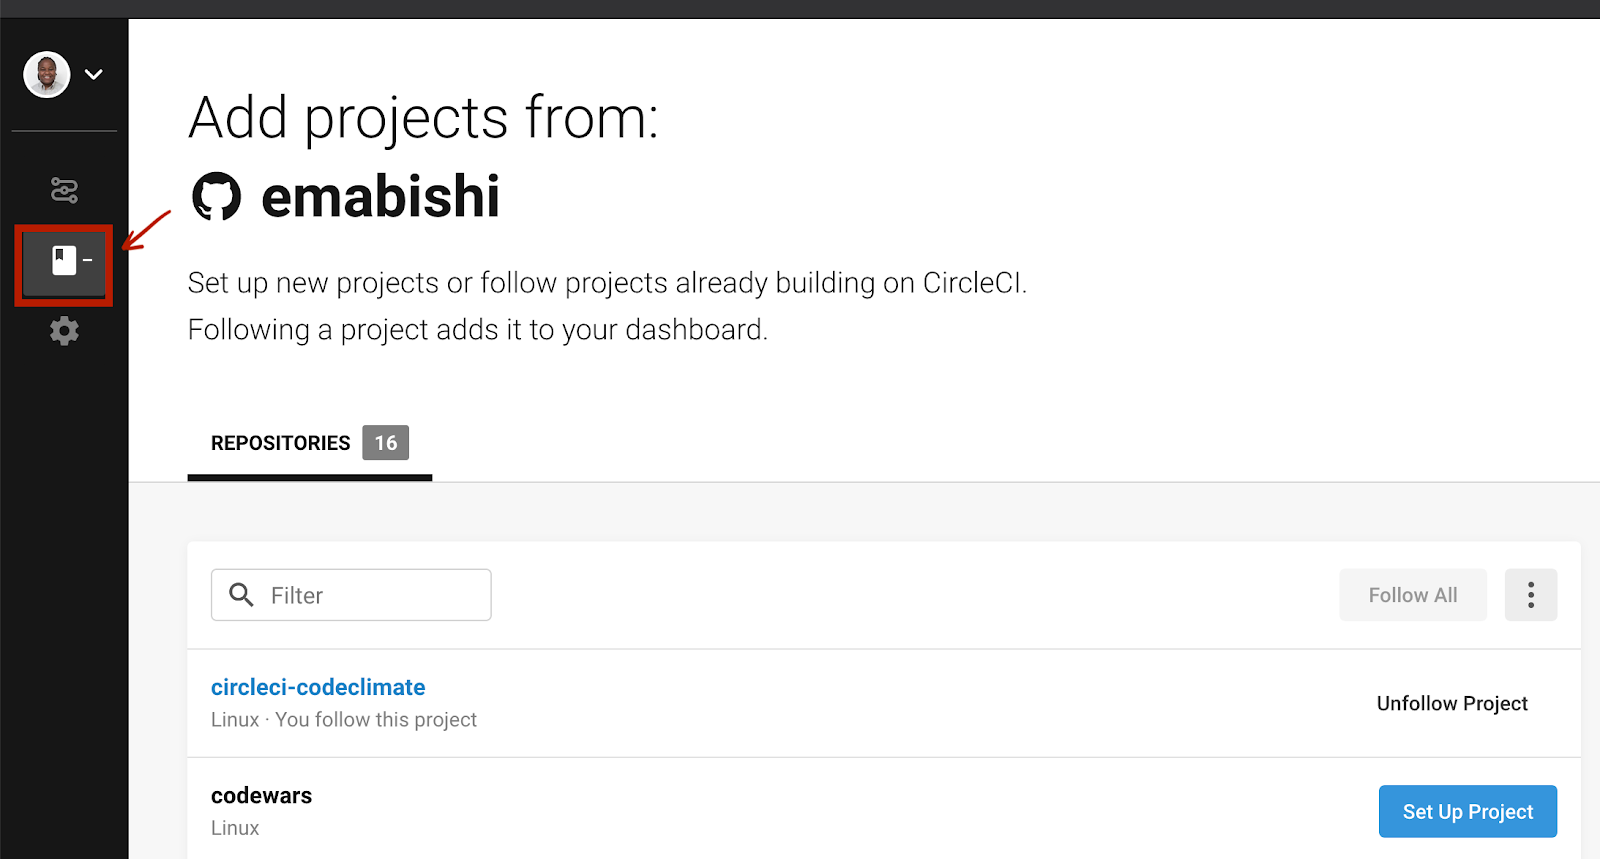
Click Set Up Project, and then Start Building on the next page. This will trigger a build of our project using the config.yml file we pushed to GitHub earlier. Let’s confirm that our fledgling build passes.

Indeed it does. Next, let’s see how to leverage the unique features that Code Climate provides to optimise our build pipeline for continuous integration.
Linking Code Climate to CircleCI
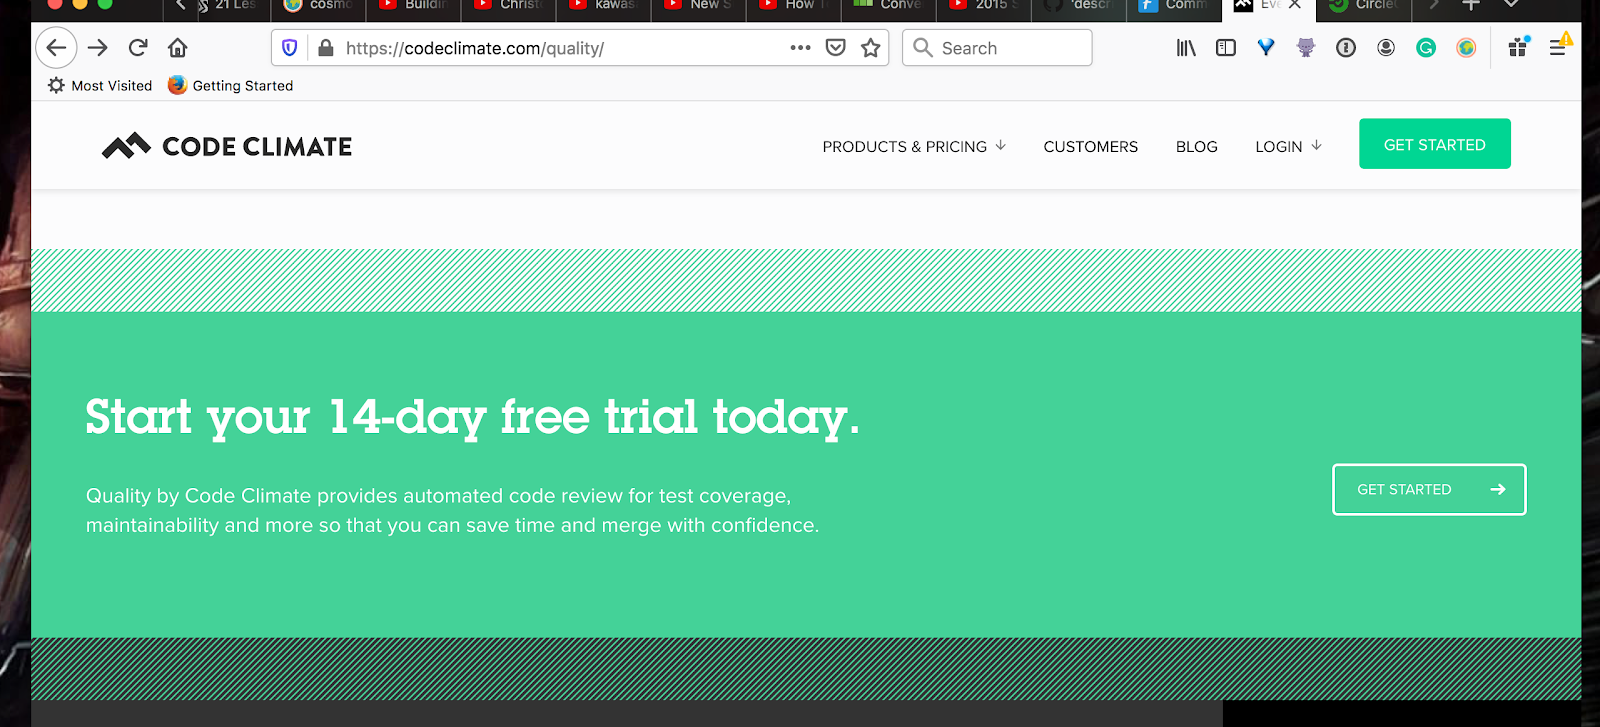
Head over here to get an account and sign in via GitHub.
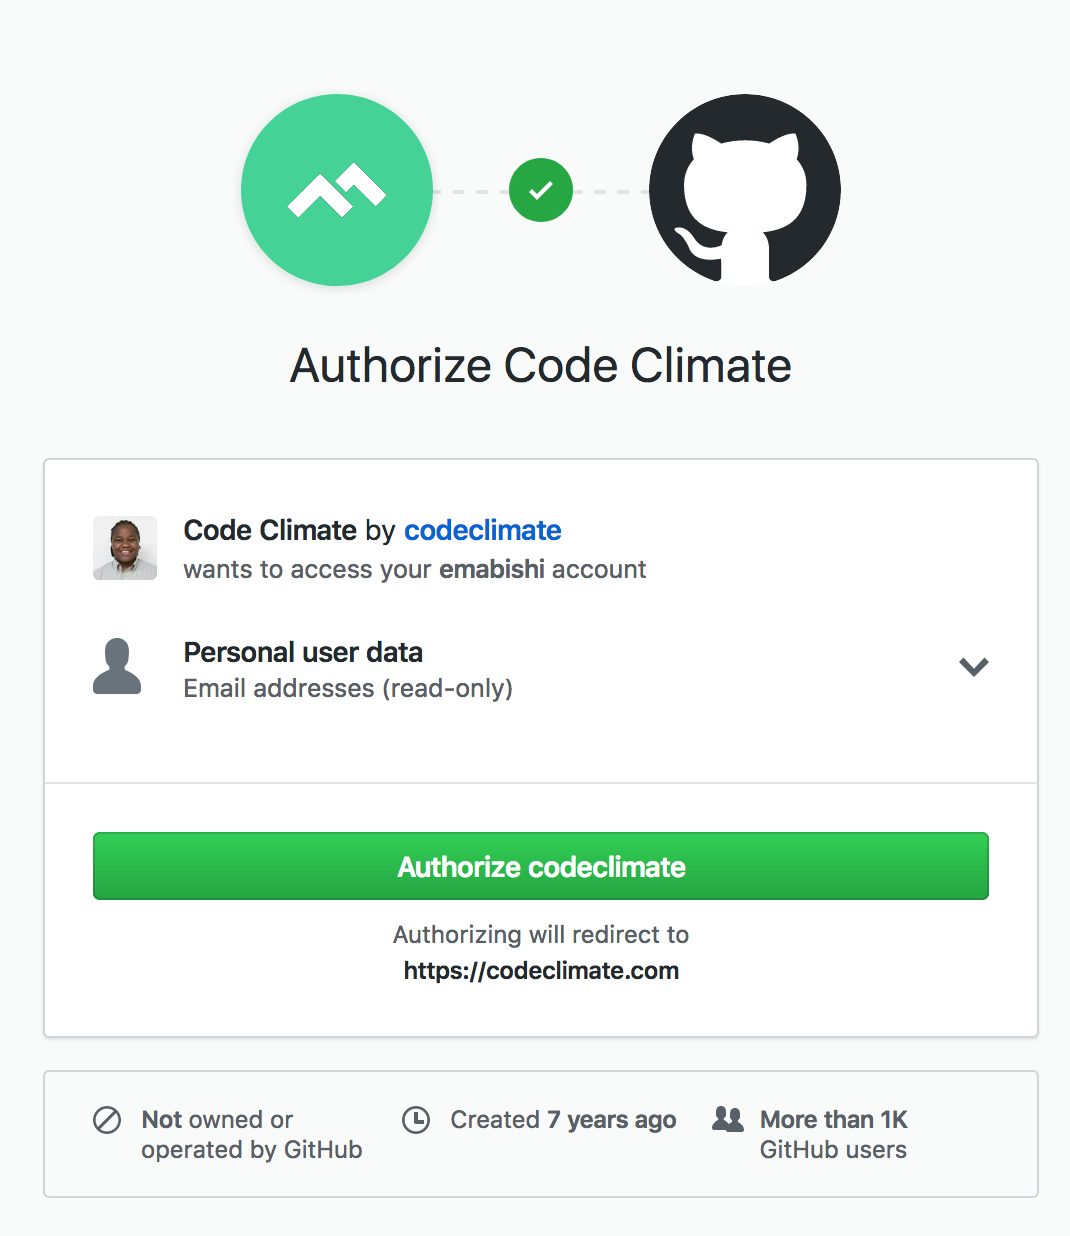
Once we’re authenticated, we’ll be redirected to our Code Climate dashboard which looks like this.
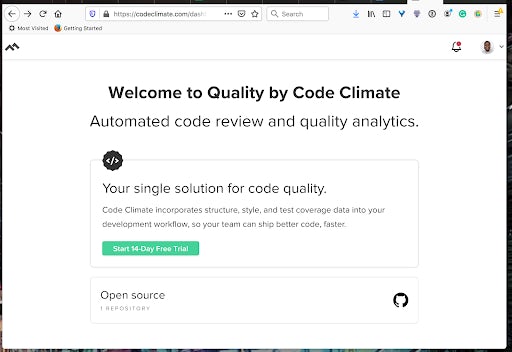
Luckily, Code Climate is free for open source projects, so as long as yours is, click Add a repository under the open source option. If you’re looking to integrate a private repo, use the other option to start a trial for the product.
Follow through to add your GitHub organization and repository to Code Climate.
Setting up test coverage reporting
We already locally generated a coverage report for our tests, so what we need to do now is instruct CircleCI to send over the report to Code Climate. We’ll do this through our .circleci/config.yml file. Make the following modifications:
# https://circleci.com/docs/collect-test-data/#mochajs
# https://github.com/codeclimate/test-reporter/issues/342
version: 2
jobs:
    build:
        docker:
            - image: circleci/node:12.13.0
        working_directory: ~/repo
        steps:
            - checkout
            # Update npm
            - run:
                name: update-npm
                command: 'sudo npm install -g npm@latest'
            # Download and cache dependencies
            - restore_cache:
                keys:
                    - v1-dependencies-{{ checksum "package-lock.json" }}
                    # fallback to using the latest cache if no exact match is found
                    - v1-dependencies-
            - run:
                name: Install dependencies
                command: npm install
            - save_cache:
                paths:
                    - node_modules
                key: v1-dependencies-{{ checksum "package-lock.json" }}
            # - run: mkdir reports
            # Run mocha tests
            - run:
                name: Run tests
                command: npm test
                when: always
            # Run coverage
            - run:
                name: Run coverage
                command: npm run cover
                when: always
            # Run coverage report for Code Climate
            - run:
                name: Setup Code Climate test-reporter
                command: |
                    # download test reporter as a static binary
                    curl -L https://codeclimate.com/downloads/test-reporter/test-reporter-latest-linux-amd64 > ./cc-test-reporter
                    chmod +x ./cc-test-reporter
                    ./cc-test-reporter before-build
                when: always
            - run:
                name: Send coverage report to Code Climate
                command:
                    # nyc report requires that nyc has already been run,
                    # which creates the .nyc_output folder containing necessary data
                    ./cc-test-reporter after-build -t lcov
                when: always
            # Upload results
            - store_artifacts: # upload test coverage as artifact
                path: ./coverage/lcov.info
                prefix: tests
Now, after the tests are run, we instruct CircleCI to execute the command
npm run cover
currently in our package.json file which generates a link to our coverage report in the /.nyc_output folder. Then, we download the Code Climate test reporter package and use it to send over our coverage report through the Code Climate API.
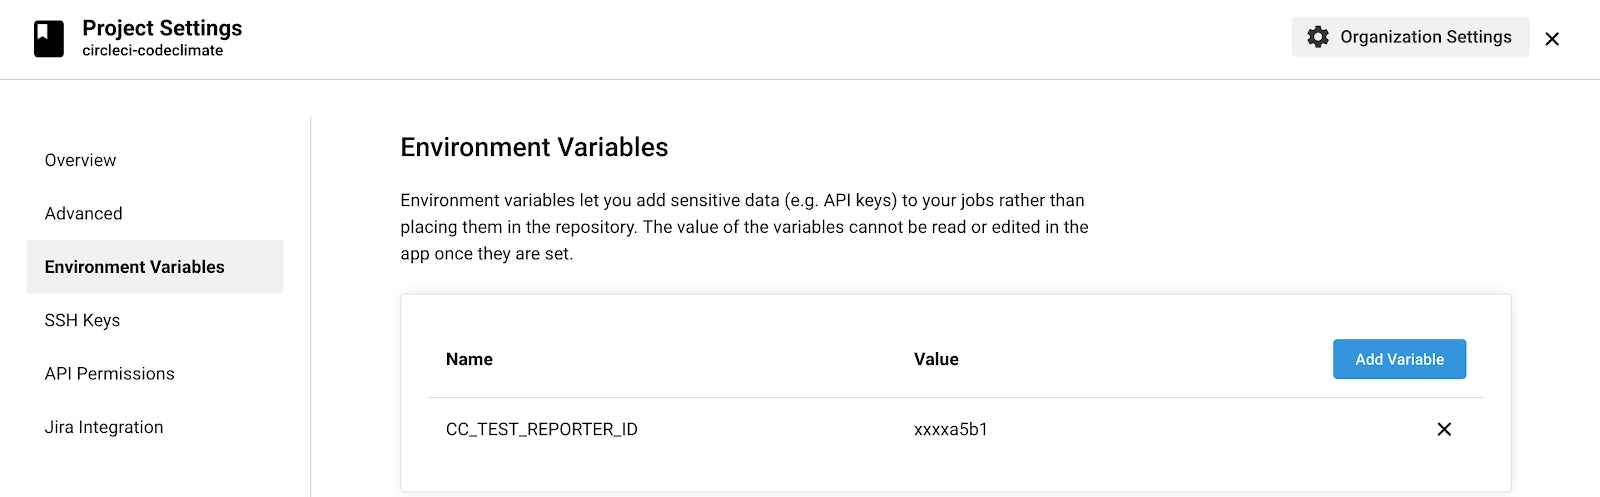
Before we push the changes to GitHub, which would automatically trigger running the tests on CircleCI, we need to allow CircleCI to send over our coverage report to Code Climate. We do this by adding in our Code Climate Test Reporter Key as an environment variable in CircleCI.
We’ll find our key here.

We need to add it over here on CircleCI as an environment variable with the name CC_TEST_REPORTER_ID.
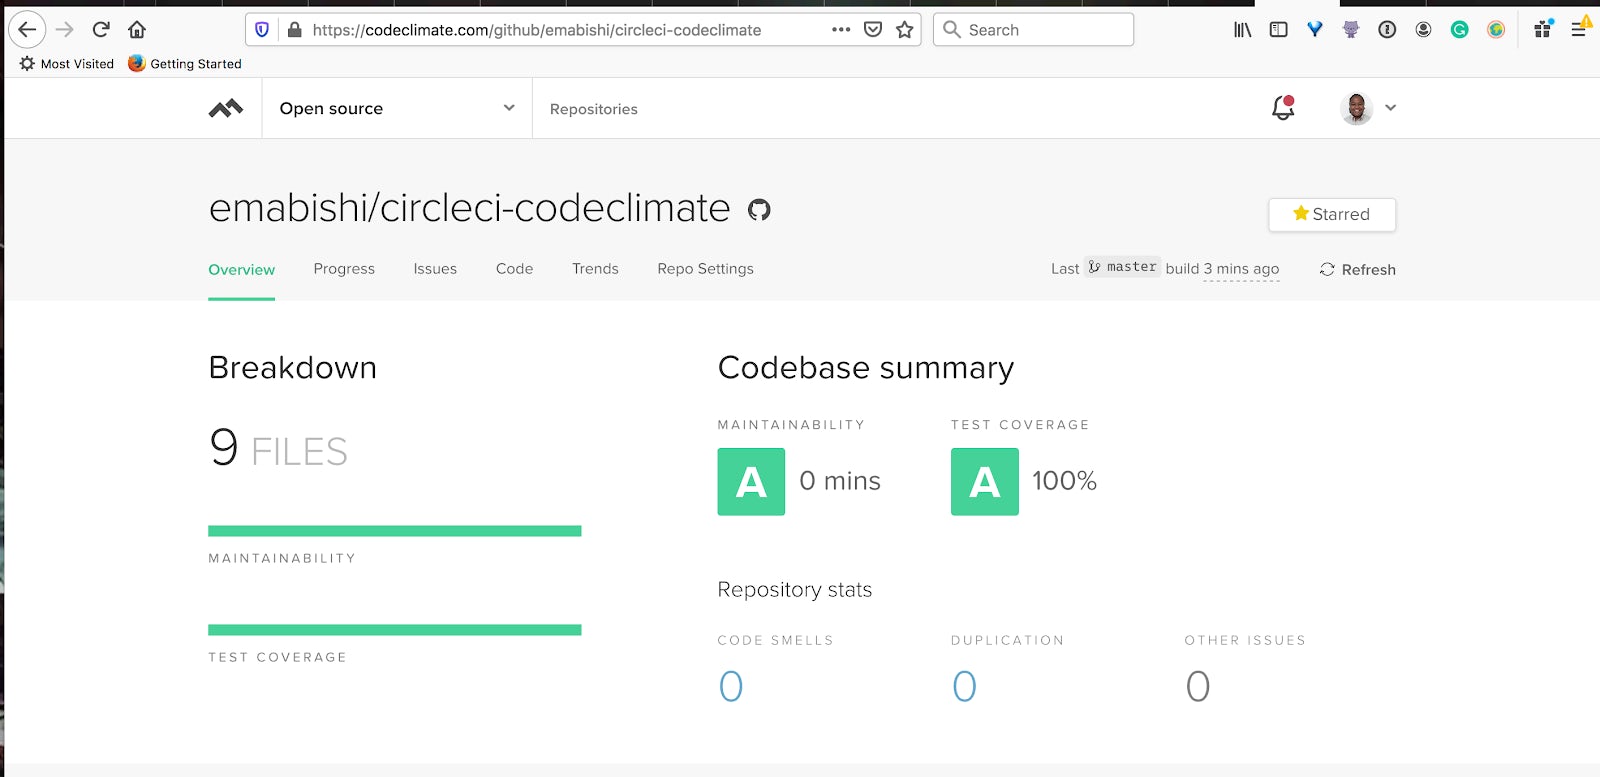
All we have to do now is push to GitHub, make sure our build passes, and watch for our coverage report on Code Climate. This is what my Code Climate dash looks like so far.
Setting up linter reporting
You’ll be happy to know that we can also set up code style reporting on Code Climate. We’re able to configure this either through our own .eslintrc file or through our Code Climate dashboard.
Let’s have a look at both methods.
Reporting through the Code Climate dashboard
Navigate to Repo Settings, and then the Maintainability tab on the dashboard as shown below.
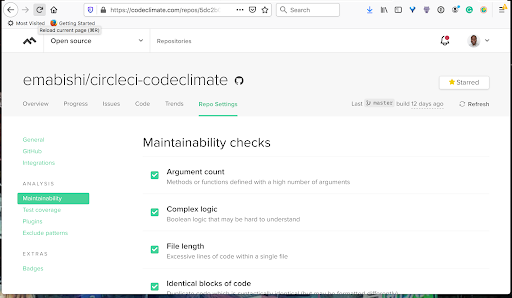
From here, you can turn the different settings on or off depending on your requirements.
Reporting through .eslintrc file
For a more detailed style analysis, let’s use Code Climate’s ESLint plugin. We’re using ESLint mostly because our code is written in JavaScript, but feel free to use whatever plugins suit your project.
Navigate to the Plugins tab on your dashboard as shown.
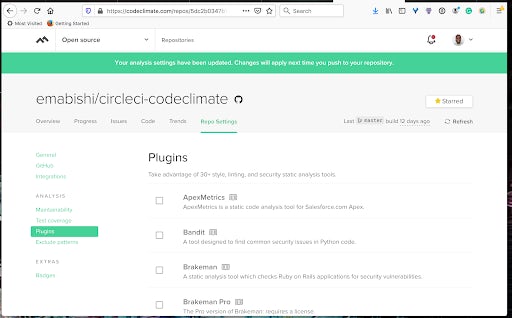
Turn the plugin on by checking the ESLint box then clicking the Save button at the bottom of the page. To configure the ESLint plugin, we’ll need to create a .codeclimate.yml file inside our root project folder.
version: "2"         # required to adjust maintainability checks
plugins:
  eslint:
    enabled: true
    channel: "eslint-5"
    config:
      extensions:
      - .js
We’re using ESLint v5.7.0, and instructing Code Climate to only review .js files. It does this by default, but I’ve added this in explicitly to show you how we can do it with other file extensions as well.
You can validate your Code Climate .yml file by installing the Code Climate CLI and then running the following command:
codeclimate validate-config
Here’s my .eslintrc.json file:
{
    "env": {
        "browser": true,
        "node": true,
        "commonjs": true,
        "es6": true,
        "mocha": true
    },
    "extends": "eslint:recommended",
    "parserOptions": {
        "sourceType": "module"
    },
    "rules": {
        "eqeqeq": [
            0
        ],
        "indent": [
            2,
            2
        ],
        "linebreak-style": [
            2,
            "unix"
        ],
        "prefer-arrow-callback": [
            0
        ],
        "quotes": [
            2,
            "single"
        ],
        "semi": [
            2,
            "always"
        ]
    }
}
We enable and disable rules in our .eslintrc file by using 0 to disable a rule or 2 to enable it. We’ll need to do this in order for Code Climate to treat enabled rules as issues. All we need now is to push our changes to GitHub in order to trigger a new build on CircleCI.
For a list of plugins you can use to extend your ESLint configuration, please have a look at the Code Climate ESLint documentation. If you want to experiment, there are also plenty of other plugins.
Build monitoring with GitHub
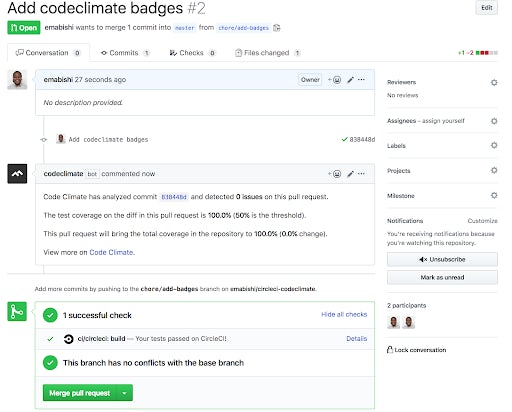
We can do even more with the Code Climate GitHub integration to make our workflow even better and our code more resilient. Let’s add PR review comments from Code Climate to GitHub. Code Climate will analyze every open PR and leave inline comments on any style issues it finds as well as a general summary of the issues it found containing the total coverage % and the change in coverage that the PR will introduce. To enable these, navigate to the GitHub tab under Repo Settings on your Code Climate dashboard. Next, enable the Pull Request Comments feature, the Summary comments and the Inline issue comments features as shown below.

Finally, under the Connections section of the page, install the GitHub webhook, which notifies Code Climate when any PRs have been opened.
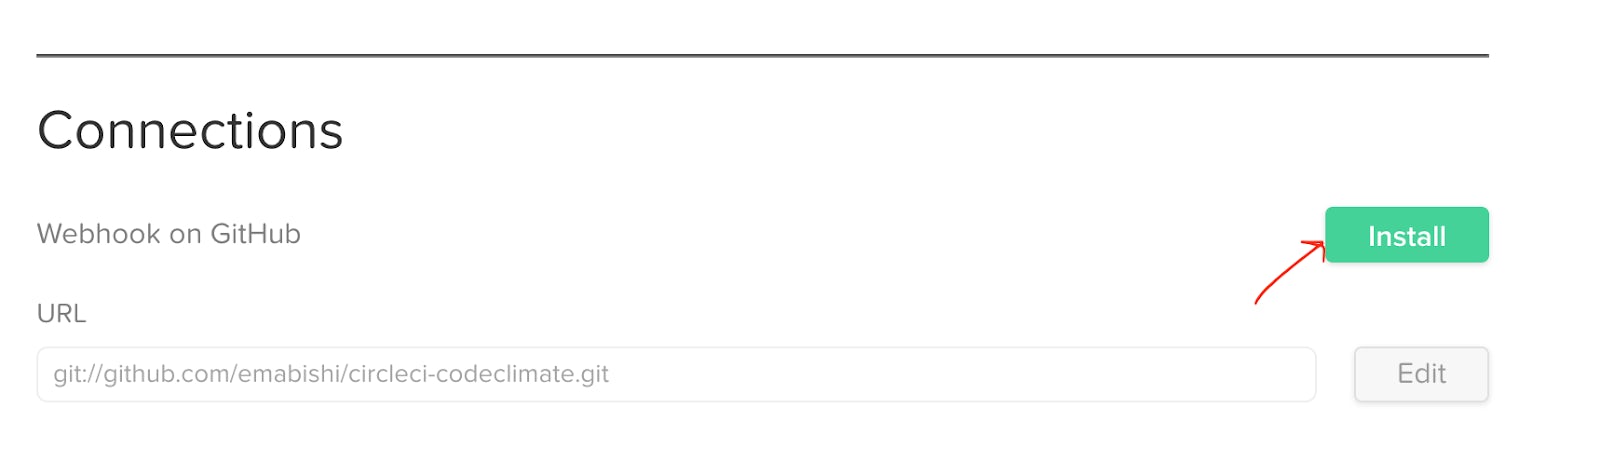
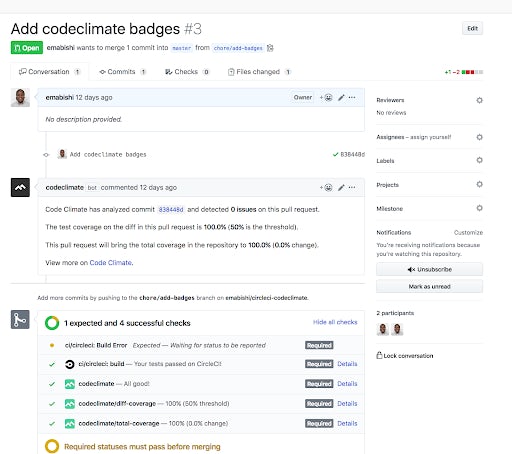
Now, our PR analysis from Code Climate is posted to our open GitHub PR.
Let’s also add PR status checks. Status checks allow us to ensure that some criteria is met before any open PR is merged to a desired branch. In this case, we’d like:
- Our tests to pass before we allow a merge
- Our test coverage to be maintained at above 50%
- There to be no style issues with the PR
Luckily, we can enforce all these rules through a simple process through GitHub and Code Climate.
Tests must pass check
We’ll show how to protect the master branch. However, this can be implemented on any branch at all. In your GitHub repository, navigate to the Branches vertical tab under the Settings horizontal tab as shown below.
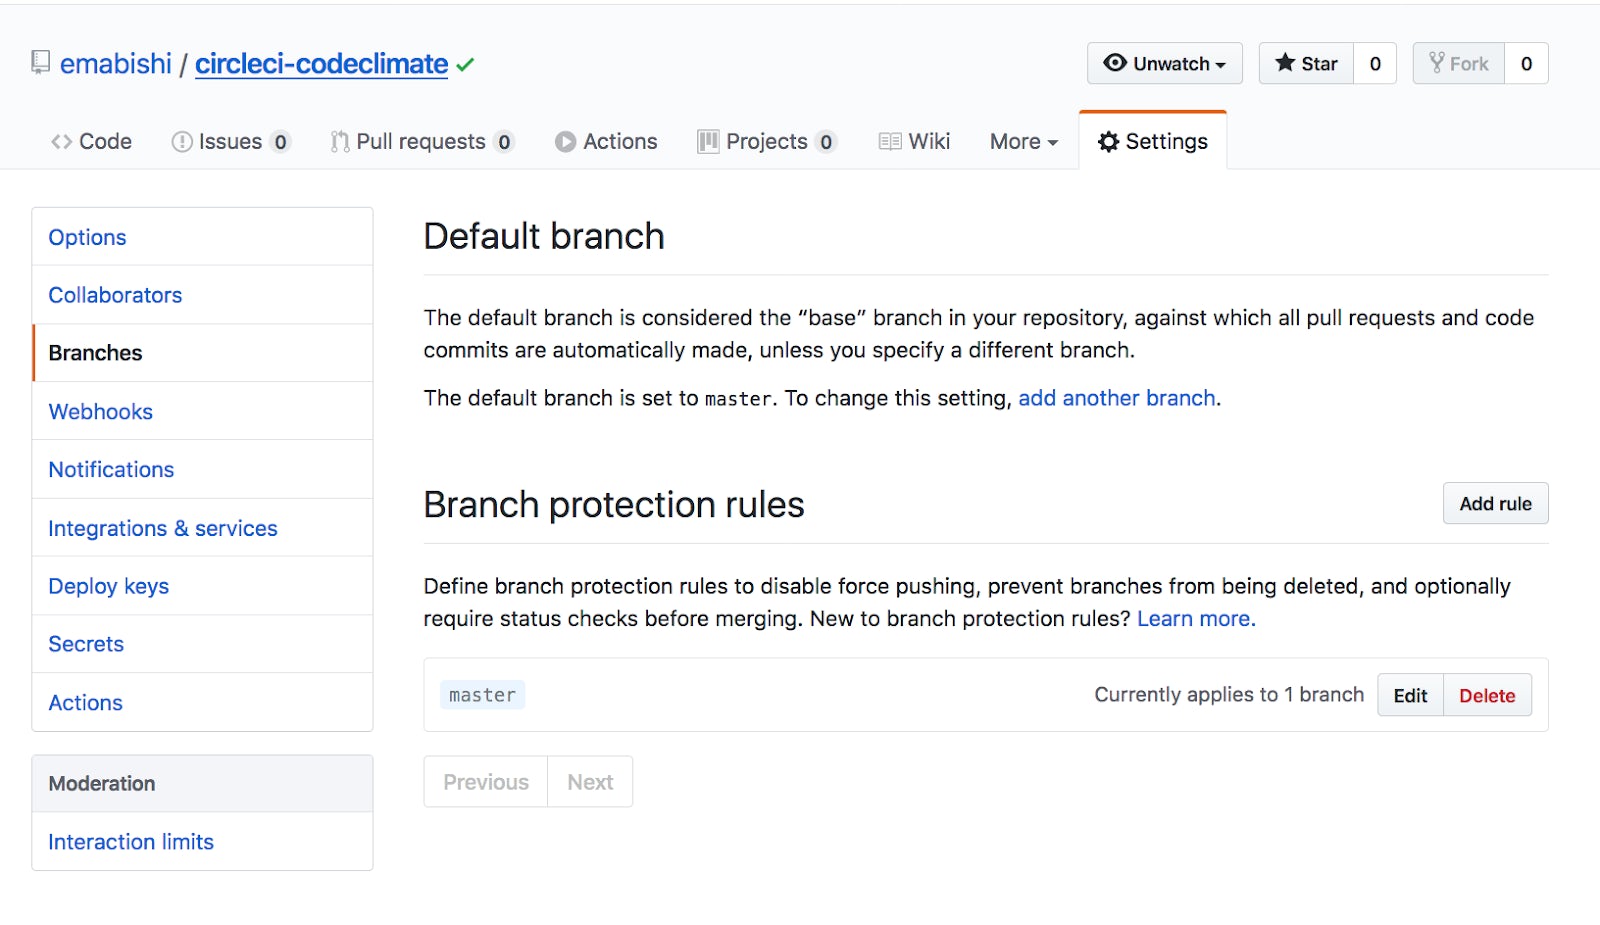
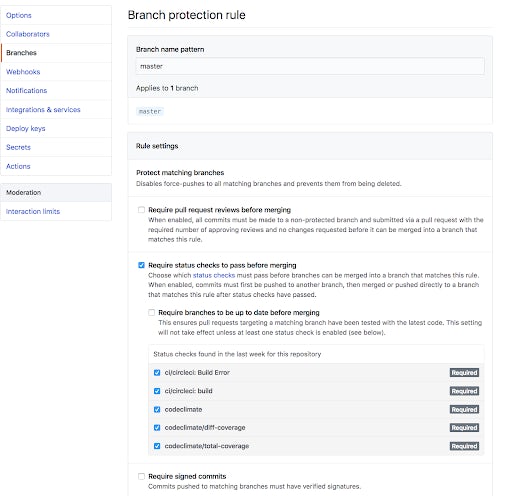
Edit the Branch Protection Rules and under Rule Settings, enable Require status checks to pass before merging then enable the ci/circleci: Build Error and ci/circleci: build checks. Finally, save the changes we’ve made so far.

Now, every time a new PR is opened, GitHub will prevent us from merging to our protected branch until our tests pass in our CircleCI build. To replicate how our tests run locally, it’s very important that we configure our environment on CircleCI to match our local build process.
Coverage threshold and style checks
Setting these up will ensure that all open PRs meet our pre-defined linting rules and test coverage standards. Navigate to the GitHub tab under the Repo Settings tab on your dashboard. Next, enable the Pull request status updates option as shown.

Finally, we follow the same process as we did in the above section, this time enabling all the Code Climate checks as well.
This is how the checks will look on the open PR.
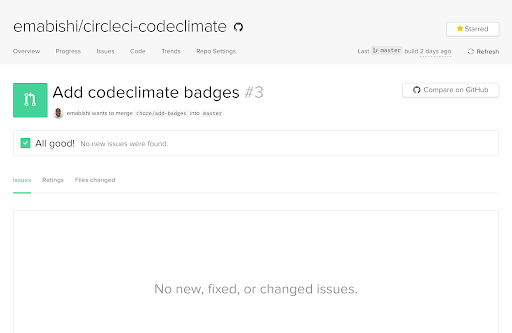
Once they pass, we’ll be free to merge our PR. When Code Climate finds any issues worth looking into, we can follow up through the specific PR issues page on Code Climate.
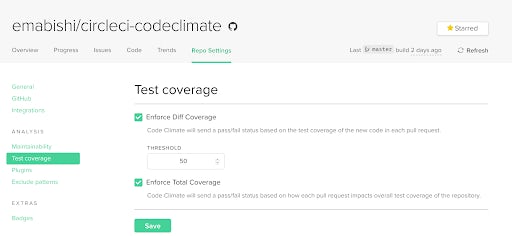
To set up our coverage threshold, under which Code Climate will trigger an issue, we navigate to the Test Coverage tab under the Repo Settings tab on your dashboard. We can edit our Diff Coverage threshold and enforce the Total Coverage rule which will trigger an issue any time our total coverage drops.
Conclusion
In this guide, we’ve seen how to easily integrate Code Climate’s Quality tool with both CircleCI and GitHub, leveraging them to optimize our CI pipeline. Using these tools, we’ve made our code resilient and our build process transparent, allowing us to focus on writing better, ready to ship code.
If you’re interested in having a look, all of the code for this guide can be found here. Feel free to leave a PR if you have a suggestion. 😀
Mabishi Wakio is a software developer who unfortunately found the allure of product management too hard to resist. When they’re not listening to users, creating wireframes, or writing code, they can be found reading a book, lifting weights, or sparring with their boxing coach and seldom winning.


