
Continuous integration (CI) is a popular term associated with DevOps in software development. CI is the automatic verification of new code pushed to a project to ensure its correctness. CI validates the code based on the tests written for the project. This means that for almost every update that is pushed, there must be tests that accompany it.
So, a typical CI process goes like this:
- Code is checked into the repository
- The CI server is notified that new code has been pushed
- The CI server takes the code from the repository, executes the tests accompanied with the code, and executes any other command you must have specified
- The CI server notifies you of the outcome of the commands executed
Typically, software projects tend to have more than one developer, and so CI comes in handy to ensure the project is stable after every push to the repository.
Continuous Deployment (CD) on the other hand goes a step further than CI. After executing the tests and generating a build, CD goes ahead to deploy the build in production. The difference between this and CI is that for CD, you will specify a deployment command in the script to push your app to production.
These operations make use of two important tools: a CI server and a repository. The repository is where the code resides and the CI server is where the integration and deployment will be triggered. For this article, you’ll check your code to GitHub and you will use CircleCI as your CI server.
Read more on continuous integration for mobile application development.
What you will build
In this article, you will build a simple Android app that shows popular movies. The app will fetch data from an API and display it. After you build this app, you will write tests for the app and set up CI/CD for it.
Prerequisites
This post assumes that you already have a basic understanding of Android development using Kotlin. If you still need to catch up on that, here is a good course to get you started. Besides that, you also need to ensure that you have the following:
- A recent stable version of Android Studio installed
- A GitHub account
- A machine with macOS installed. We will be using fastlane in this project and it is officially supported to run on macOS. You can follow this issue to know when it’ll be ready for other platforms.
With all those in check, feel free to proceed.
Building the app
For the sake of brevity, you won’t be building the app from scratch. Instead, you will build on top of a starter project. Go ahead and download the starter project here. It is important that you understand the classes and files in the starter project before moving ahead.
In the project, you have the following classes/files:
APIClient.kt: This is an object used to access an instance of Retrofit. Retrofit is a type-safe HTTP client for Android and Java developed and maintained by Square. You will use it to make network requests for your app.ApiInterface.kt: This interface holds the endpoints you will access in the course of building your app. The interface is used by Retrofit.MovieListAdapter.kt: This is an adapter class that will help you to manage data on your lists. This class controls the size of the list, how each row looks like and how data is bound to the list. This class makes use of the DiffUtilCallback class to check the uniqueness of contents to be populated on the list.MovieModel.kt: This class contains data classes that match the response you’ll receive from the server.MainActivityViewModel.kt: This is the ViewModel used by the MainActivity to make network requests and return a result.MainActivity.kt: This is the class where you will link up every other class. This is where your app will start off from.
Now that you understand how the starter project works, you will add the finishing touches to get the app working.
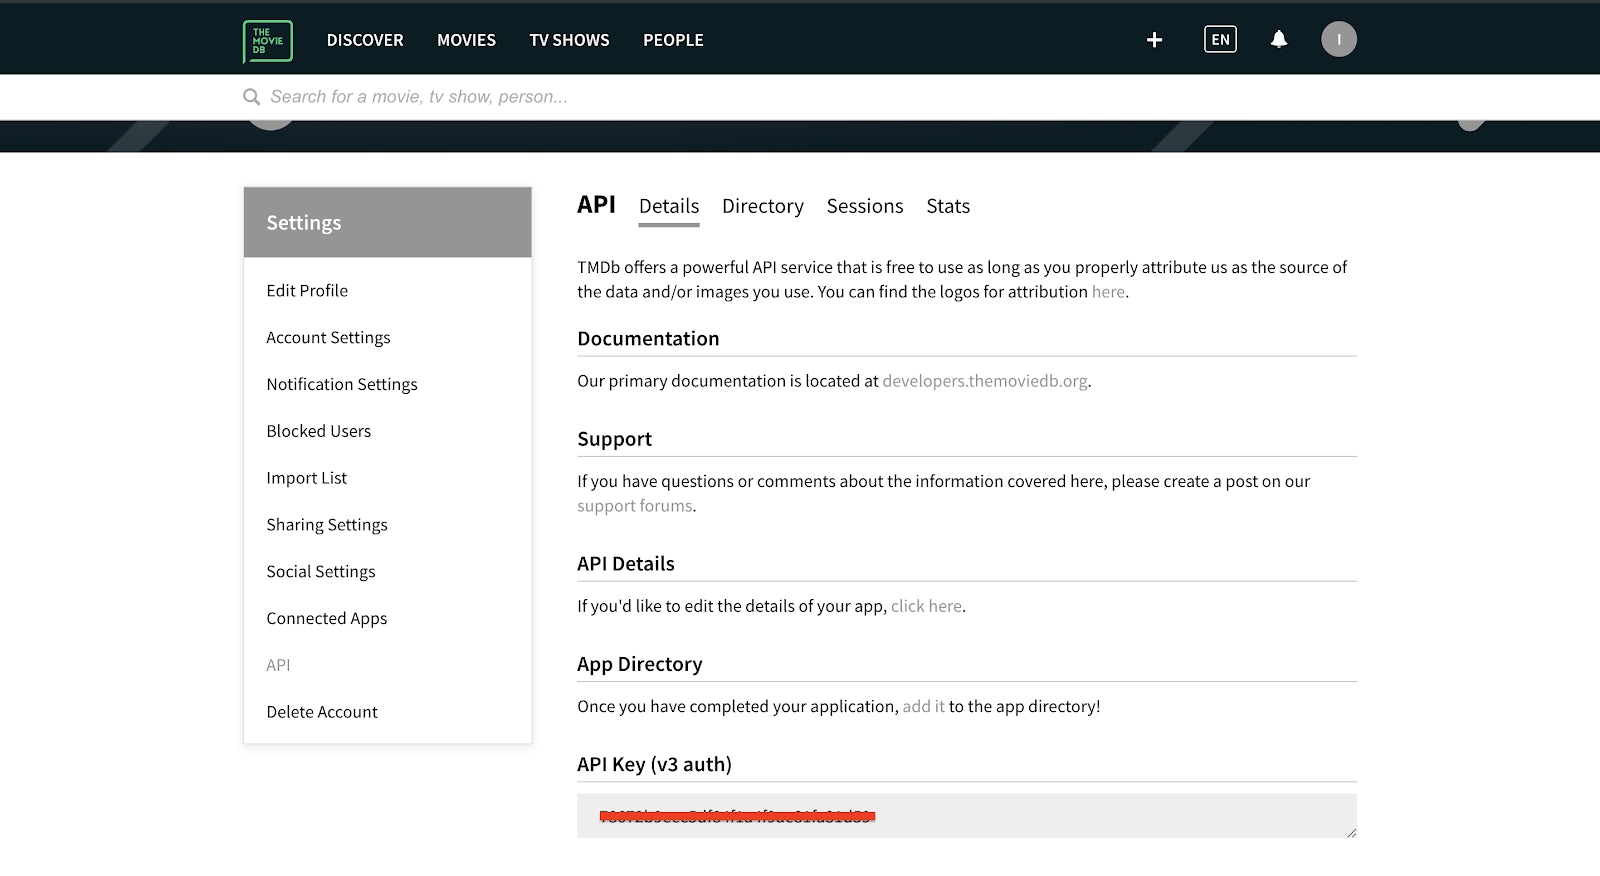
The first thing you need to do is acquire an API KEY from The Movie DB. You need to create an account if you have none. After you have finished setting up your account, go to the settings (by clicking on Settings on the dropdown menu that appears when you click on your user image at the top right), then click on API tab on the vertical menu. Request an API Key (if you haven’t done so).

After that, copy out the API KEY(v3 auth) value.
After copying the key, open the gradle.properties file and add this snippet :
API_KEY = "MOVIE_DB_API_KEY"
Note: Replace MOVIE_DB_API_KEY with the key you just copied.
By now you will see a notification suggesting that you should sync your Gradle files. Go ahead and sync them.
The next step is to add the logic to fetch the popular movies from the API. You will do this in your view mode. Open the MainActivityViewModel class and add these imports:
// app/src/main/java/dev/idee/cicdandroid/MainActivityViewModel.kt

import android.util.Log
import androidx.lifecycle.MutableLiveData
import retrofit2.Call
import retrofit2.Callback
import retrofit2.Response

Then, add this snippet to the body of your class:

// app/src/main/java/dev/idee/cicdandroid/MainActivityViewModel.kt

private val movieListLiveData = MutableLiveData<List<MovieModel>>()

open fun getMovieLiveData(): MutableLiveData<List<MovieModel>> {
    return movieListLiveData
}

fun setMovieLiveData(movieModelList: List<MovieModel>) {
    movieListLiveData.value = movieModelList
}

init {
    fetchMovies()
}

private fun fetchMovies() {

    APIClient.client.create(ApiInterface::class.java).getPopularMovies(BuildConfig.API_KEY)
        .enqueue(object : Callback<MovieResponse> {
            override fun onFailure(call: Call<MovieResponse>, t: Throwable) {
                Log.e("MainActivityViewModel", t.toString())
            }

            override fun onResponse(call: Call<MovieResponse>, response: Response<MovieResponse>) {
                response.body()?.let {
                    setMovieLiveData(it.movieModelList)
                }

            }

        })

}
The init block is called when the class is initialized. In this block, you called the fetchMovies method. This method fetches the movies and updates the movieListLiveData object with the response. This object is observable and will be used by the MainActivity to listen for results.
Next, you willset up the view model in the MainActivity to look out for updates in the movieListLiveData object. You will also set up a recycler view to display the movies you have fetched.
Open your MainActivity.kt, and add these imports to the import section:
// app/src/main/java/dev/idee/cicdandroid/MainActivity.kt

import android.view.View
import androidx.lifecycle.Observer
import androidx.lifecycle.ViewModelProviders
import androidx.recyclerview.widget.LinearLayoutManager
import kotlinx.android.synthetic.main.activity_main.*

Then add these objects just before the onCreate method:

// app/src/main/java/dev/idee/cicdandroid/MainActivity.kt

private lateinit var viewModel: MainActivityViewModel
private val movieAdapter = MovieListAdapter(DiffUtilCallback())
Here, you are declaring an instance of the MainActivityViewModel and also initializing the adapter to be used by the recycler view.
Next, go ahead and add these two methods to the MainActivity class:
// app/src/main/java/dev/idee/cicdandroid/MainActivity.kt

private fun setupRecyclerView() {
    with(movieRecyclerView) {
        layoutManager = LinearLayoutManager(this@MainActivity)
        adapter = movieAdapter
    }
}

private fun setupViewModel() {
    viewModel = ViewModelProviders.of(this)[MainActivityViewModel::class.java]
    viewModel.movieListLiveData.observe(this, Observer {
        progressBar.visibility = View.GONE
        movieAdapter.submitList(it)
    })
}
setupRecyclerView: This initializes your RecyclerView with a layout manager and an adapter.setupViewModel: This initializes the view model and starts observing the movieListLiveData object to listen for a response.
Right now, these methods are not referenced. Add them to the onCreate method of the class so that they’ll be triggered as soon as the activity starts up:
// app/src/main/java/dev/idee/cicdandroid/MainActivity.kt

override fun onCreate(savedInstanceState: Bundle?) {
    // ...
    setupRecyclerView()
    setupViewModel()
}
With this, your app is ready. Click the run button on Android Studio and you should have something like this:
Writing tests
For continuous integrations to be effective, tests are necessary. This is how checks and balances are maintained in the project. In this section, you will add some tests for your applications. You don’t have to worry about the test dependencies, they were already added in the starter project you downloaded.
Open the androidTest directory. Something like this:
/android-projects/ci-cd-android/app/src/androidTest/java/{package-name}. To confirm if you’re in the right directory, you would see an ExampleInstrumentedTest test file.
Create a new file called MainActivityTest and add this snippet to it:
// /app/src/androidTest/java/dev/idee/cicdandroid/MainActivityTest.kt

import androidx.test.core.app.ActivityScenario
import androidx.test.ext.junit.runners.AndroidJUnit4
import androidx.test.rule.ActivityTestRule
import org.junit.Rule
import org.junit.Test
import org.junit.runner.RunWith

@RunWith(AndroidJUnit4::class)
class MainActivityTest {

    @get:Rule
    val activityRule = ActivityTestRule(MainActivity::class.java, false, false)

    @Test
    fun appLaunchesSuccessfully() {
        ActivityScenario.launch(MainActivity::class.java)
    }

}
This test simply checks that the app launches successfully without errors. After this, create
another file MainActivityViewModelTest in the same directory and add this snippet:
// /app/src/androidTest/java/dev/idee/cicdandroid/MainActivityViewModelTest.kt

import androidx.arch.core.executor.testing.InstantTaskExecutorRule
import androidx.test.ext.junit.runners.AndroidJUnit4
import org.junit.Assert
import org.junit.Before
import org.junit.Rule
import org.junit.Test
import org.junit.runner.RunWith

@RunWith(AndroidJUnit4::class)
class MainActivityViewModelTest {

    private lateinit var viewModel: MainActivityViewModel
    private val list = ArrayList<MovieModel>()
    @get:Rule val instantTaskExecutorRule = InstantTaskExecutorRule()

    @Before
    fun setUp() {
        viewModel = MainActivityViewModel()
    }

    @Test
    fun testWhenLiveDataIsUpdated_NewValueTakesEffect() {
        list.add(MovieModel("","",""))
        viewModel.setMovieLiveData(list)
        Assert.assertEquals(viewModel.getMovieLiveData().value!!.size,1)
    }

}
This test checks that the methods that update and get results from the LiveData object function optimally. You can run your tests and you should see them pass.
Now that you’ve built your Android app and written tests, you need to check it to a remote repository. Open your GitHub profile and create a new project (repository).
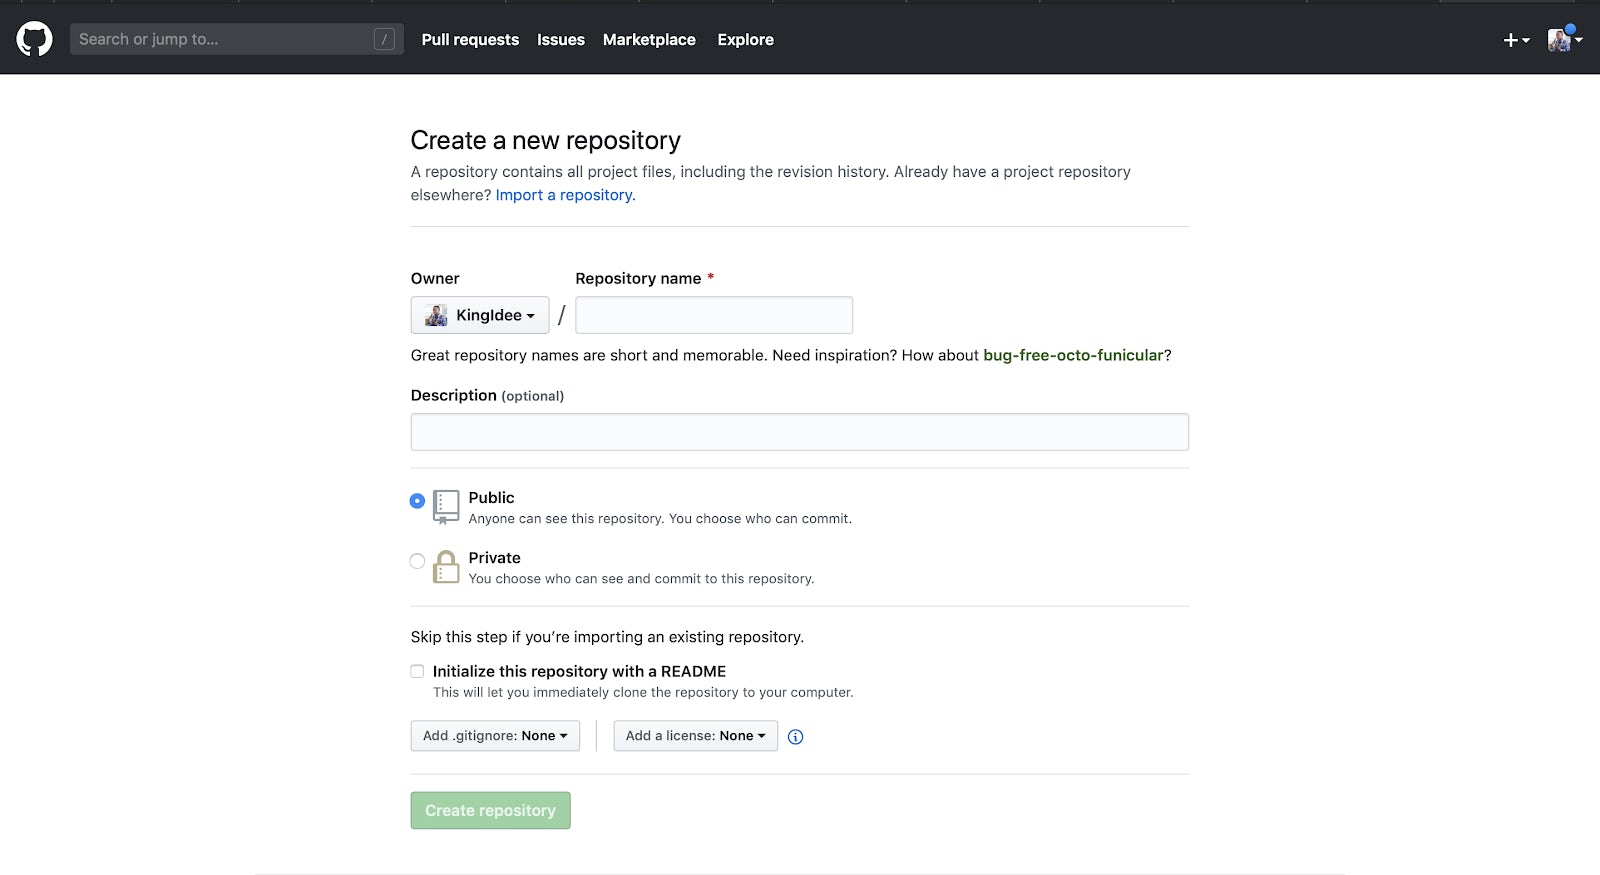
Enter a suitable name and description for your project. You can use ci-cd-android as the project name. After creating the project, you will see instructions on how to push your local project to the repository:
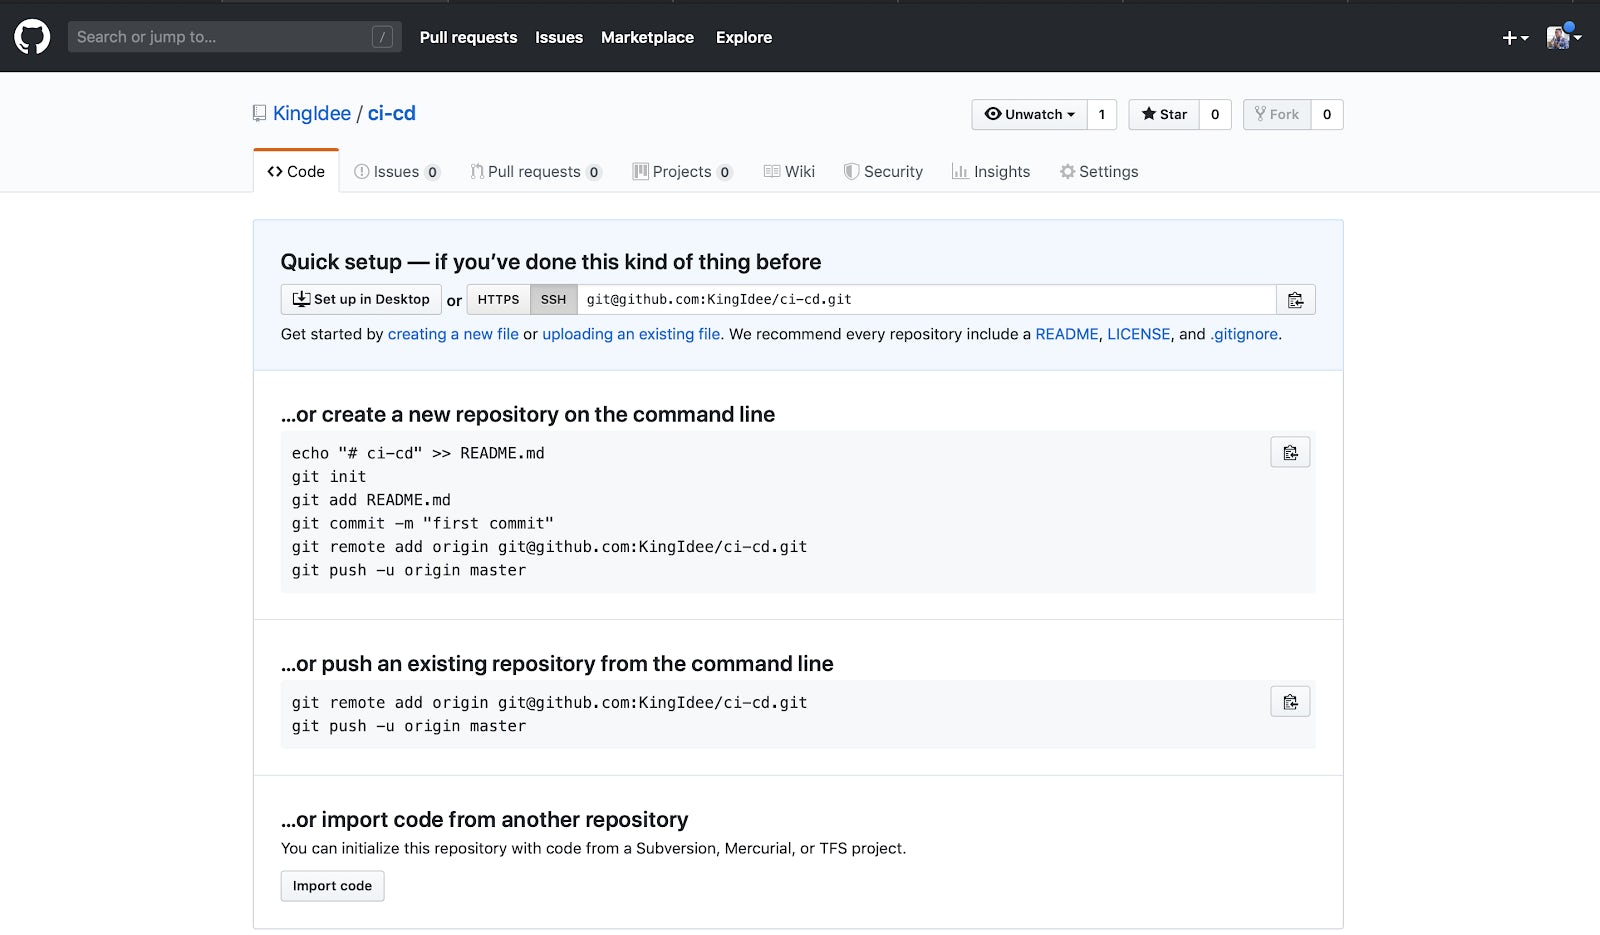
You can skip these instructions for now and move to the next section.
Setting up CI with CircleCI
In this section, you will set up CI for your Android project with CircleCI. In the root directory of your Android project, create a new folder named .circleci and add a file called config.yml inside it.
Inside the config.yml file, paste this snippet:
version: 2.1

orbs:
 android: circleci/android@0.2.0

jobs:
 build:
   executor: android/android

   steps:
     - checkout
     - run:
         command: ./gradlew build
This is the script that contains the commands to be executed on the code when it is checked into a repository. This file can be referred to as a pipeline.
In this snippet, you have different sections. You have the version part which tells the version of CircleCI being used. In this case it is version 2.1, Then you have the jobs section. A job is what runs your build process. When defining a config file, you need a minimum of one job.
In summary, the job you defined checks out your code, downloads the necessary dependencies, runs your tests, and uploads the results.
After this, the next thing to do is to push the updates to your project to the repository. You can do so by running these commands one after the other:
# adds all the changes in the working directory to the staging area
git add .

# Save changes to the local repository
git commit -m "added tests and Circle CI config file"

# Push changes on the local repository to the remote repository
git push origin master
Next, you have to set up the GitHub project on your CircleCI dashboard. If you don’t have a CircleCI account, you can easily create one here.
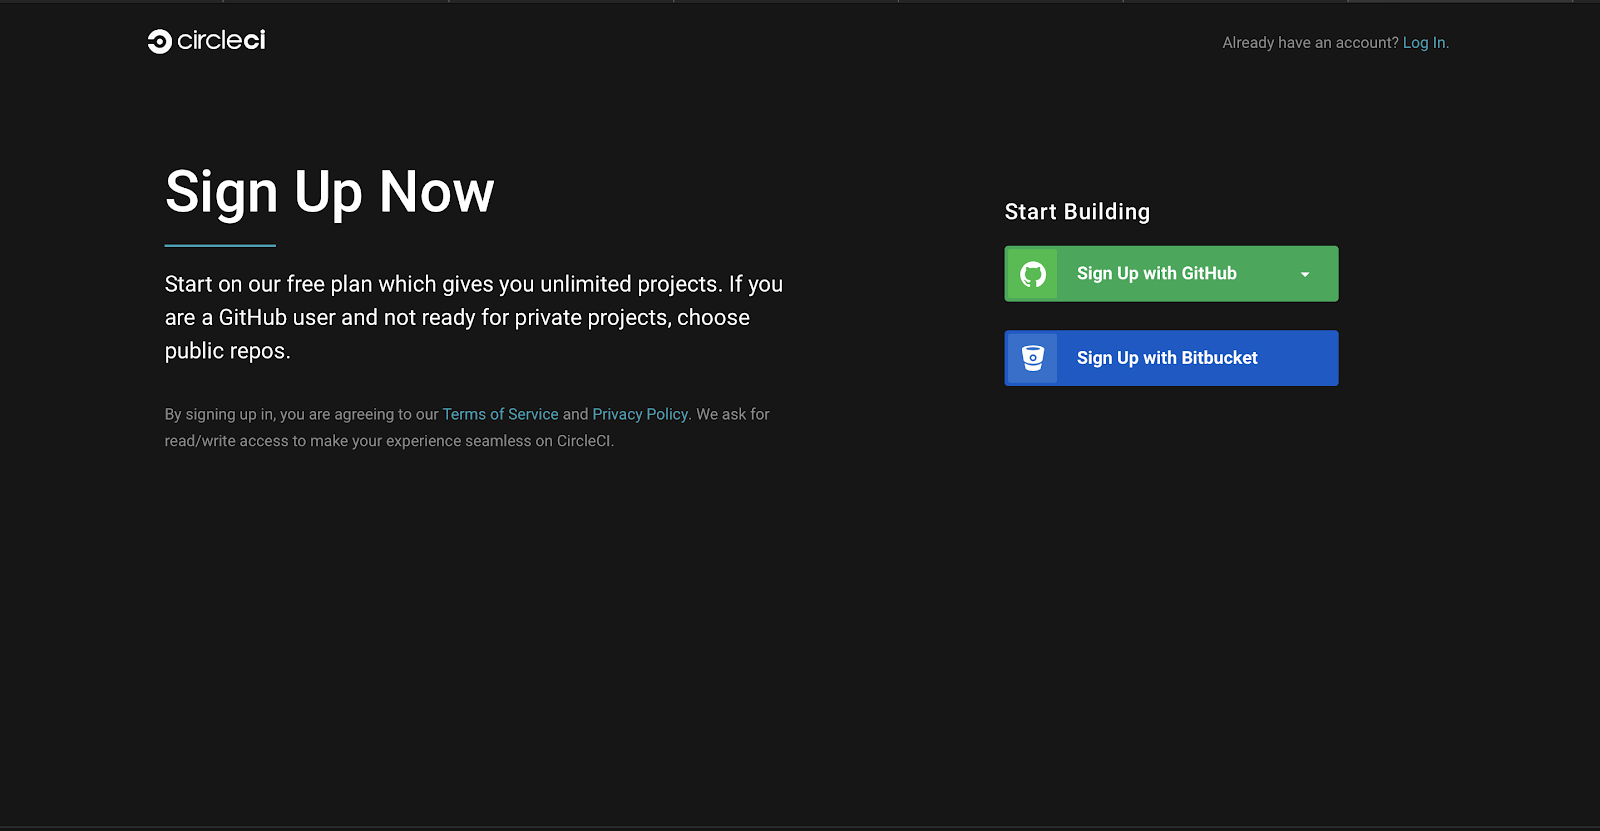
Luckily, since you have a GitHub account already, this shouldn’t take a while. If you have a CircleCI account already, you should log in instead. Either way, you would end up on your dashboard. On your dashboard, select the ADD PROJECTS tab:
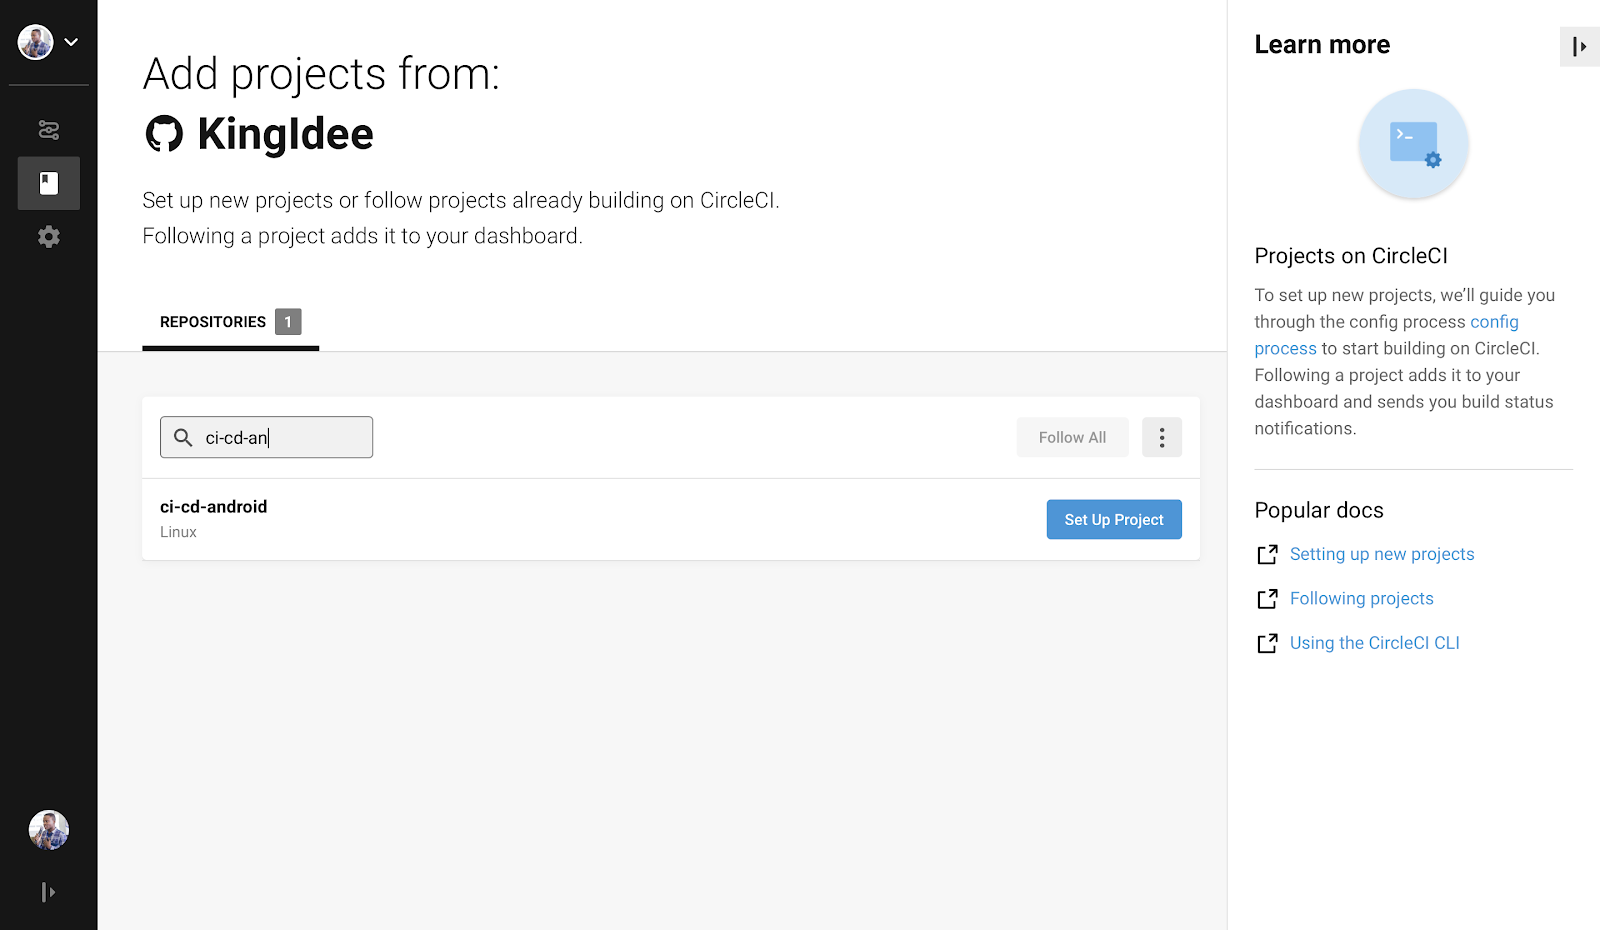
Search for the repository you created earlier and click Set Up Project. After clicking the button, you should now see a page like this:
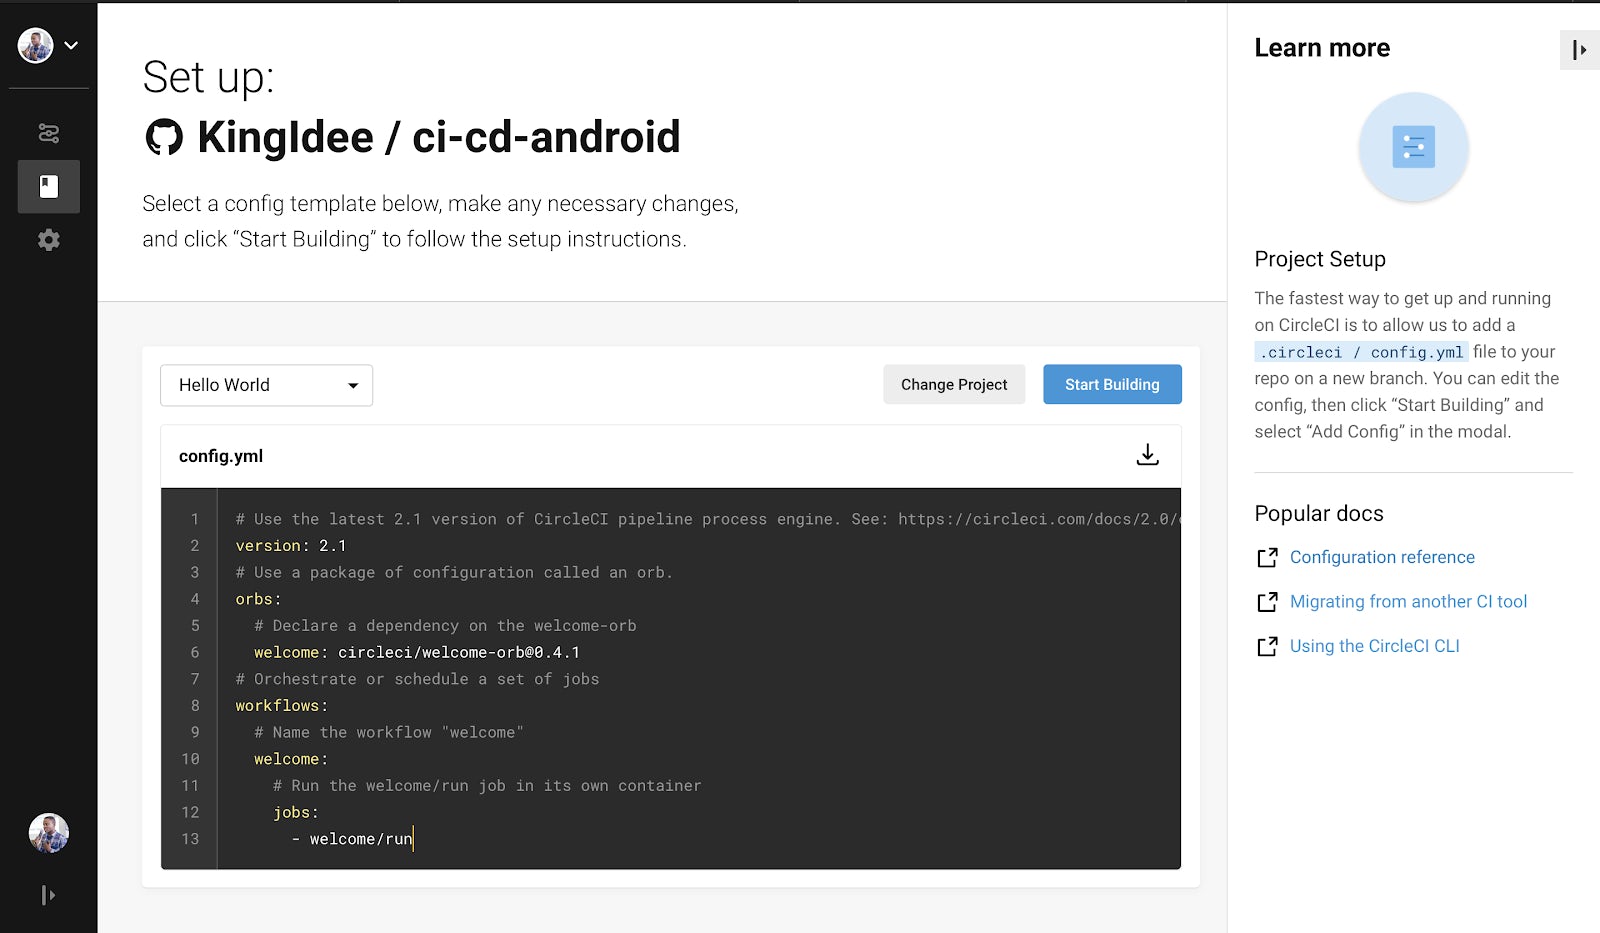
Click Start Building. Choose Add Manually when asked if you want CircleCI to add a config file to your repo for you. This is because we have already added the config file.
Setting up fastlane for deployment
Now you will move a step further to set up continuous deployments for your Android project. You will make use of fastlane which will help automate the release of your Android app to the Google Playstore.
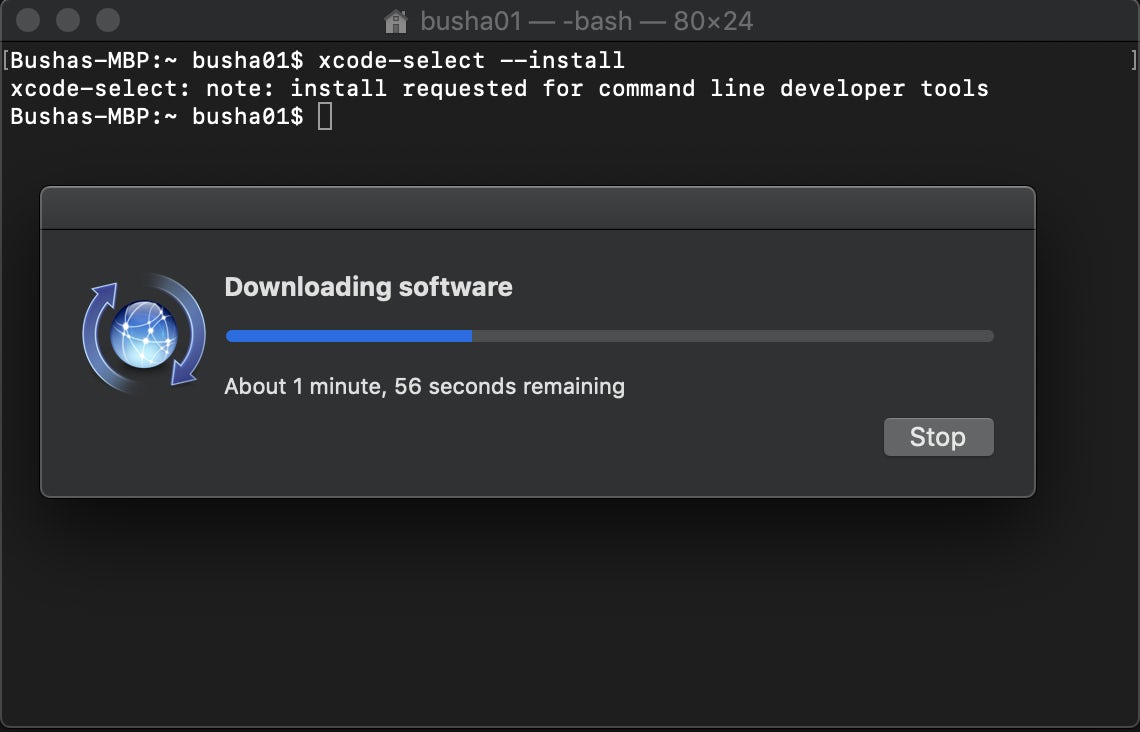
The first thing you should do is install the latest Xcode command line tools using this command:
xcode-select --install
This will bring up a permission request, accept it and accept the terms shown after. Then the latest tools will be fetched and installed:
When that is completed, install fastlane by running this command:
brew cask install fastlane
After installing fastlane, you need to add it to your path. Open the bash profile file with this command:
open -e .bash_profile
Note: If the file did not exist before, you can use the command: touch .bash_profile to create it.
Then, add this snippet to the file:
PATH=$PATH:$HOME/.fastlane/bin
After that, run this command to refresh the bash profile:
. .bash_profile
Next, go to your Android project terminal and initialize fastlane in the project with this command:
fastlane init
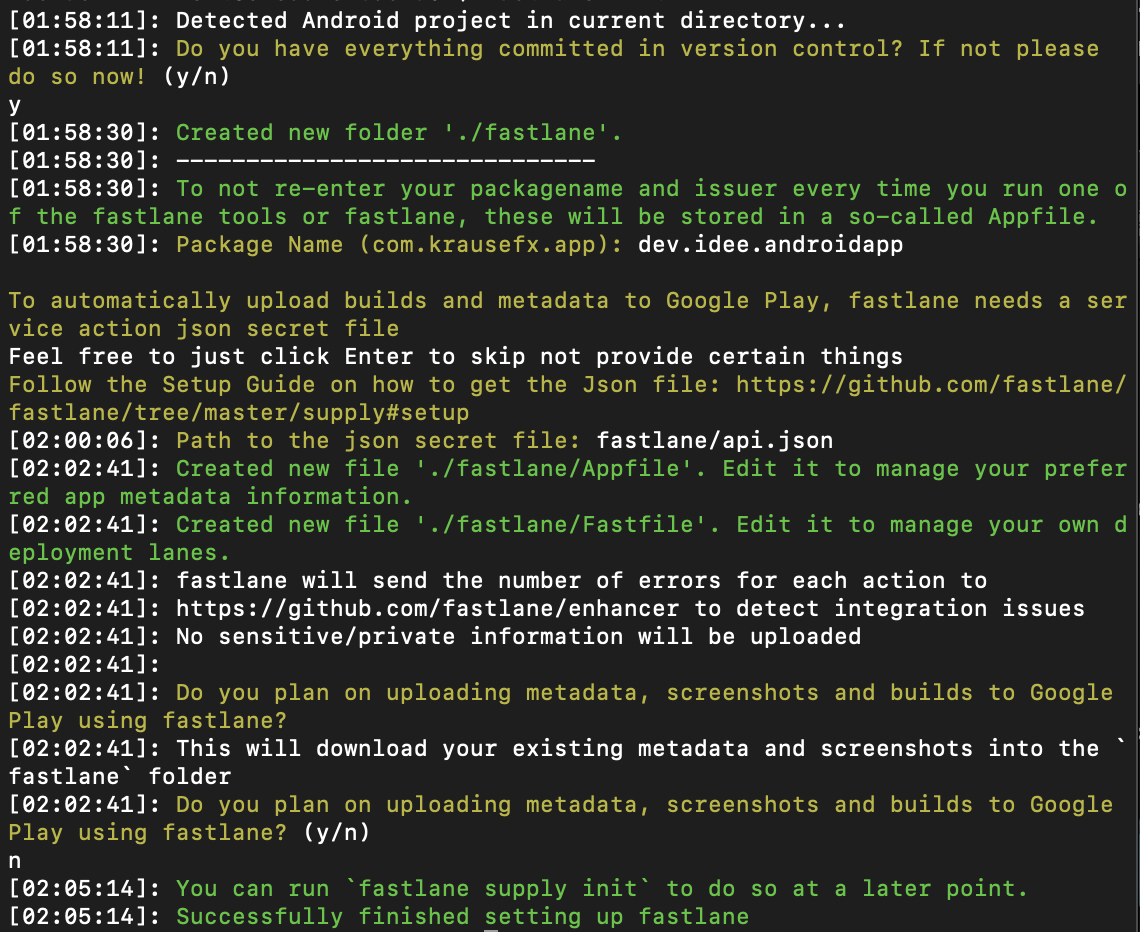
It starts by creating a fastlane folder in the directory. Then it proceeds to request for the package name of your app. Input the package name of your app and press Enter. You can find your app package name in the app-module build.gradle file. In the file, the package name is referred to as the applicationId.
After this, you will be asked for the path to your JSON secret file. Input fastlane/api.json and select Enter. Finally, Answer n when asked if you plan on uploading info to Google Play via fastlane.
Note: With fastlane, you can go as far as uploading screenshots and release notes for your app, but we won’t consider that in this tutorial.
Here is a screenshot of the process on the terminal:
After initializing fastlane on your project, you now need to get a credentials file from your Google Developers Service Account. This is the file that will enable you to actually upload your binaries to the PlayStore.
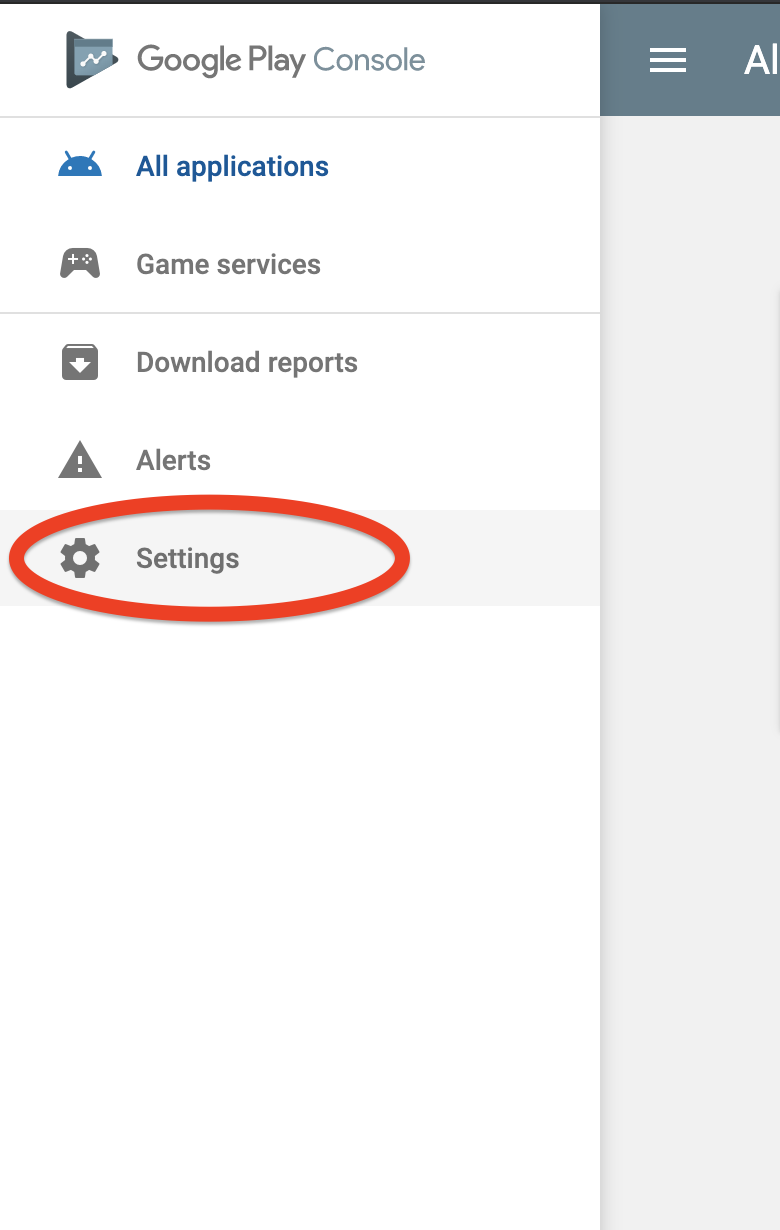
Open the Google Play Console. Then, select Settings:
Then select the API access option under Developer Account:
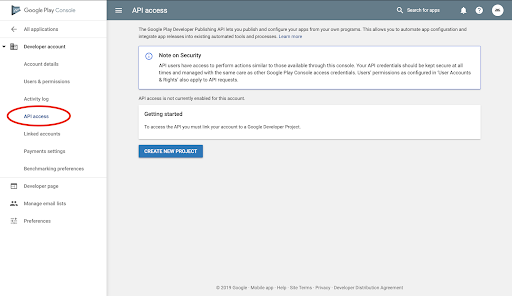
To enable API access for your Google Play account, click CREATE NEW PROJECT. It will show you a screen like so:
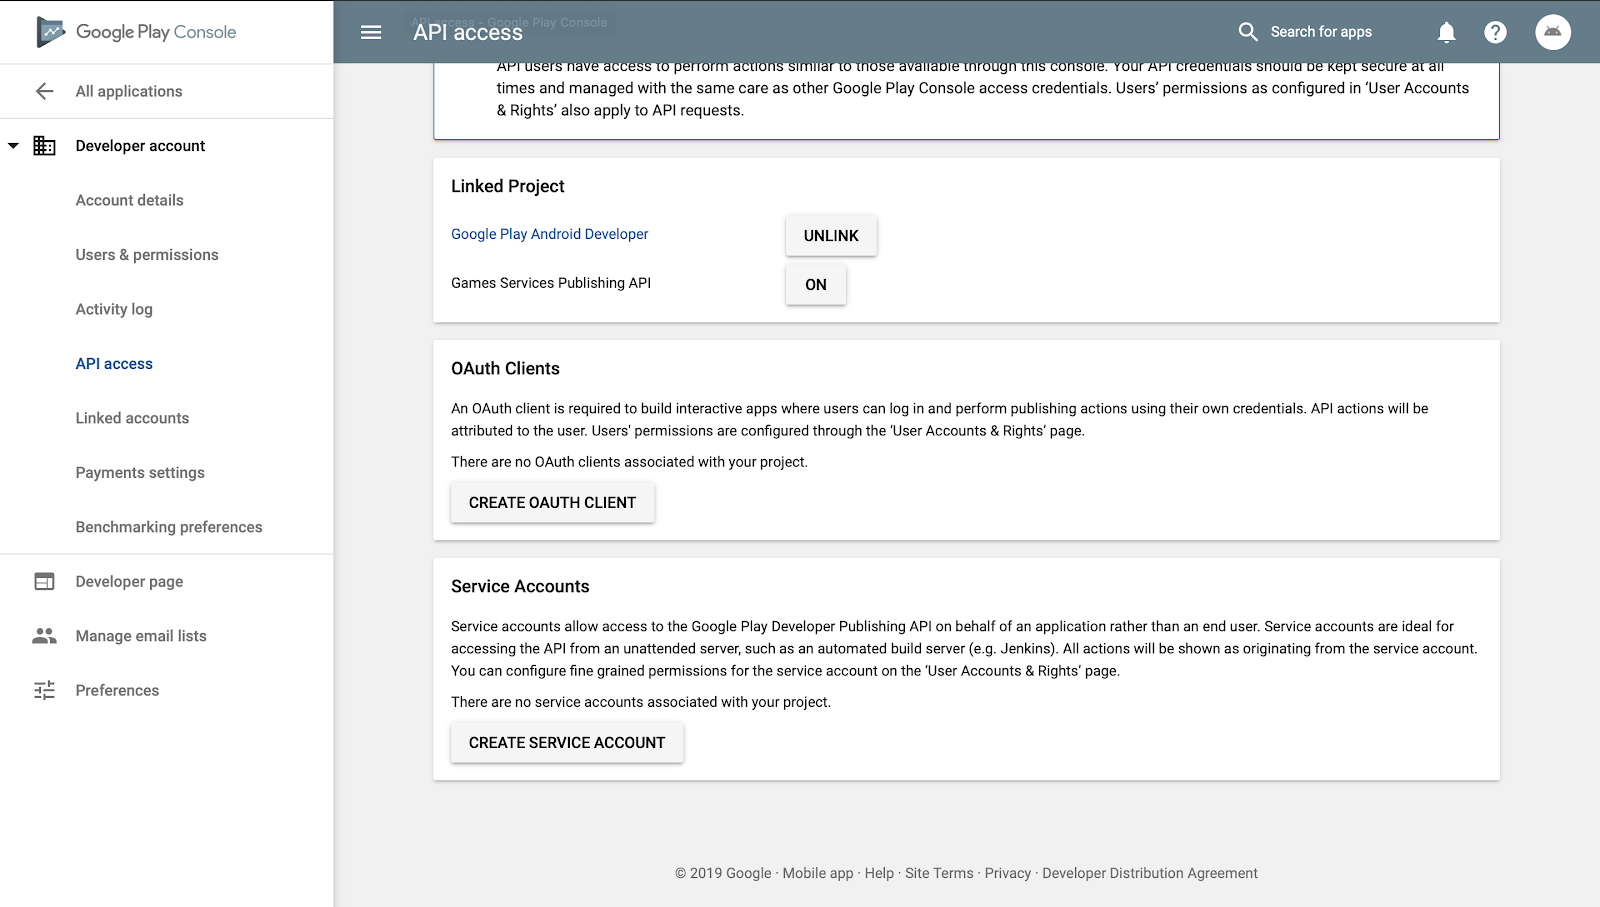
Click CREATE SERVICE ACCOUNT. You will be presented with a dialog like this:

Click the Google API Console link. This will direct you to the project on the Google Cloud console:
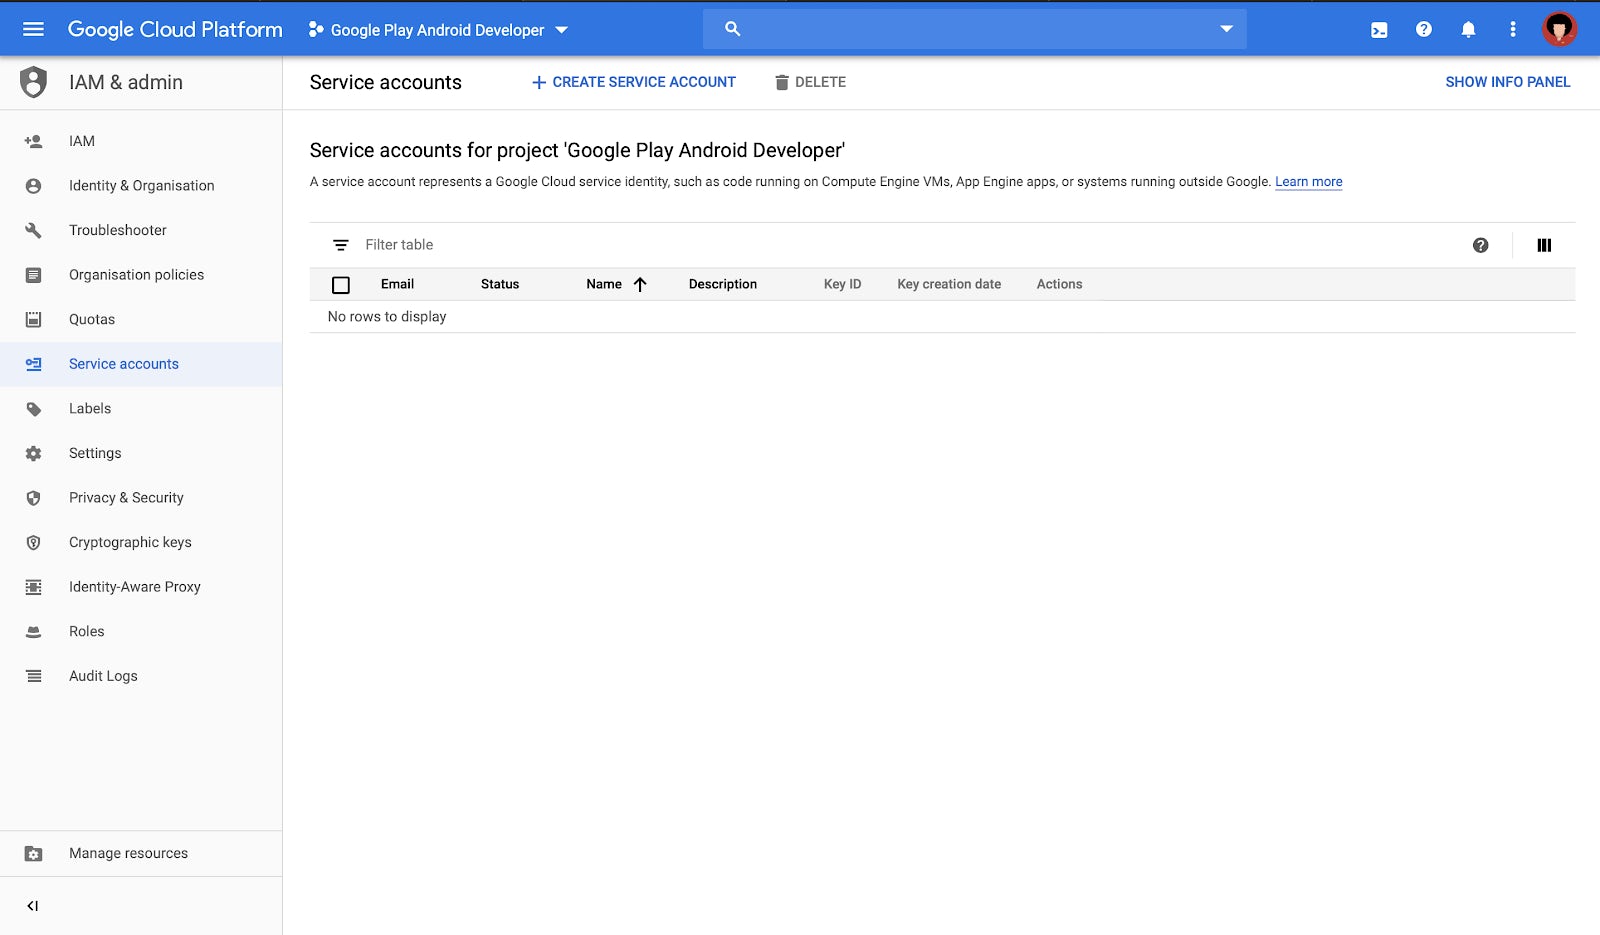
When you get here, click CREATE SERVICE ACCOUNT.
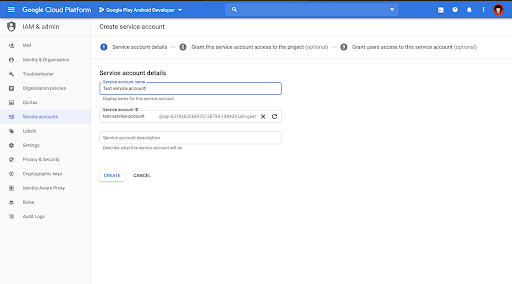
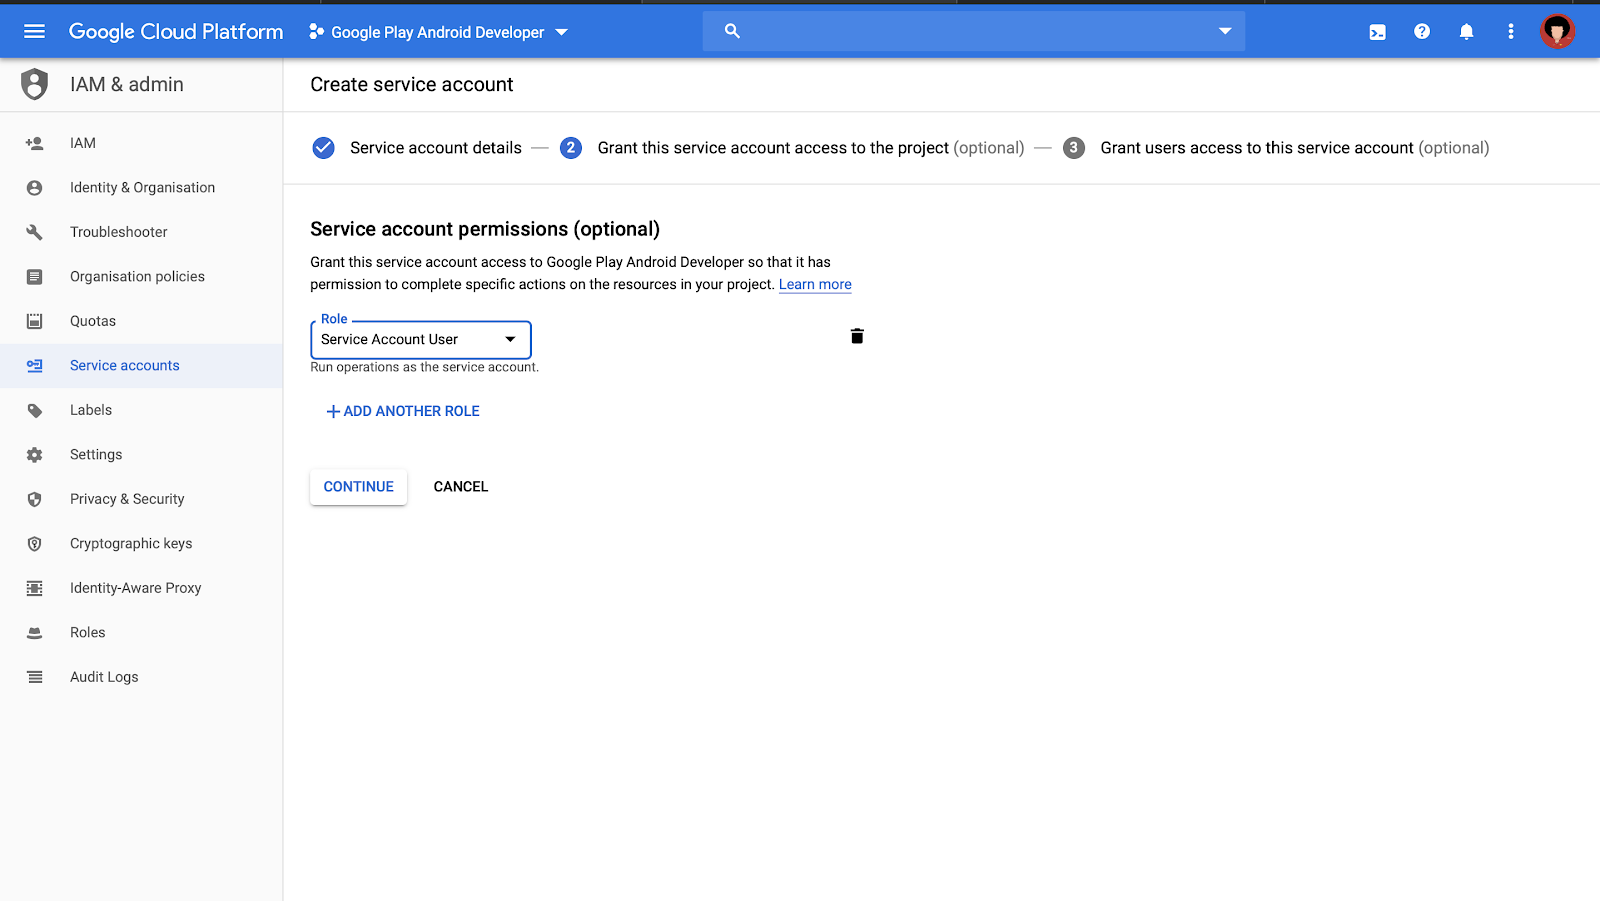
Then you fill in your details and click CREATE. When asked for a role, choose Service Accounts > Service Account User then click CONTINUE:
After that, you will be presented with this screen:
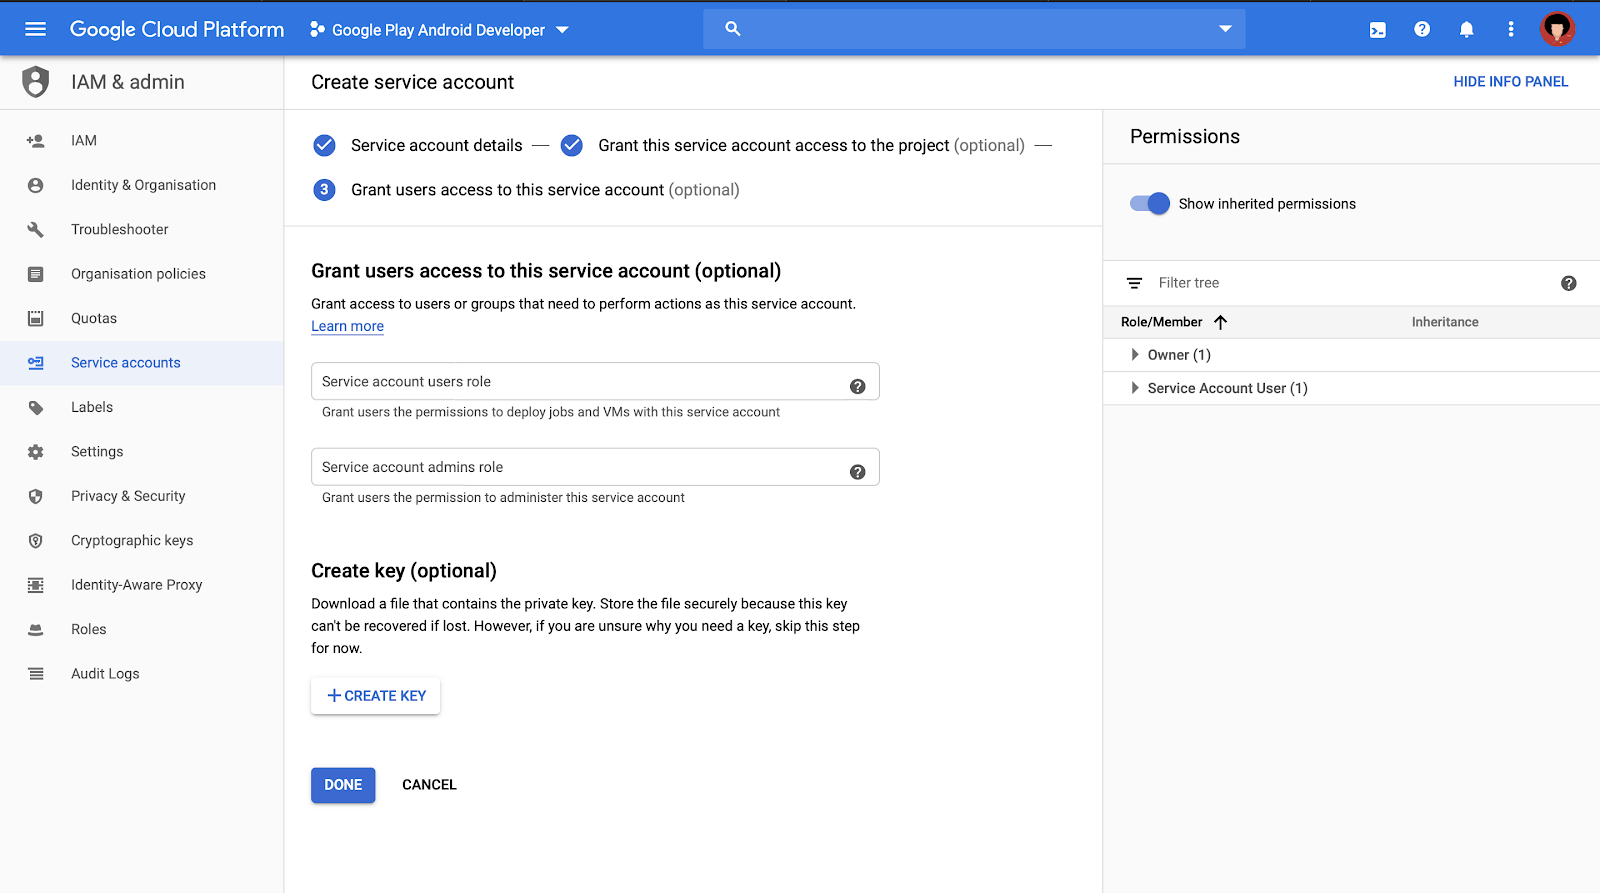
Click CREATE KEY. Make sure the key type is JSON. As soon as your key is created, it will be downloaded to your machine.
Go back to the tab that had your Google Play Console open. Click DONE on the dialog. You will now see a new service account. Click GRANT ACCESS, choose the Release manager role and click ADD USER.
Note: Alternatively, you can select Project Lead from the Role dropdown. Note that choosing Release Manager grants access to the production track and all other tracks. Choosing Project Lead grants access to update all tracks except the production track.
Now that you have acquired your key, copy the key to the fastlane folder of the project. This time, rename it to api.json. This is so that the filename and directory matches the configurations you did when setting up fastlane.
Note: This file contains secrets of your Playstore account and as such should be only used in a private repository.
Fastlane has a file named Fastfile in its folder. This file is used to configure the tasks you can execute with fastlane. If you open the default file, you will observe three different blocks:
before_all: This is where you insert instructions to be performed before a lane is executed.lane: This is where you define an actual task you want to perform, such as deploying to PlayStore. You can define as many lanes as you want.after_all: This block is called when the executed lane was successful.error: This block will be called if an error occurs in any of the other blocks.
The Fastfile already comes with a lane that generates a release build and deploys it to the PlayStore, the playstore lane. You will modify this lane a bit. Open your Fastfile and update the playstore lane like so:
lane :playstore do
 gradle(
   task: 'bundle',
   build_type: 'Release'
 )
 upload_to_play_store skip_upload_apk:true
end
Note: If you don’t have the playstore lane, create one and add the snippet above.
Here, you updated the task to bundle. This is so that fastlane will build an aab (Android App Bundle) instead of an apk. Aab is the recommended format for uploading artifacts to the Playstore. You also added a skip_upload_apk:true parameter to the upload_to_play_store command so that only the aab generated will be used and if there are any apks present, it will be discarded.
Preparing your app for deployment
Next, you have to make some updates to your app to prepare it for deployment. You’ll have to add a release signing config to your app-module build.gradle file. This is so that fastlane will use the same keystore you used to generate earlier releases of your app to generate subsequent ones too.
Add the signingConfigs snippet to your app-module build.gradle:
android {
    signingConfigs {
        release {
            keyAlias 'key0'
            keyPassword 'keyPassword'
            storeFile file('../KeyStore')
            storePassword 'storePassword'
        }
    }
    // Leave the rest untouched...
}
Note: Replace the key password and store password with your actual passwords. Replace the key alias and the name of your keystore too. From this snippet, the keystore was stored in the project root directory. If you need help generating a keystore for your application, you can visit this resource.
After that, update the buildTypes section of the build.gradle file like so:
buildTypes {
    release {
        signingConfig signingConfigs.release
        // Leave other parts untouched...
    }
}
With this, we have configured the app to use a specific keystore. Next, you will create functions in your build.gradle file to help you generate build numbers for your app versions. Add this snippet just before the android section of your app-module build.gradle file:
ext.versionMajor = 1
ext.versionMinor = 0
ext.versionPatch = 1
ext.versionClassifier = null
ext.isSnapShot = false
ext.minSdkVersion = 21

private Integer generateVersionCode() {
    return ext.minSdkVersion * 10000000 + ext.versionMajor * 10000 +
            ext.versionMinor * 100 + ext.versionPatch
}

private String generateVersionName() {
    String versionName = "${ext.versionMajor}.${ext.versionMinor}.${ext.versionPatch}"

    if (ext.versionClassifier == null) {
        if (ext.isSnapShot) {
            ext.versionClassifier = "SNAPSHOT"
        }
    }

    if (ext.versionClassifier != null) {
        versionName += "-" + ext.versionClassifer
    }

    return versionName
}
In this snippet, you added variables that hold your app version values. You then added two methods generateVersionCode and generateVersionName to generate the version code and version name based on how the app version value changes.
This helps to give your app a unique and progressive way of generating your version code when you modify your app versions. Now, update these properties in the defaultConfig section of the build.gradle file like so:
defaultConfig {
    versionName generateVersionName()
    versionCode generateVersionCode()
    // ... Leave others untouched

}
Now, you will update the CircleCI config file to tell it which fastlane command to execute. Open the config.yaml file and add these steps in your file:
# .circleci/config.yaml
- run:
    name: Install fastlane
    command: bundle install
- run:
    name: Execute fastlane
    command: bundle exec fastlane playstore
Here, you have two commands, the first one installs fastlane, the second one generates a build and sends to the Google PlayStore. For your app to upload successfully, it is expected that an app with the package name(dev.idee.cicdandroid in this case) already exists on your PlayStore account. You can use this tutorial as a guide on uploading your app if you haven’t done so before.
Now, when you push new code to your repository, you should see your app GO LIVE!
Conclusion
In this article, we covered the basics of continuous integration and deployment. We built a simple app to demonstrate this, and went further to learn about deployments with fastlane. Now, you can set up your app to automatically test and deploy directly to the Playstore. This is just the start. There is so much more you can do with CircleCI and fastlane.
Happy hacking!
Idorenyin Obong is a software engineer specializing in mobile development. He loves to write about everything software.


