

In the world of hybrid mobile development, no other framework has done more for the industry than the Ionic framework. Created in 2013 and originally built on Angular.js and Apache Cordova, Ionic has grown to a full-featured application framework for developing mobile, desktop, and progressive web applications. Ionic has also become framework-agnostic, allowing developers to use Angular.js, React.js, or Vue.js for development.
In this tutorial, we will be building a handy task manager. We will write tests for features in the application and set up a continous integration (CI) pipeline to automate our development and testing. We will be developing our application using Ionic React, the Ionic version that supports developing using React.js.
Prerequisites
To follow this post, a few things are required:
- Basic knowledge of React.js (Not a deal-breaker, you only have to copy-paste the code snippets)
- Node.js installed on your system
- The Ionic CLI installed on your system
- A CircleCI account
Scaffolding the Ionic application
To begin, let’s scaffold a new Ionic application by running the following command:
ionic start task-manager tabs --type=react
This will immediately trigger the Ionic CLI to scaffold a new project for us using the tabs template inside a folder named task-manager.
Note: You might be prompted at some point with Create free Ionic account?. Hit n to decline. For more information on creating an Ionic account see here.
Once this is done, go into the root of the application (cd task-manager) and run the following command to serve the application in your web browser:
ionic serve
Once this command has completed, you will see an application view in your browser similar to the one below.
Note: I am using a mobile preview activated in Chrome’s development tools.
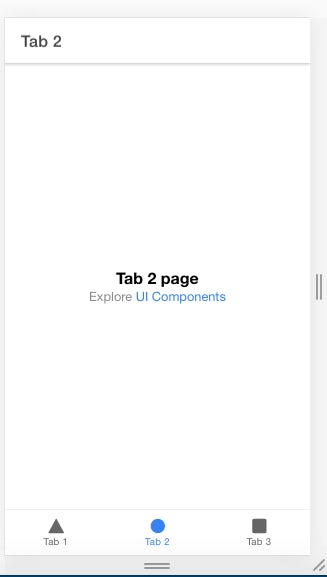
Don’t be surprised if yours has a black background and white font. It uses the default mode of your machine.
Building the Task Manager application
Next, let’s begin building the main application. Go into the src/pages folder of your application and open the Tab1.tsx file. This is the default home page for the newly scaffolded application. Remove everything in this file and replace it with the following code:
// src/pages/Tab1.tsx

import React, { useState } from "react";
import {
  IonContent,
  IonHeader,
  IonPage,
  IonTitle,
  IonToolbar,
  IonList,
  IonItemSliding,
  IonItem,
  IonLabel,
  IonItemOptions,
  IonItemOption,
  IonFab,
  IonFabButton,
  IonIcon,
  IonModal,
  IonButton,
  IonCard,
  IonCardContent,
  IonInput,
} from "@ionic/react";

import { add } from "ionicons/icons";

import "./Tab1.css";

interface Task {
  id: number;
  name: string;
}

const Tab1: React.FC = () => {
  const [tasks, setTasks] = useState<Task[]>([]);
  const [showModal, setShowModal] = useState(false);
  const [taskName = "", setTaskName] = useState<string>();

  function addNewTask() {
    const new_id = tasks.length + 1;

    const newTask = {
      id: new_id,
      name: taskName,
    };

    tasks.push(newTask);

    setTasks(tasks);

    setTaskName("");

    setShowModal(false);
  }

  return (
    <IonPage>
      <IonHeader>
        <IonToolbar>
          <IonTitle>Task Manager</IonTitle>
        </IonToolbar>
      </IonHeader>
      <IonContent>
        <IonList>
          {tasks.length > 0 ? (
            tasks.map((item: Task) => {
              return (
                <IonItemSliding key={item.id}>
                  <IonItem className="todo-item">
                    <IonLabel>{item.name}</IonLabel>
                  </IonItem>
                  <IonItemOptions side="end">
                    <IonItemOption onClick={() => {}}>Done</IonItemOption>
                  </IonItemOptions>
                </IonItemSliding>
              );
            })
          ) : (
            <IonItem>
              <IonLabel>You have yet to add tasks for today</IonLabel>
            </IonItem>
          )}
        </IonList>

        {/* Modal*/}
        <IonModal isOpen={showModal}>
          <IonCard>
            <IonItem>
              <IonLabel>Add New Task</IonLabel>
            </IonItem>

            <IonCardContent>
              <IonItem>
                <IonInput
                  value={taskName}
                  placeholder="Enter Task Name..."
                  onIonChange={(e) => setTaskName(e.detail.value!)}
                ></IonInput>
              </IonItem>

              <IonButton
                expand="full"
                color="primary"
                onClick={() => addNewTask()}
              >
                Add Task
              </IonButton>
            </IonCardContent>
          </IonCard>
          <IonButton onClick={() => setShowModal(false)}>Close Modal</IonButton>
        </IonModal>

        {/* Add Task Button */}
        <IonFab vertical="bottom" horizontal="end" slot="fixed">
          <IonFabButton onClick={() => setShowModal(true)}>
            <IonIcon icon={add} />
          </IonFabButton>
        </IonFab>
      </IonContent>
    </IonPage>
  );
};

export default Tab1;
Now let’s go through the code snippet above. This is the entire code for our Task Manager application.
We start by importing the necessary dependencies including the css file for our page. We then define an interface to define our task objects.
interface Task {
  id: number;
  name: string;
}
Next, we create our component as a React function component type React.FC and begin the function by defining the data we want to hold in our state using hooks: a tasks array of Tasks, a showModal boolean to control the opening and closing of our task creation form, and taskName which holds the value of a new task in the process of creation.
const [tasks, setTasks] = useState<Task[]>([]);
const [showModal, setShowModal] = useState(false);
const [taskName = "", setTaskName] = useState<string>();
Following these is the function that we call to add a new task. This function creates a new task by setting its id based on the length of the array and clears the form after adding the new task to our existing list of tasks.
function addNewTask() {
  const new_id = tasks.length + 1;

  const newTask = {
    id: new_id,
    name: taskName,
  };

  tasks.push(newTask);

  setTasks(tasks);

  setTaskName("");

  setShowModal(false);
}
Next, we render our template to display our list of tasks and also display a helpful message that reads You have yet to add tasks for today when the task list is empty.
Following the list is a modal component that contains our task form for adding new tasks. Below the component is a floating action button that the user clicks to open the modal.
Before we preview this, open Tab1.css located in the same folder as Tab1.tsx and replace its contents with the following code:
/* src/pages/Tab1.css */

.todo-item {
  --min-height: 70px;
  font-size: 1.2em;
}
This simply bumps up the height and font-size of the list items.
Now, go to your browser and load the homepage of your application (Tab1). You will see the page displayed below.
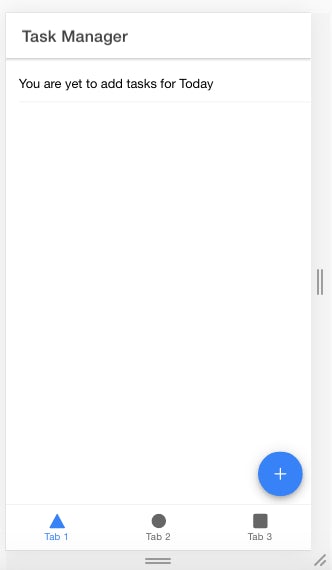
Because we haven’t added any tasks yet, we have the message You have yet to add tasks for today displayed. We also have our Add Task button in the bottom right corner with the plus symbol.
Adding tasks
To add a new task, click the bottom-right blue button to pull up the task creation form and type in a task as shown below.
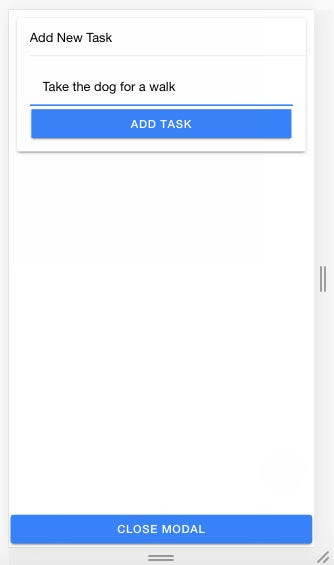
Click ADD TASK to add the task and go ahead to add 2 to 3 more tasks. We should now have enough tasks on the page for our application to look functional.
 : .zoomable }
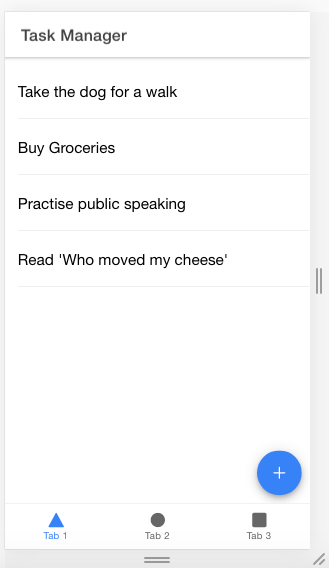
Great!
Now we have a functional application. Not production-ready, but good enough to start testing.
Adding tests to the Task Manager application
One advantage that we have with testing our Ionic applications is that while scaffolding the application, the Ionic CLI has set up all that the application needs, in terms of packages and configurations, for testing.
Testing Ionic React applications is done using the Jest testing framework together with the React Testing Library and the Ionic React Test Utils library which is a small suite of utilities to simulate common features in Ionic like firing custom Ionic events.
The project already comes with a test file for the App.tsx file inside the src folder. As you may have guessed, the test file is named App.test.tsx which follows the convention for Jest tests.
// src/App.test.tsx

import React from "react";
import { render } from "@testing-library/react";
import App from "./App";

test("renders without crashing", () => {
  const { baseElement } = render(<App />);
  expect(baseElement).toBeDefined();
});
This test simply checks that the application renders properly and does not crash.
To run this test, run the following command:
npm run test
This will invoke the jest command to run the test defined in the file. As directed, press a to run all tests. The above command is the command we will be using to run all tests in our application.
Now, let’s add some tests of our own. We will be creating a test file to test the application logic we have in our Tab1.tsx file which houses our application.
Create a file named Tab1.test.tsx inside the src/pages folder. It’s the same place that the Tab1.tsx file is located. Inside the newly created file, place in the following code:
// src/pages/Tab1.test.tsx

import React from "react";
import { render } from "@testing-library/react";
import Tab1 from "./Tab1";

test("Page title is Task Manager", async () => {
  const { findByText } = render(<Tab1 />);
  await findByText("Task Manager");
});

test("When there are no Tasks, inform the user that no tasks have been created", async () => {
  const { findByText } = render(<Tab1 />);
  await findByText("You have yet to add tasks for today");
});
In this file, we have added two tests. The first test checks if our page displays with the correct title which is Task Manager. The second test checks if our application initially loads without tasks, and if it does, it displays the message You have yet to add tasks for today.
Great!
Now, let’s run these tests by running the following command at the root of our project:
npm run test
You will see a screen similar to the one below on your command line interface.
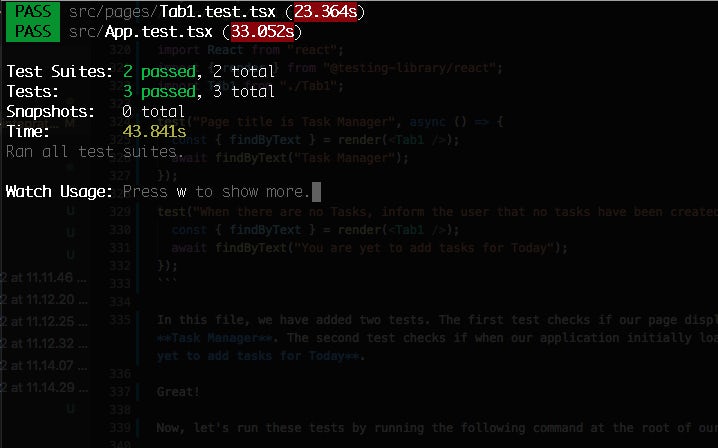
Awesome!
We now have our tests running as expected.
Automating our testing
Our final task is to automate our continuous integration process. To achieve that, we will be doing the following:
- Add a configuration script to our project to set up a CI pipeline on CircleCI
- Push our project to a GitHub repository
- Create a CircleCI project for our application
- Run the CI pipeline on CircleCI
Let’s get to it.
First, let’s add a configuration file for our CI pipeline to our project.
At the root of your project, create a config.yml file in a .circleci folder. Inside the config.yml file, enter the following code:
version: 2.1
jobs:
  build:
    working_directory: ~/repo
    docker:
      - image: cimg/node:12.16
    steps:
      - checkout
      - run:
          name: update-npm
          command: "sudo npm install -g npm@5"
      - restore_cache:
          key: dependency-cache-{{ checksum "package-lock.json" }}
      - run:
          name: install-packages
          command: npm install
      - save_cache:
          key: dependency-cache-{{ checksum "package-lock.json" }}
          paths:
            - ./node_modules
      - run:
          name: test
          command: npm run test
This configuration pulls in a Node.js image and installs all the dependencies defined in package.json. Once the installation is complete, the test script npm run test is then executed to run all the tests in our application.
Our pipeline configuration file is good to go.
Next, commit all your changes and push the project to a GitHub repository on the GitHub account connected to your CircleCI account.
The next step is to set up the repository for our project as a CircleCI project.
On the CircleCI console, go to the Add Projects page to add the project:

Click Set Up Project. This will load the next screen.
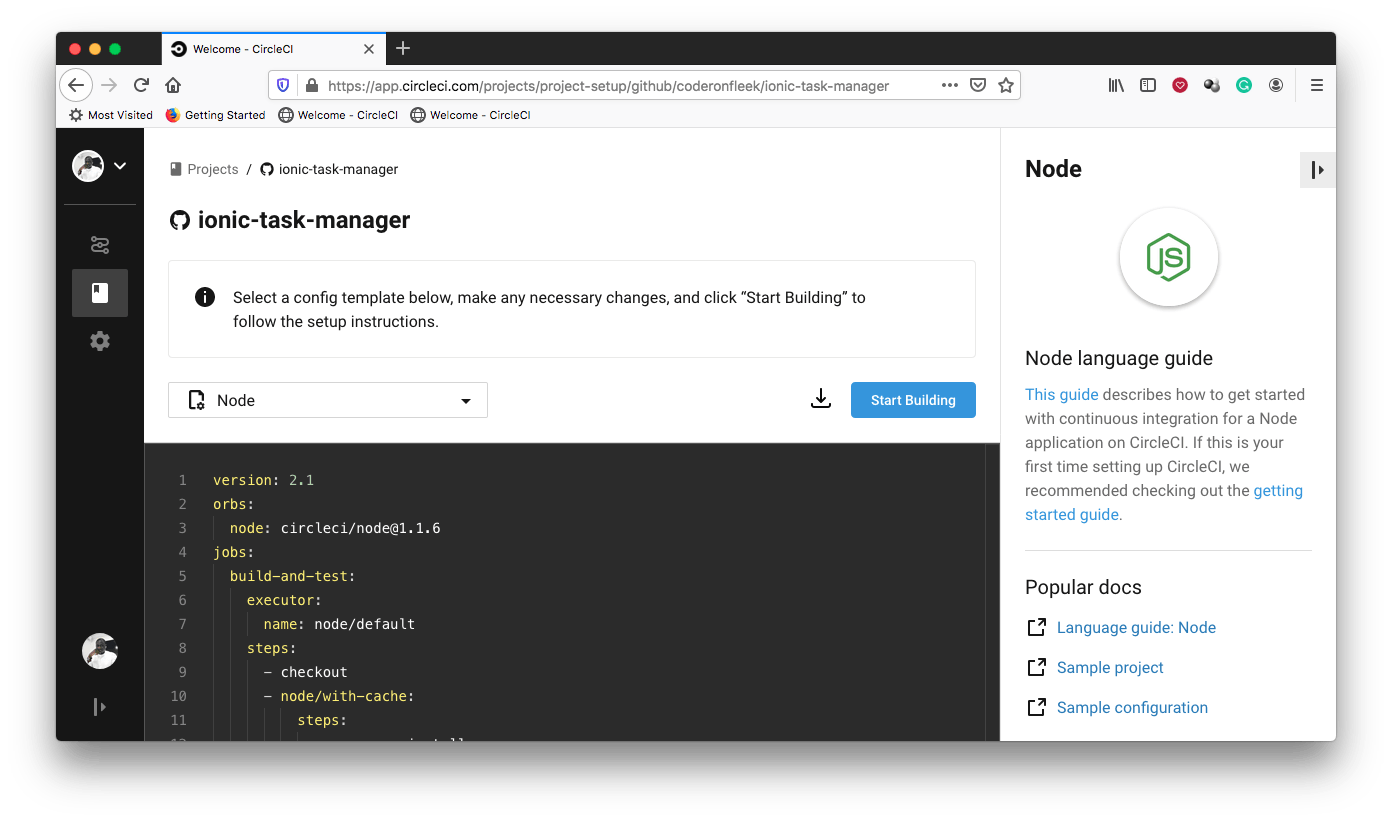
On the setup page, click Start Building. Before the build starts, you get a prompt to either download and use the provided CircleCI configuration file and have it on a separate branch or set up one manually.
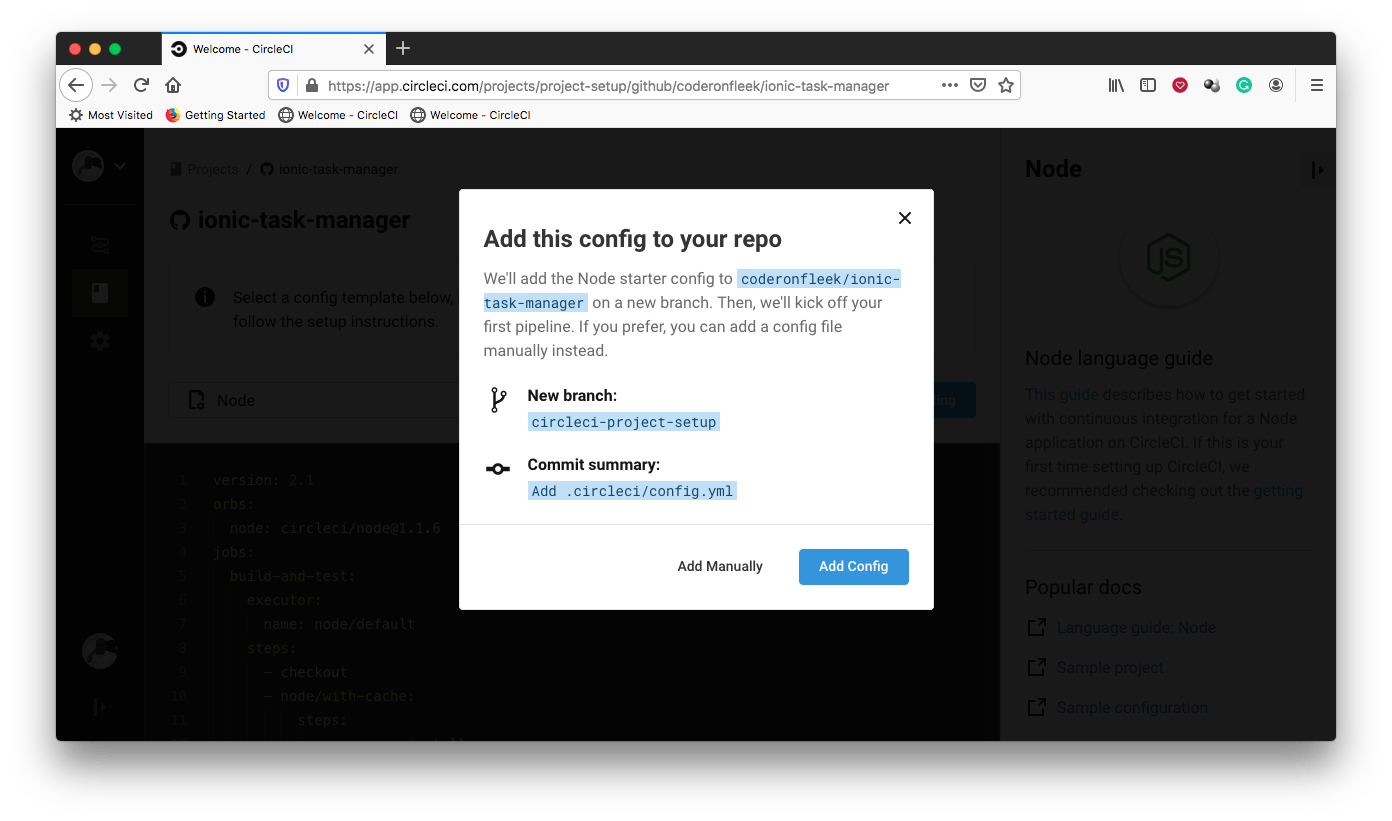
Select Add Manually to proceed. This will prompt another dialog that checks to confirm that you have a configuration file set up to begin building.
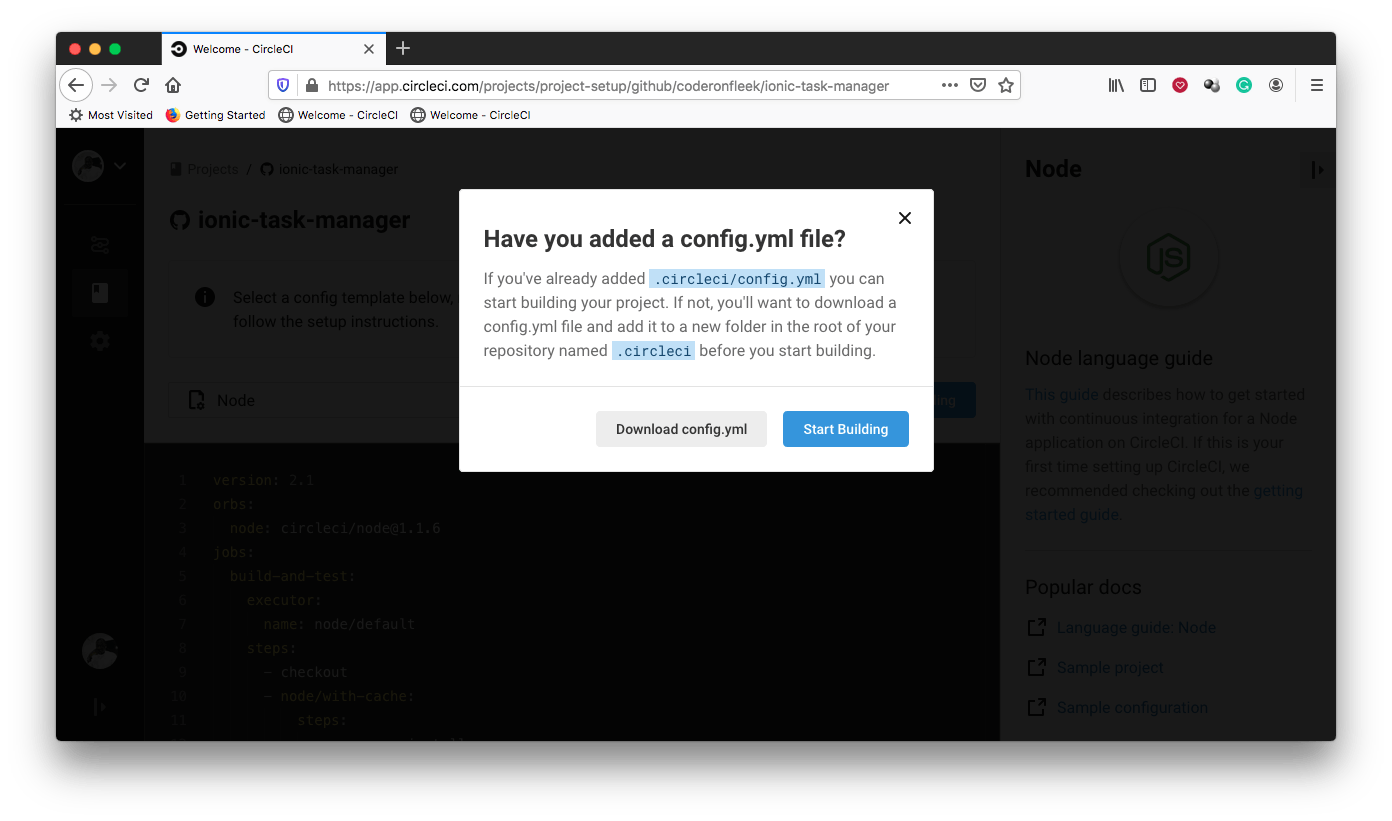
Click Start Building to complete the setup. This will immediately trigger the pipeline using the configuration file in our project.
After the build is done running, you will get a successful build.
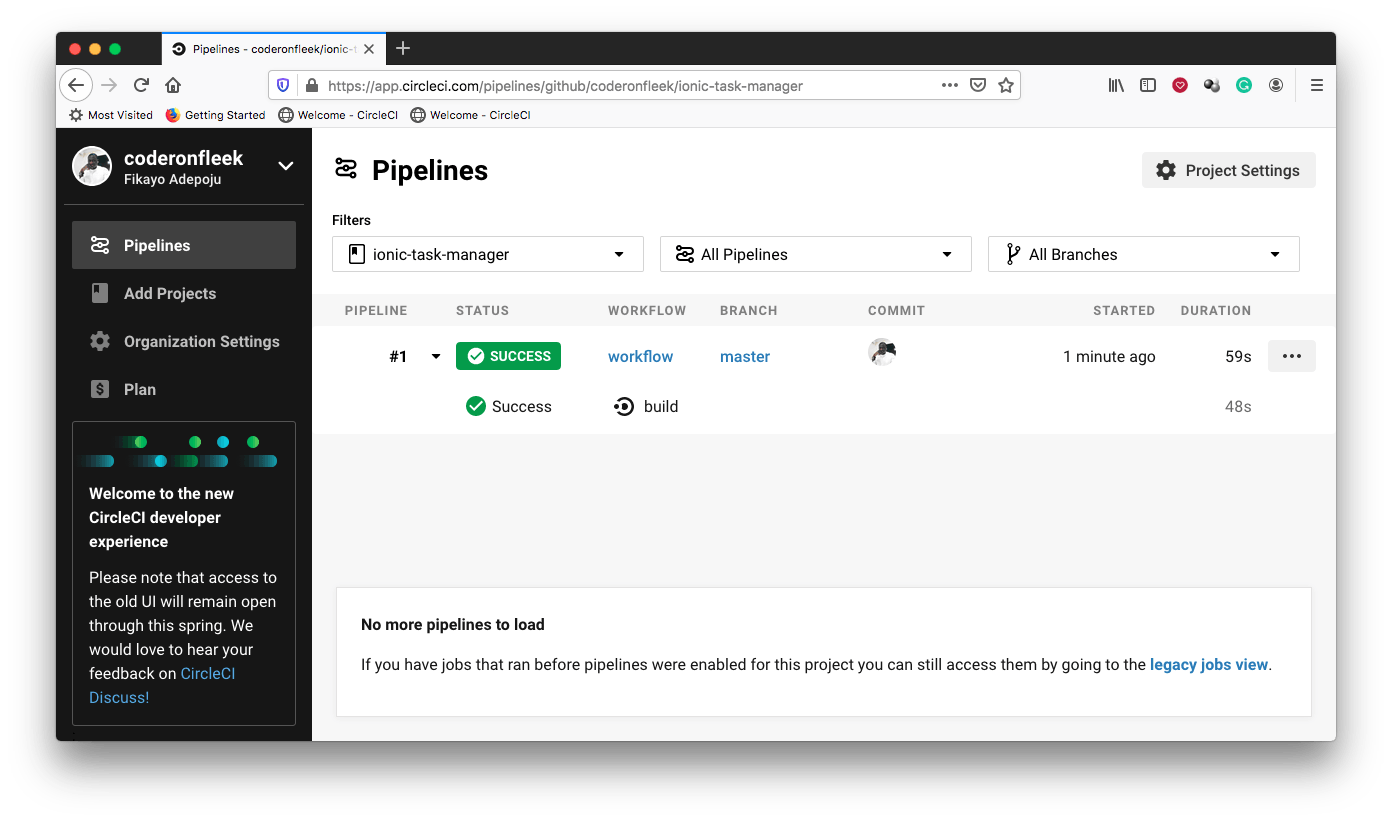
Click build to see the behind-the-scenes process(I have collapsed the test step).

As you can see from the above screen, our project is properly set up and all our tests are running fine.
Now, as you develop, all you have to do is add more features, add tests to them and push to GitHub. Once you push, the CI pipeline will run and all your tests will be executed. If any test fails, your build will fail which will indicate that there is a bug in your application to be fixed.
This will ensure that you’re not pushing any bugs into your application.
Conclusion
In this article, we have set up an automated CI pipeline for our Ionic applications to improve our development workflow by automating the testing process. Having a CI pipeline that properly runs our tests protects us against ourselves by ensuring that we don’t end up with broken applications or that we don’t push buggy code to our team’s repository while working together on a project.
Happy coding :)
Fikayo Adepoju is a LinkedIn Learning (Lynda.com) Author, Full-stack developer, technical writer, and tech content creator proficient in Web and Mobile technologies and DevOps with over 10 years experience developing scalable distributed applications. With over 40 articles written for CircleCI, Twilio, Auth0, and The New Stack blogs, and also on his personal Medium page, he loves to share his knowledge to as many developers as would benefit from it. You can also check out his video courses on Udemy.


