With no runtime or garbage collector, Rust is a powerful language that runs in any environment and can be integrated into any existing language or framework. With WebAssembly, Rust has become even more useful in the web development space. Built on the promise of performance and reliability, Rust delights web developers by seamlessly pairing with Node.js to build highly performant functionalities. Many web developers would rather write Rust than have to learn/write C++ or C for WebAssembly integrations.
In this tutorial, you will learn how to test Rust applications automatically as you push updates and upgrades to a remote repository.
Prerequisites
To follow along with the tutorial, you will need:
- Basic knowledge of Rust
- Rust installed on your system (find installation instructions here)
- A CircleCI account
- A GitHub account
Our tutorials are platform-agnostic, but use CircleCI as an example. If you don’t have a CircleCI account, sign up for a free one here.
Creating a new Rust project
If you have already installed Rust before starting this project, run rustup update so your current installation is compatible. To begin, create a new Rust application by running this command:
cargo new rust-app-testing
This command quickly scaffolds a barebones Rust application inside the rust-app-testing folder. You will build a simple CLI application that prompts the user for a name and prints a greeting message back to the CLI.
Locate the file src/main.rs and replace its content with this code:
fn main() {
    let mut line = String::new();
    println!("Please enter your name: ");
    std::io::stdin().read_line(&mut line).unwrap();
    println!("{}", build_message(line));
}

fn build_message(name: String) -> String{
    let message = "You are welcome ".to_owned() + &name;
    return message;
}
This code, defines a build_message function that takes in a name argument of type String. It returns a greeting message constructed using the name argument.
The main function prompts the user for a name. The name is then passed to the build_message function and its return value is printed to the CLI output.
At the root of the project folder, run:
cargo run
The application will prompt you for your name. Enter your name and press Enter to display the greeting message on the CLI screen.
Finished dev [unoptimized + debuginfo] target(s) in 0.00s
     Running `target/debug/rust-app-testing`
Please enter your name:
Fikayo Adepoju
You are welcome Fikayo Adepoju
Adding tests for the Rust application
One of the beauties of Rust is that it comes bundled with its own testing framework, which requires no additional setup. You will be writing a unit test for the build_message function to assert its output. Unlike most other languages and frameworks that place tests in separate files, Rust actually encourages you to place your unit tests in the same file as the piece of code being tested.
The cargo test command for running tests in a Rust application will locate any function with the #[test] attribute in the project and run it as a test case.
Add this test case just below the build_message function:
#[test]
fn test_build_message(){
    let name = String::from("Fikayo");

    assert_eq!(build_message(name), "You are welcome Fikayo")
}
In this test, a name variable is declared and assigned a String value of Fikayo. The next line checks that the build_message function returns the expected message for the argument passed in.
Run:
cargo test
The test should run successfully. This is the output that will appear on your CLI:
 Compiling rust-app-testing v0.1.0 (/Users/yemiwebby/tutorial/circleci/rust-app-testing)
    Finished test [unoptimized + debuginfo] target(s) in 0.44s
     Running unittests src/main.rs (target/debug/deps/rust_app_testing-845d6c68f8b5843f)

running 1 test
test test_build_message ... ok

test result: ok. 1 passed; 0 failed; 0 ignored; 0 measured; 0 filtered out; finished in 0.00s
Automating tests for the Rust application
Time to write the continuous integration script. This script will automate the running of tests in the project any time updates are pushed to the remote code repository.
At the root of your project, create a folder named .circleci and add a file named config.yml to it. Inside config.yml, enter this code:
version: 2.1

jobs:
  build:
    docker:
      - image: cimg/rust:1.73.0
    steps:
      - checkout
      - run: cargo --version
      - run:
          name: Run Tests
          command: "cargo test"
This code pulls in the CircleCI Rust image cimg/rust:1.73.0. This image gives you access to all CLI commands available for a Rust installation.
The code is then pulled from the remote repository and the step labelled Run Tests uses the cargo test command to run tests contained in the project.
Commit all changes to the project and push the project to GitHub.
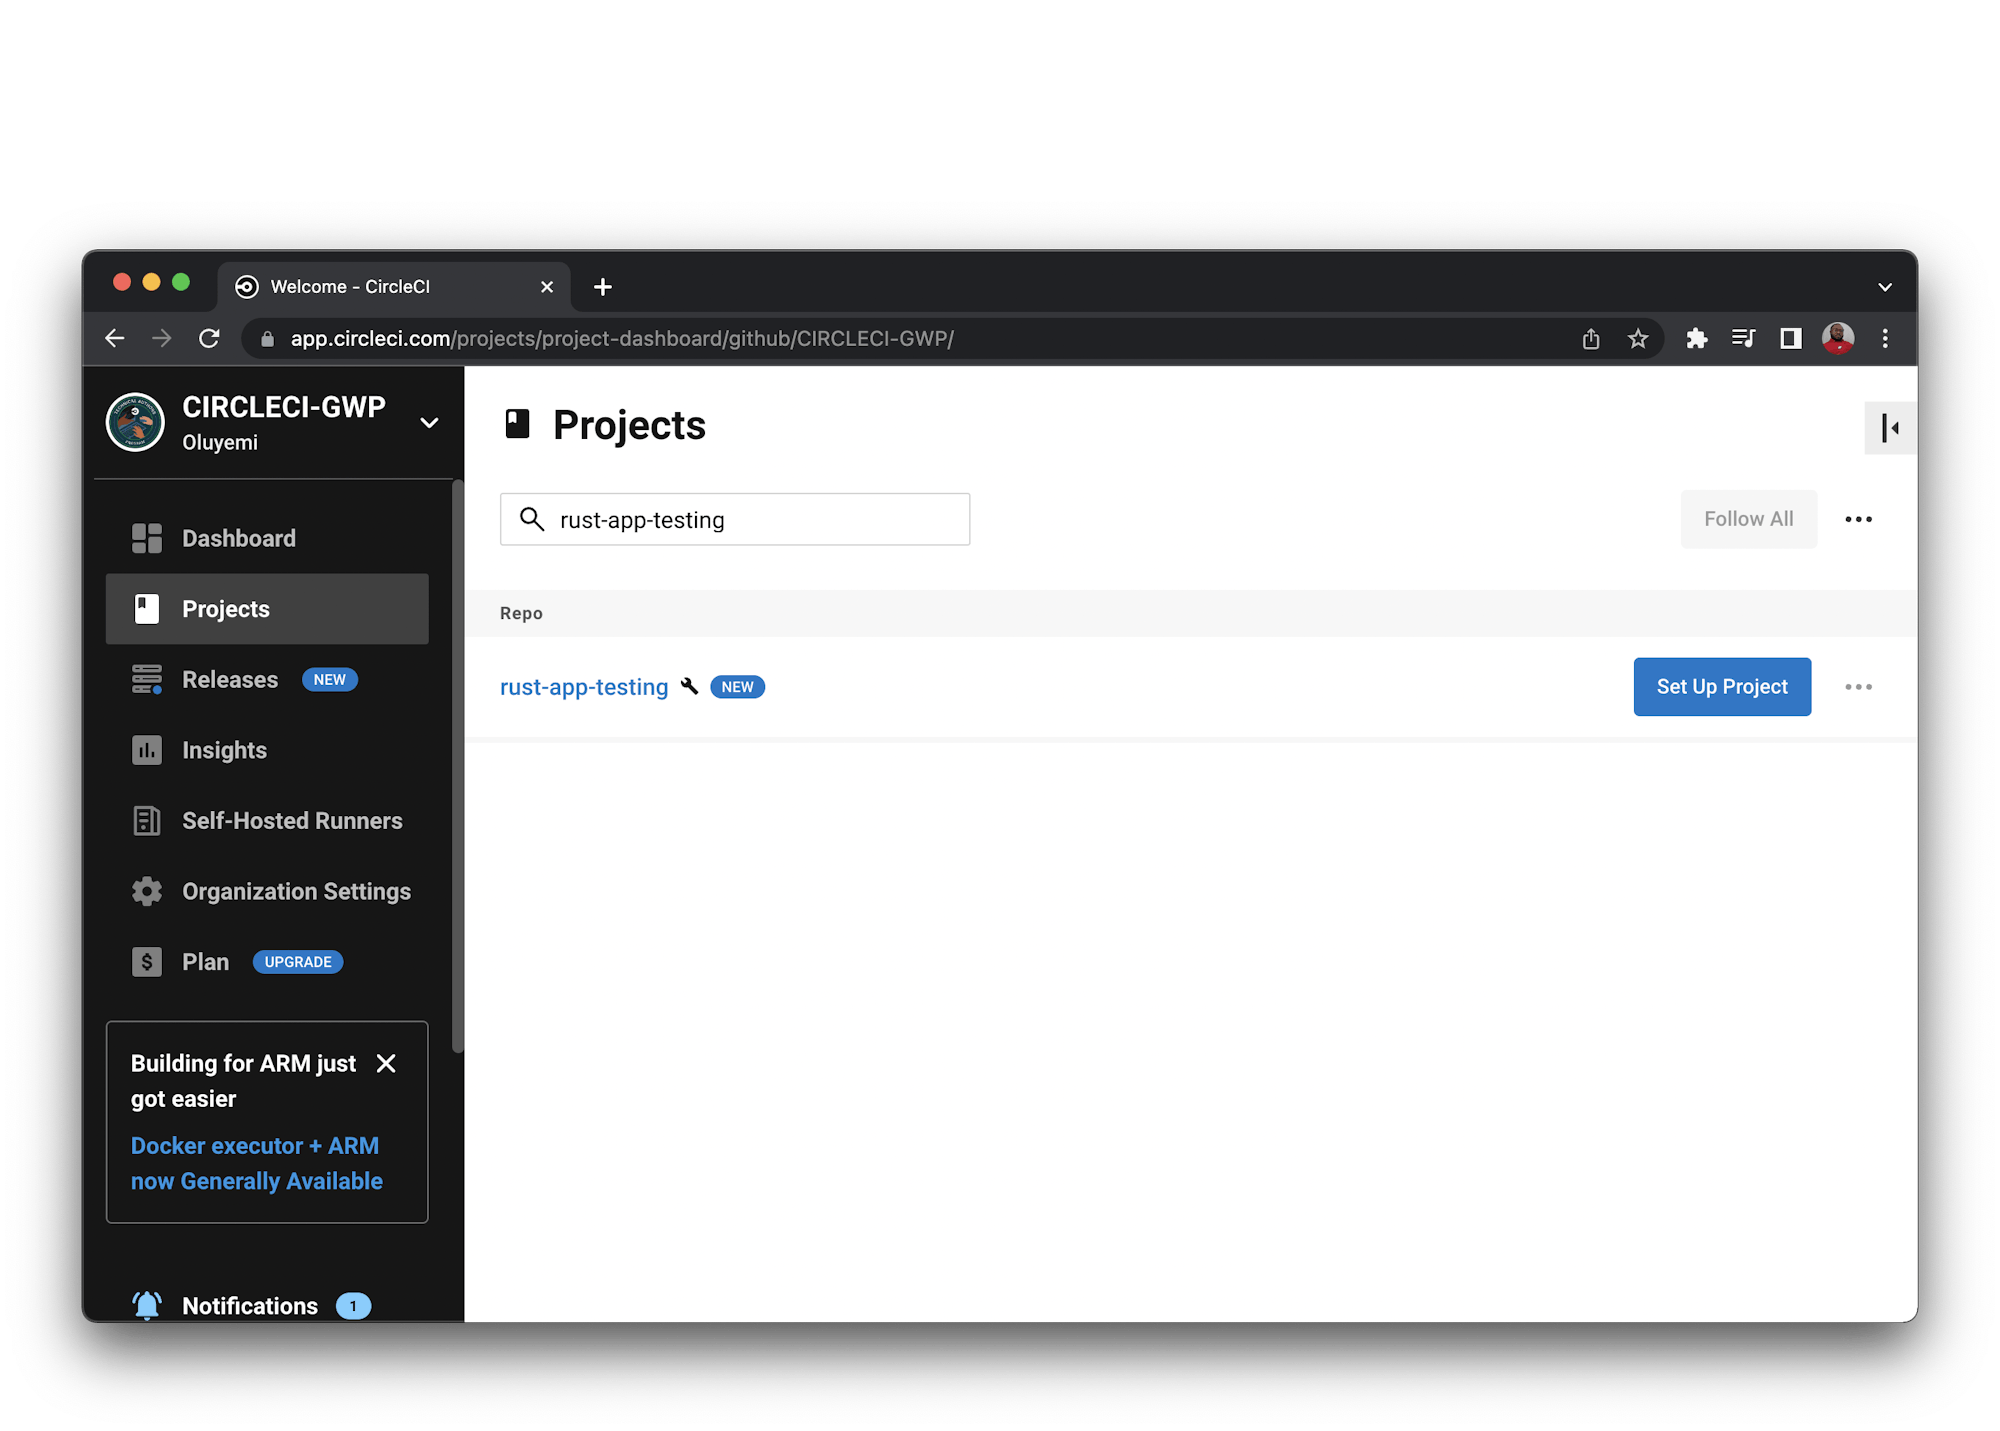
Next, log into your CircleCI account. If you signed up with your GitHub account, all your repositories will be available on your project’s dashboard.
Click Set Up Project for your rust-app-testing project.
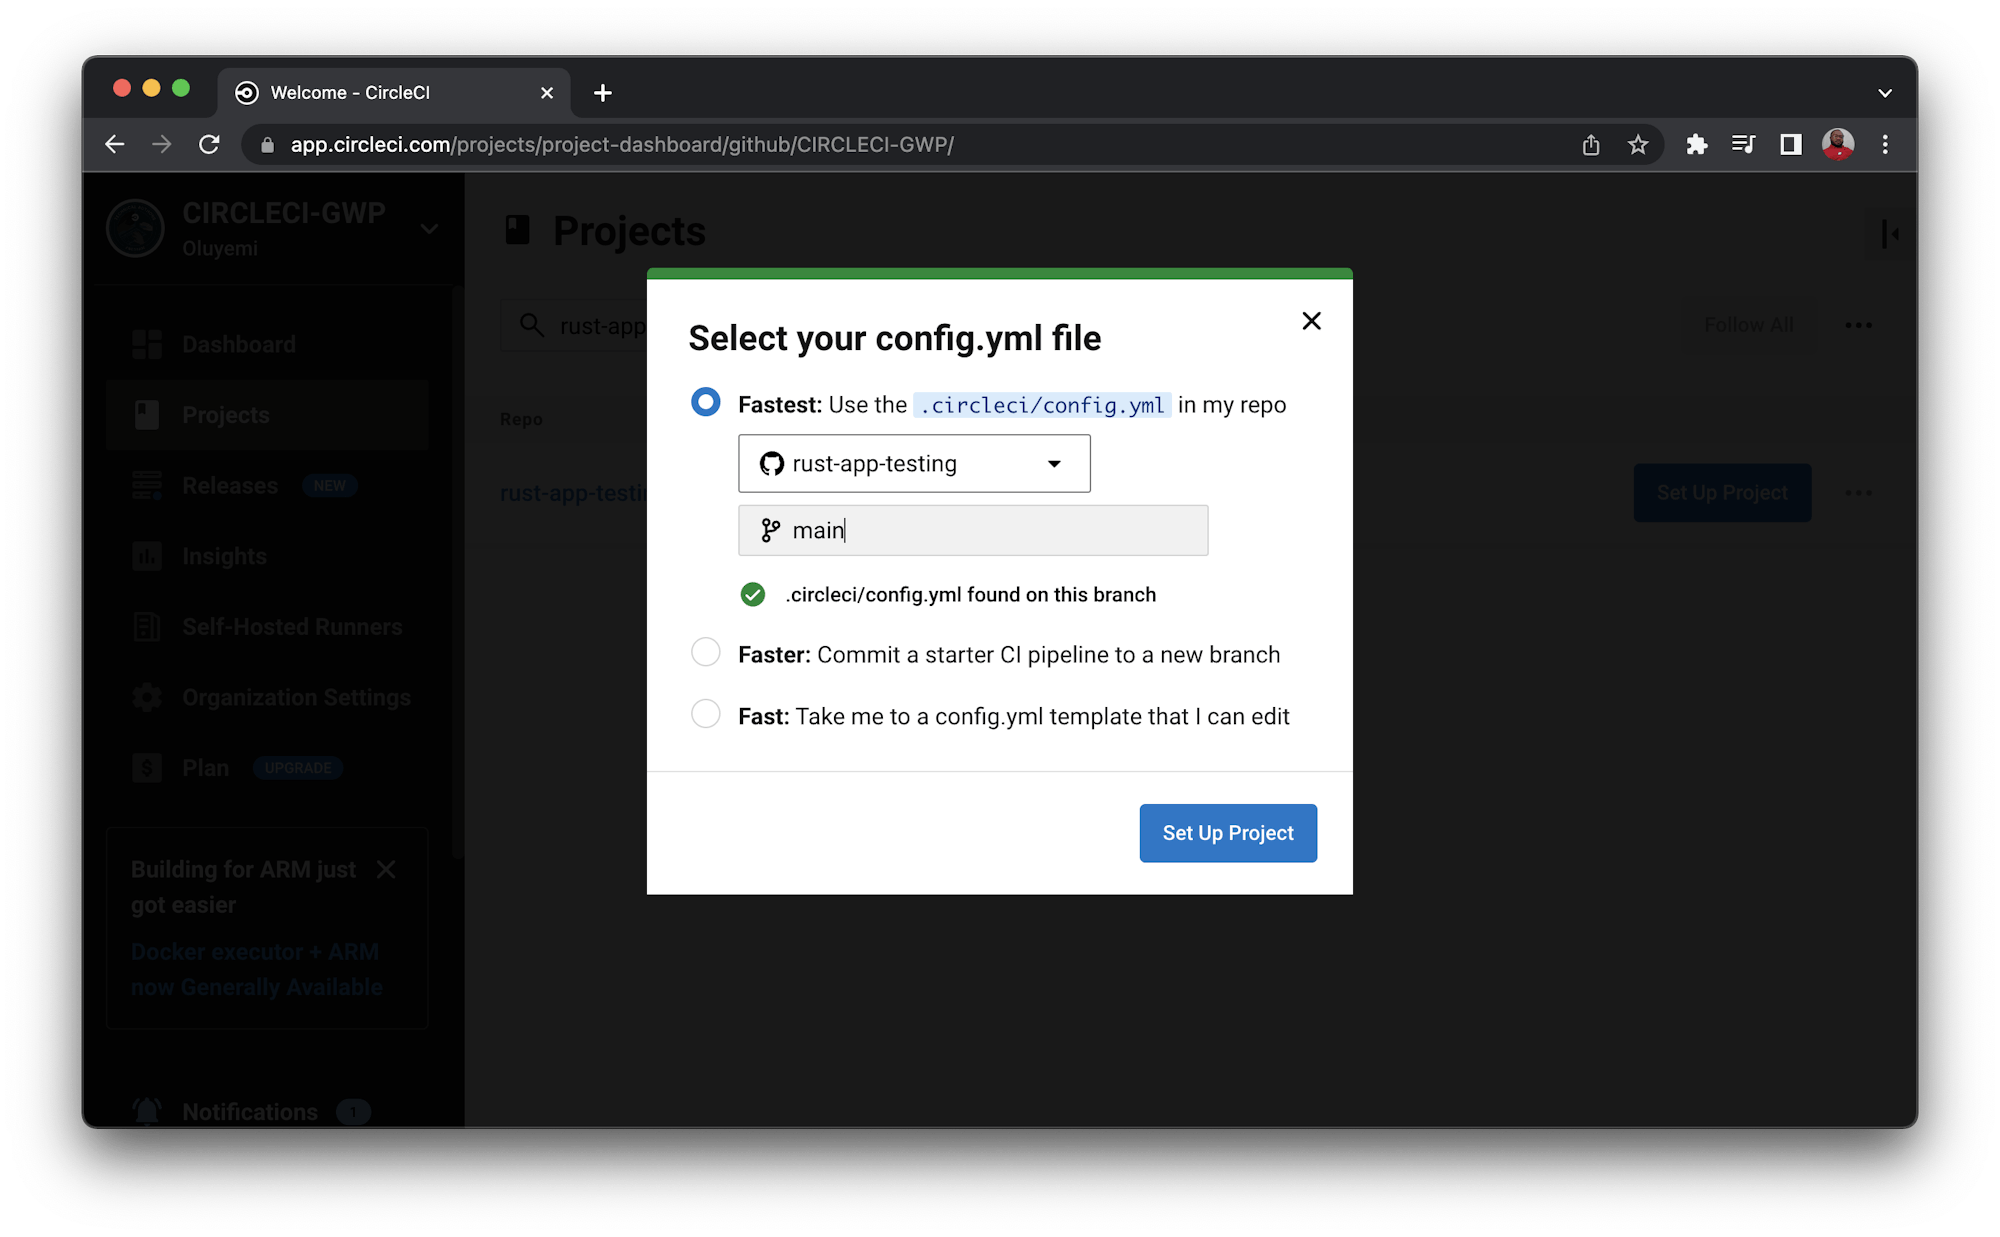
You will be prompted with a couple of options regarding the configuration file. Select the use the .circleci/config.yml in my repo option. Enter the name of the branch where your code is housed on GitHub, then click the Set Up Project button.
Your first workflow will start running, but it will fail. This is because you have not provided your Heroku API key. You can fix that now.
The integration pipeline is triggered, and you should have a successful build.

Click the build job for details about the deployment.
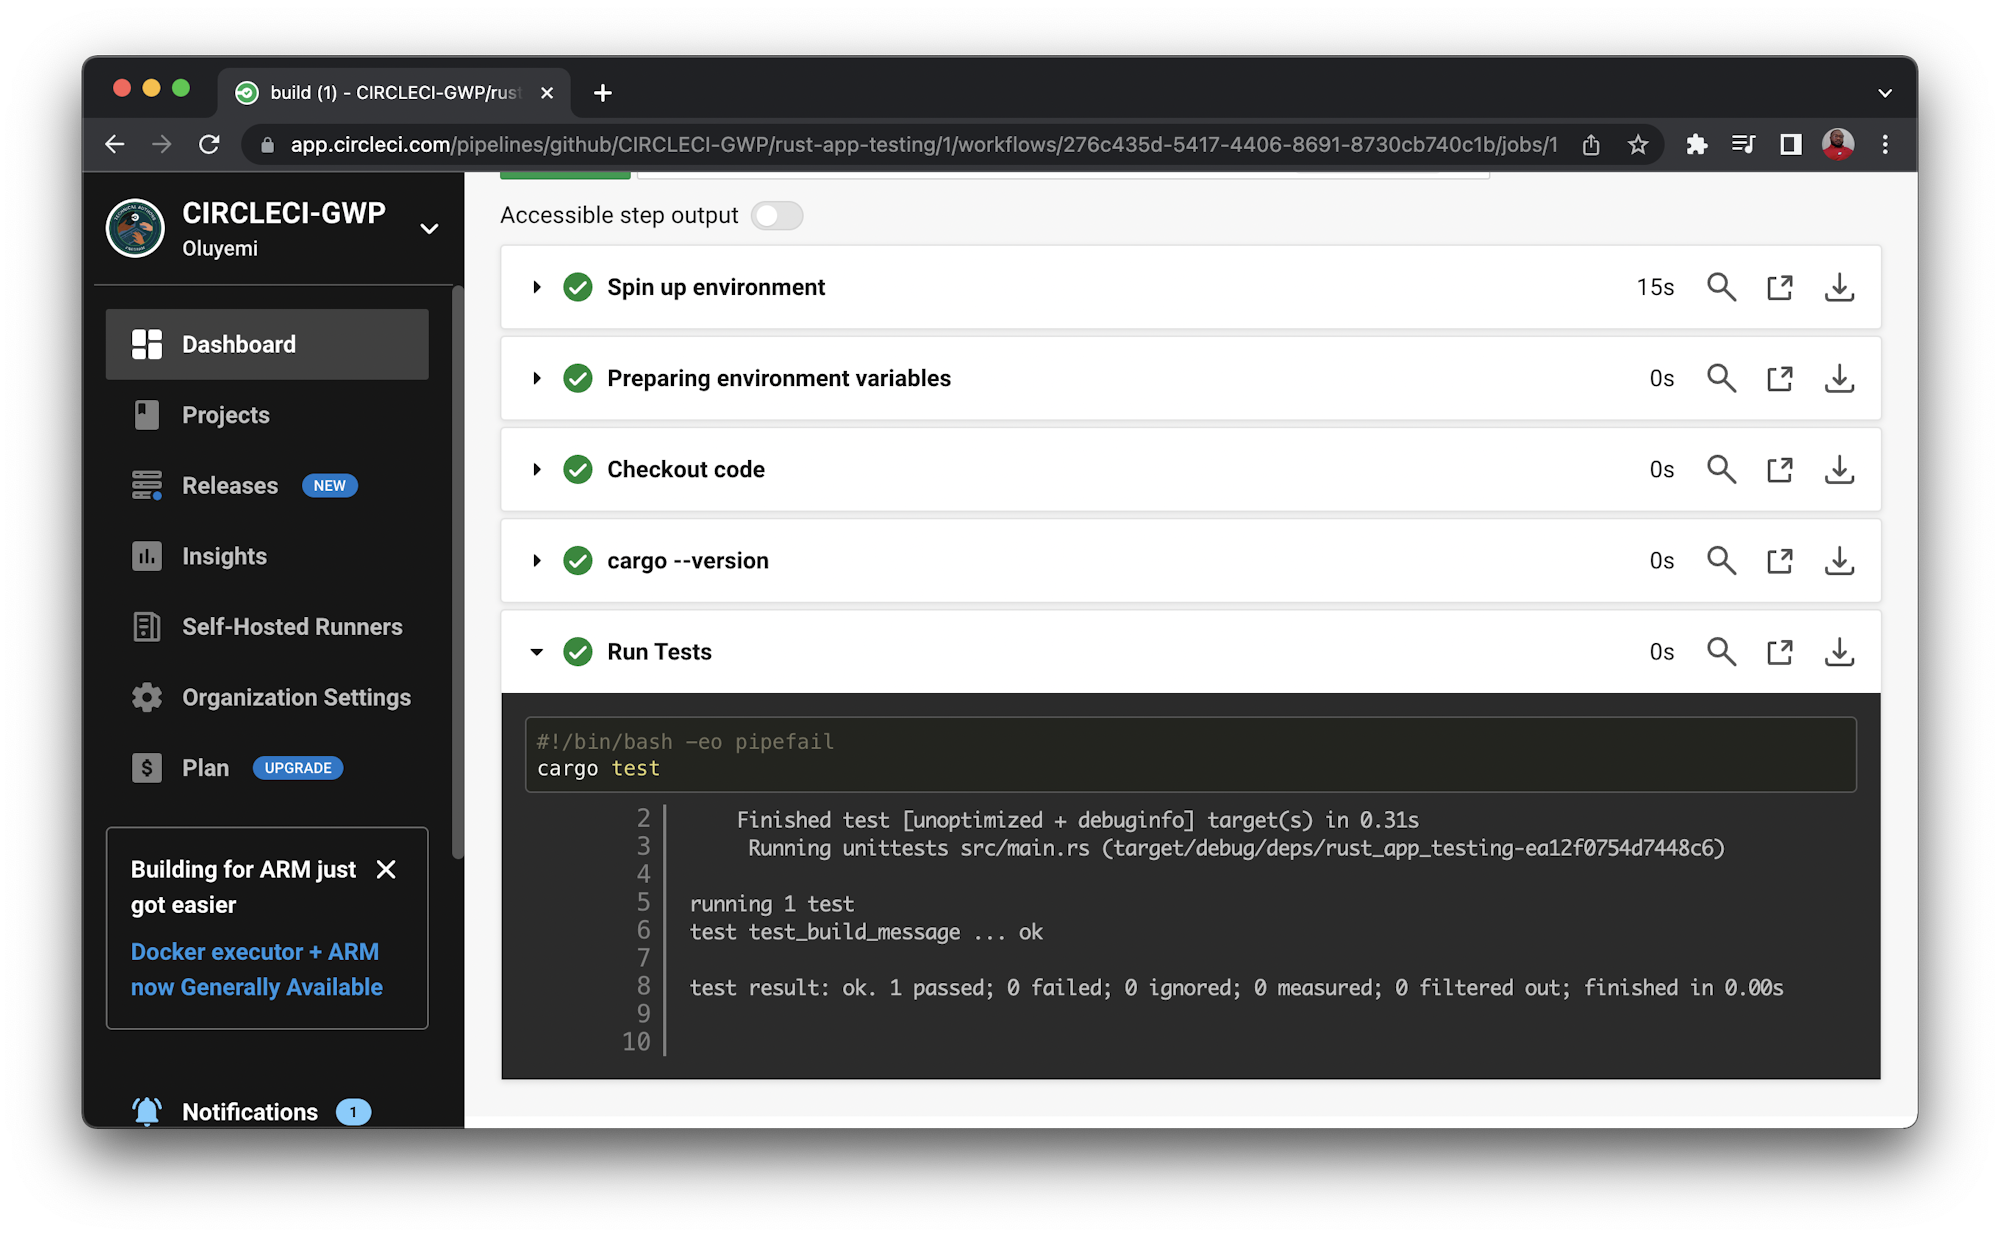
Now, each time you change your code, either by adding more features or more tests, and then push to your remote repository, your tests will automatically run. You will be alerted if your build failed due to a broken piece of code.
Conclusion
In this tutorial, you have learned how to automate tests in your Rust projects using a continuous integration pipeline. To expand your knowledge, learn how to continously deploy Rust applications. From start to finish, you can increase the value of Rust for your team so you can build better apps, faster.
Happy coding!
Fikayo Adepoju is a LinkedIn Learning (Lynda.com) Author, Full-stack developer, technical writer, and tech content creator proficient in Web and Mobile technologies and DevOps with over 10 years experience developing scalable distributed applications. With over 40 articles written for CircleCI, Twilio, Auth0, and The New Stack blogs, and also on his personal Medium page, he loves to share his knowledge to as many developers as would benefit from it. You can also check out his video courses on Udemy.