Apigee API Management Platform is one of the powerful tools used to manage the API proxies in a secure development environment. Apigee API proxies can be deployed to the API platform using the FlexDeploy Apigee plugin. Developers can maintain proxy code in an SCM and FlexDeploy can provide the Continuous Integration and Continuous Delivery capabilities. You can also use the Maven plugin, but one of the biggest challenges is to manage the POM and config.json configuration files for different cloud environments.
The good news is that FlexDeploy comes to your rescue with our Apigee plugin. You do not need to create any shared or project-specific POM files, and you no longer need to create one config.json file with all hard-coded environment specific properties. FlexDeploy will take care of generating the appropriate pom files and manage the config.json properties across Apigee environments. Let’s see how the FlexDeploy Apigee plugin can be useful for implementing Continuous Integration for Apigee API proxies.
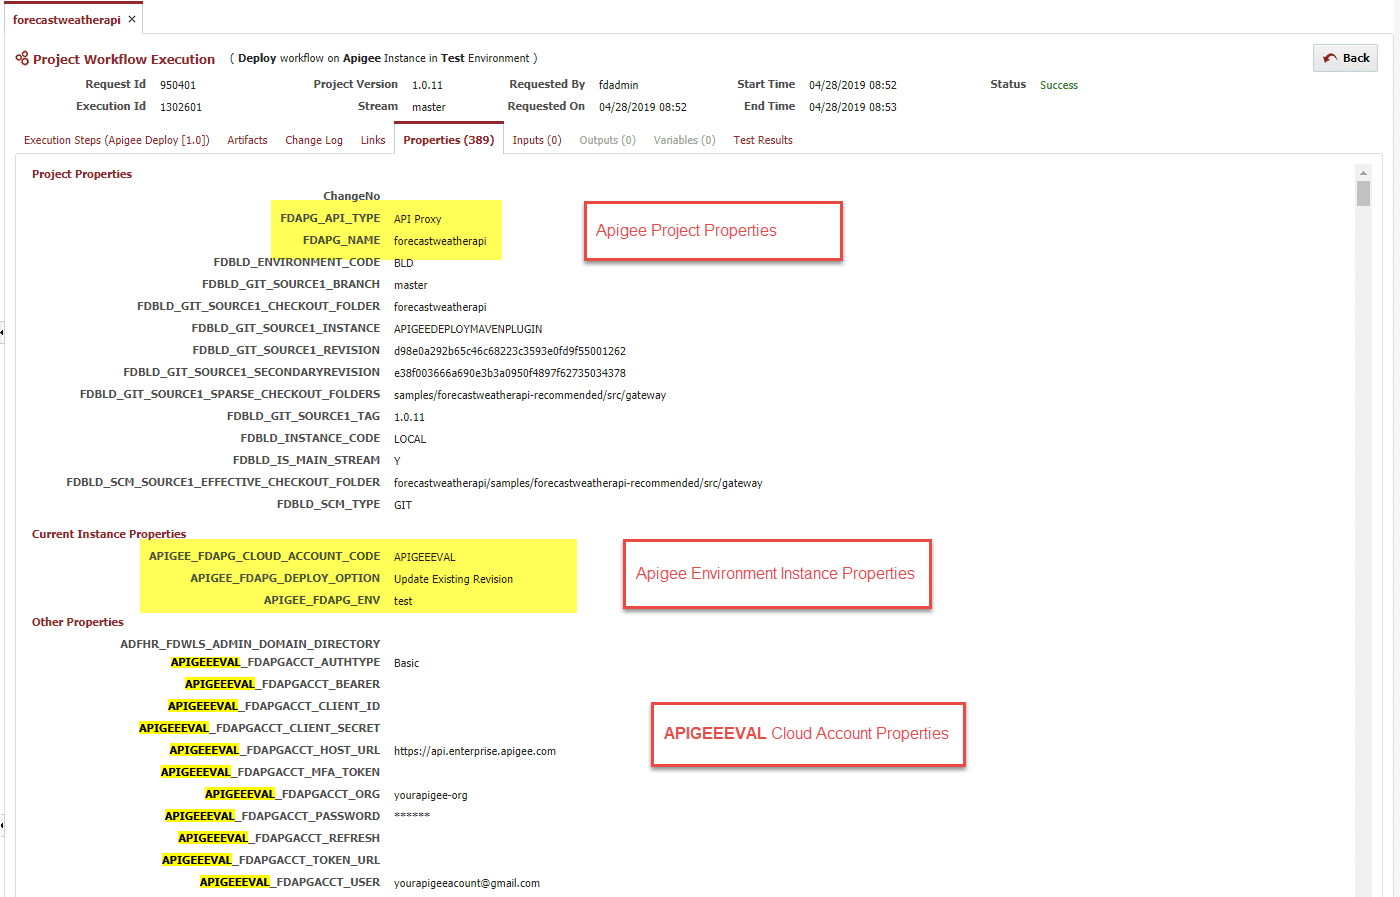
In this blog, we will refer to the forecastweatherapi-recommended source code from GitHub. For more details about the POM and config.json format, refer to the plugin documentation. FlexDeploy simplifies Apigee deployment using different properties:
- Apigee cloud account properties
- Environment instance properties
- Project (proxy or shared flow) specific properties
Let’s say you have an account in the Apigee API platform that has two cloud environments – test and prod. To use FlexDeploy DevOps pipeline capabilities for Apigee API proxies, you will need to do the following
- Setup Apigee cloud account
- Create build and deploy workflows
- Create Apigee instance
- Update environment instance properties
- Setup Apigee projects and configure SCM, workflows, and project properties
- Run build and deploy
- Verify in the Apigee platform
Setup Apigee cloud account
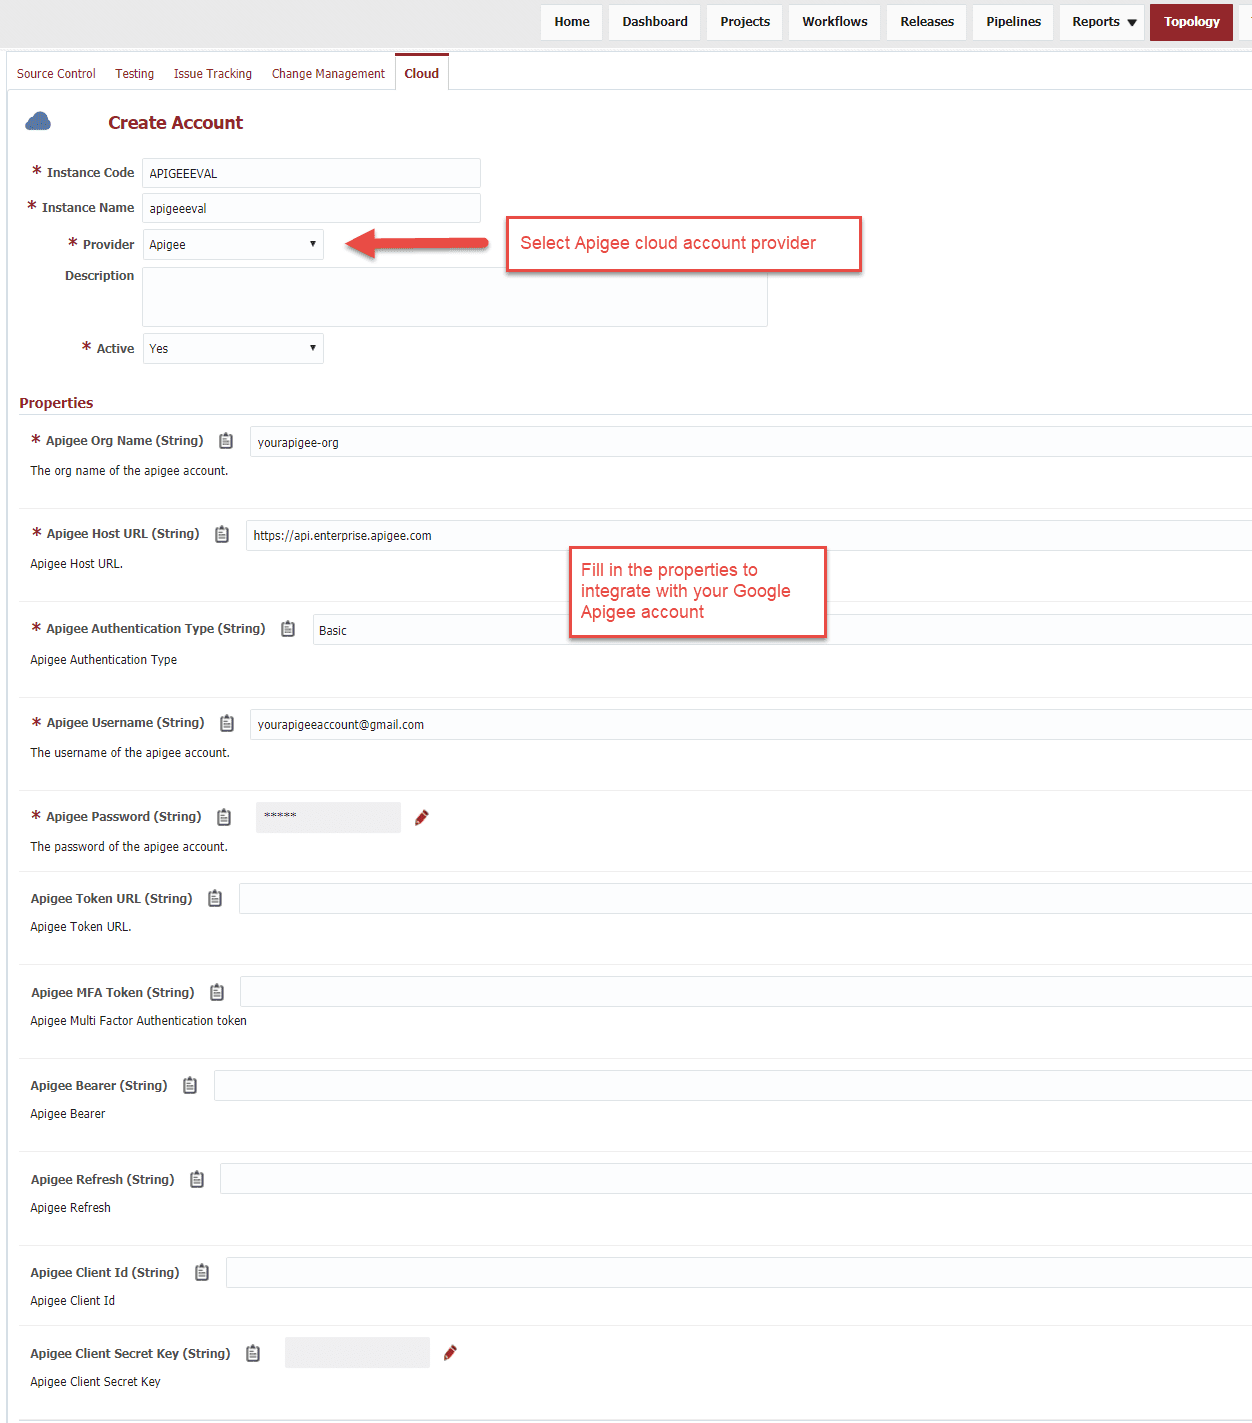
FlexDeploy provides an out-of-box cloud account provider to support DevOps features for Apigee API proxies. Refer to cloud account provider for details of Apigee cloud account provider and its properties. The list of properties will help to integrate with your Google Apigee account.
Navigate to the Cloud screen and create a new account for the Apigee provider. Apigee cloud account helps you to manage all the account properties in one place. You can create one or more accounts depending on your needs.
Create build and deploy workflows
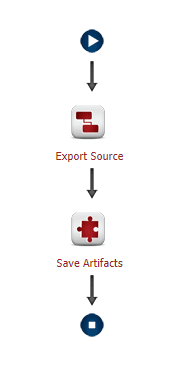
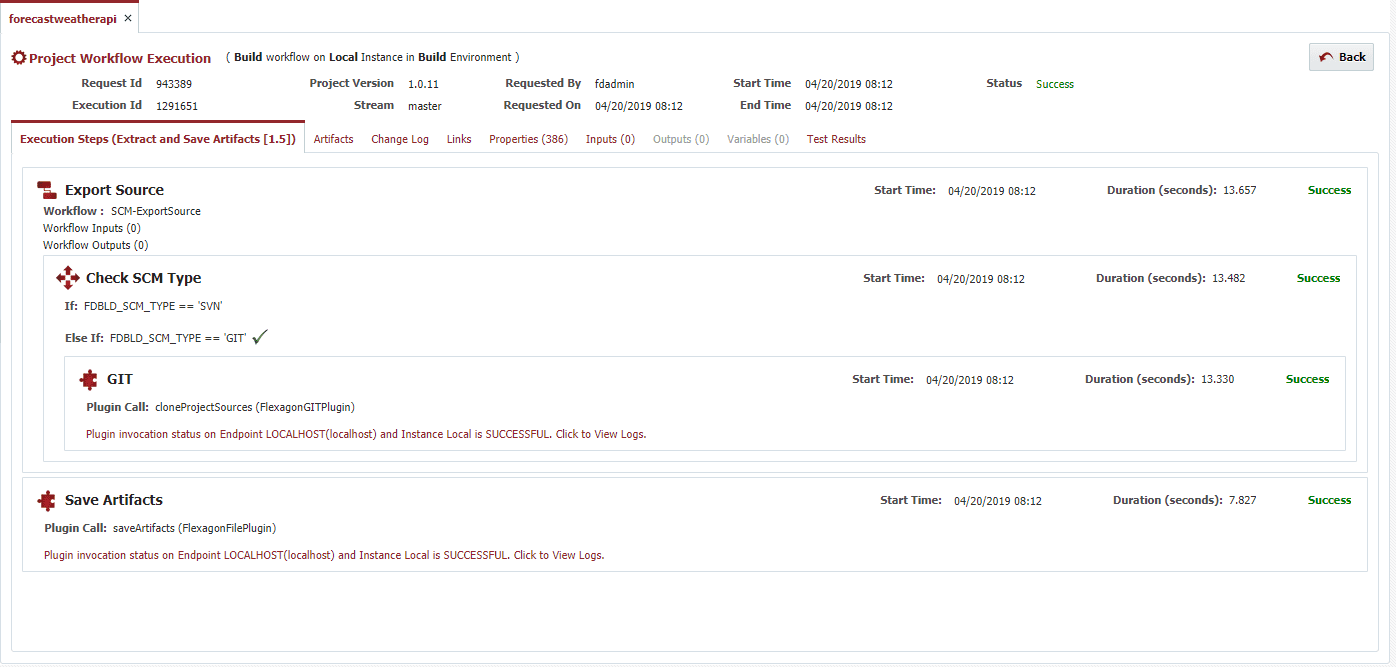
Let’s create a build workflow named ‘Extract and Save Artifacts’. The steps in the workflow are:
- Export the source code from SCM (For example, Git, Subversion, Microsoft TFVC, CVS, PVCS etc.).
- Save the artifacts to the repository
In our example, it will copy the forecastweatherapi from GitHub to FlexDeploy artifacts repository. At deploy time, FlexDeploy will deploy using artifacts from internal artifact repository. You can download this workflow from here – ExtractAndSaveArtifacts.xml
 Keep in mind that this workflow can also be reused for different flows that need the source code to be exported and saved to the FlexDeploy repository.
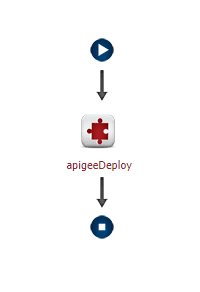
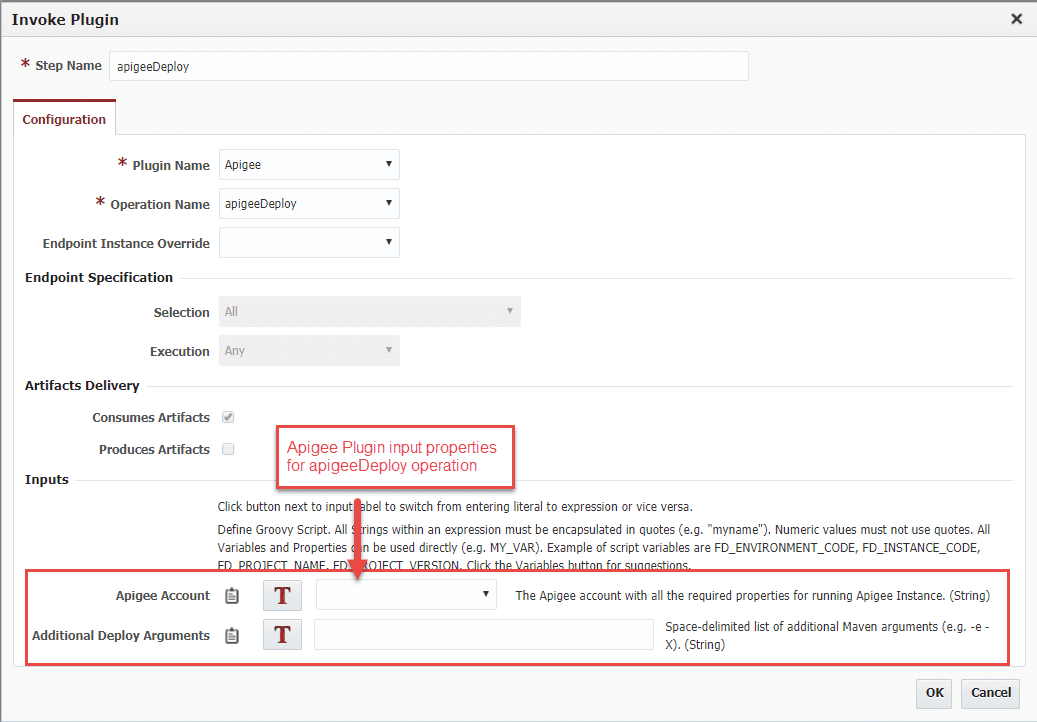
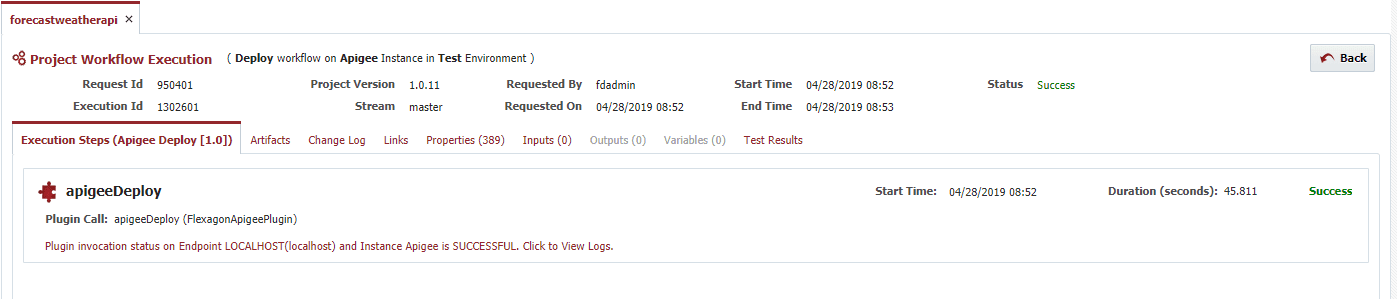
Let’s create a new deploy workflow named ‘Apigee Deploy’. The only step in the workflow is apigeeDeploy plugin operation. You can download this workflow from here – DeployApigee.xml

 Create Apigee instance
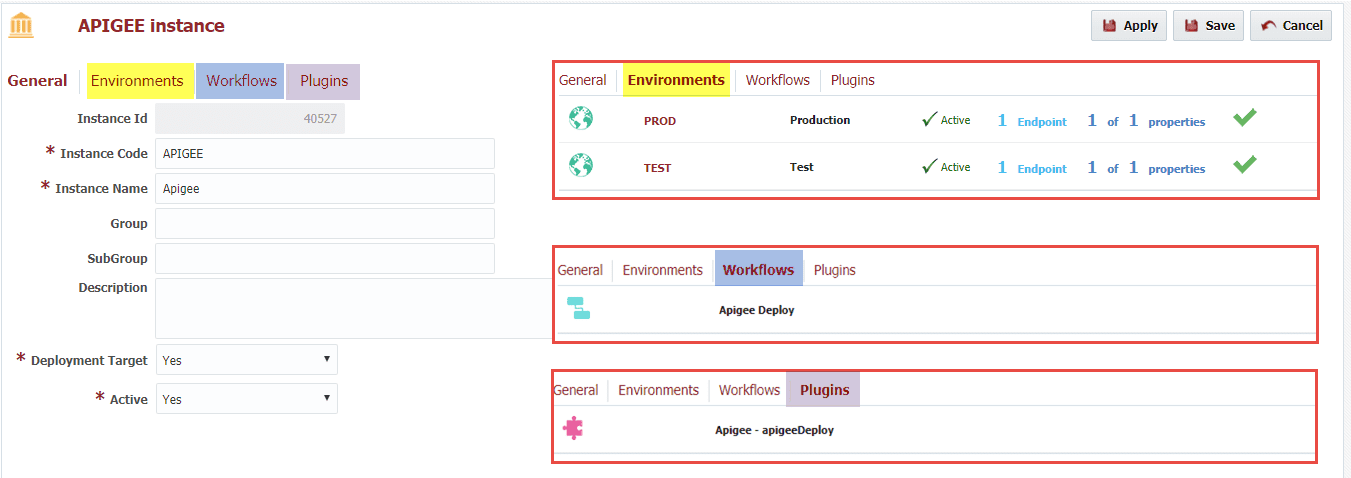
Navigate to Instances screen and create a new instance for Apigee. This is how the instance will look after the setup. An Instance is a logical target which is mapped to one or more environments. Deployment will be done to a specific instance for an environment.

Update environment instance properties
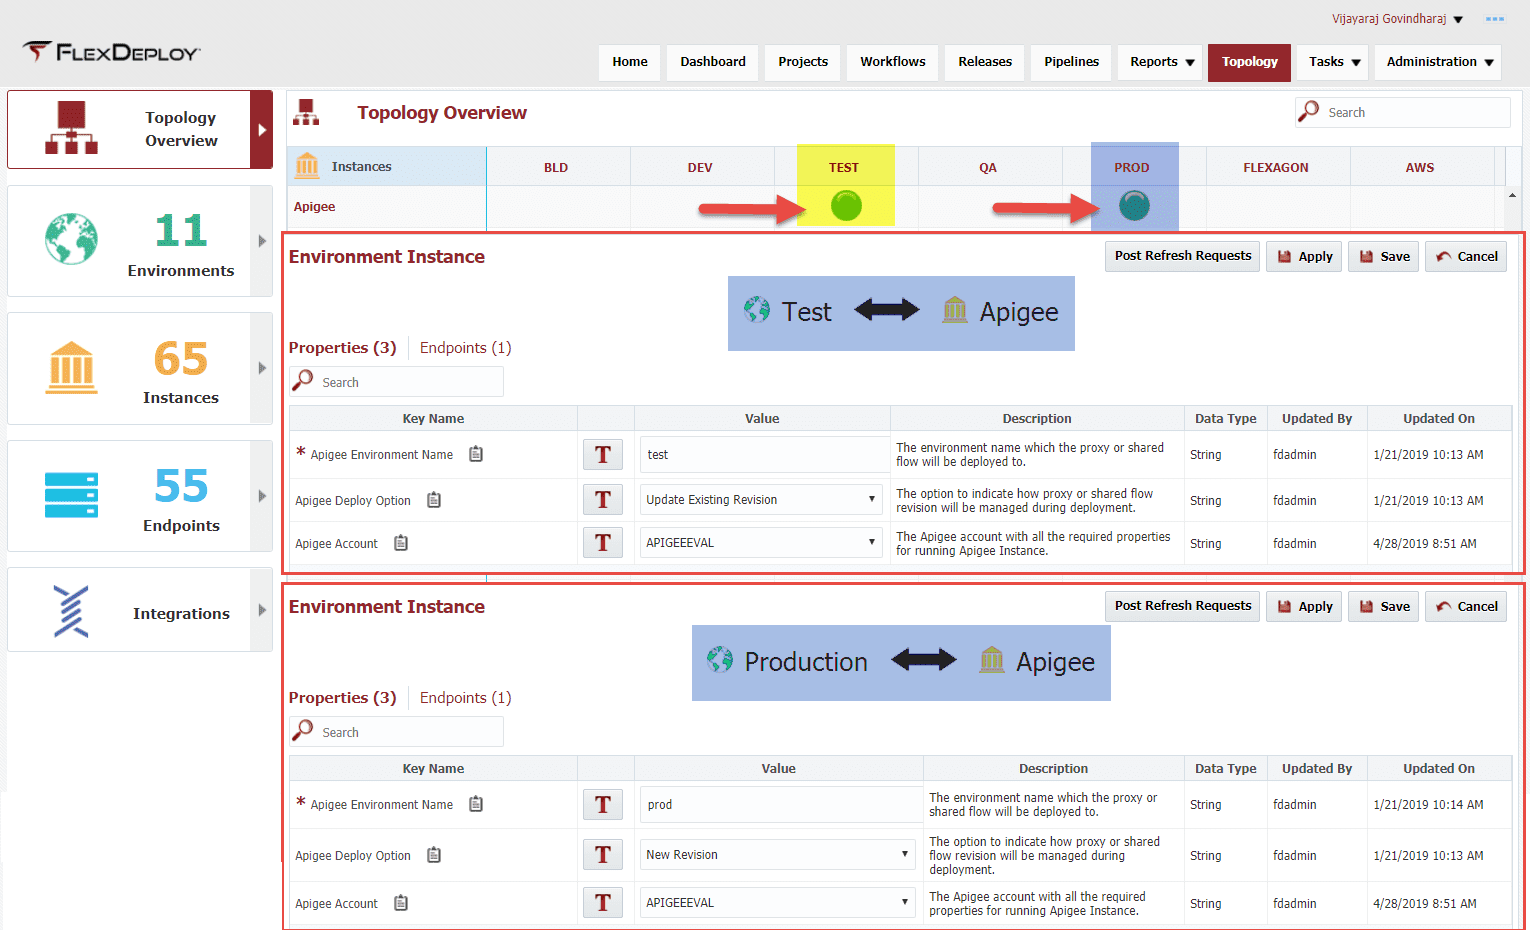
Navigate to the Topology Overview and update the environment instance properties for Apigee instance. As per this example, test and prod are the Apigee environments in the API platform. Apigee Environment Name environment instance property in TEST and PROD environments are updated to test and prod respectively. The environment codes in FlexDeploy need not match exactly with the one in Apigee API platform. The link between the two is done through Apigee Environment Name property as shown below.
 Setup Apigee API proxy project
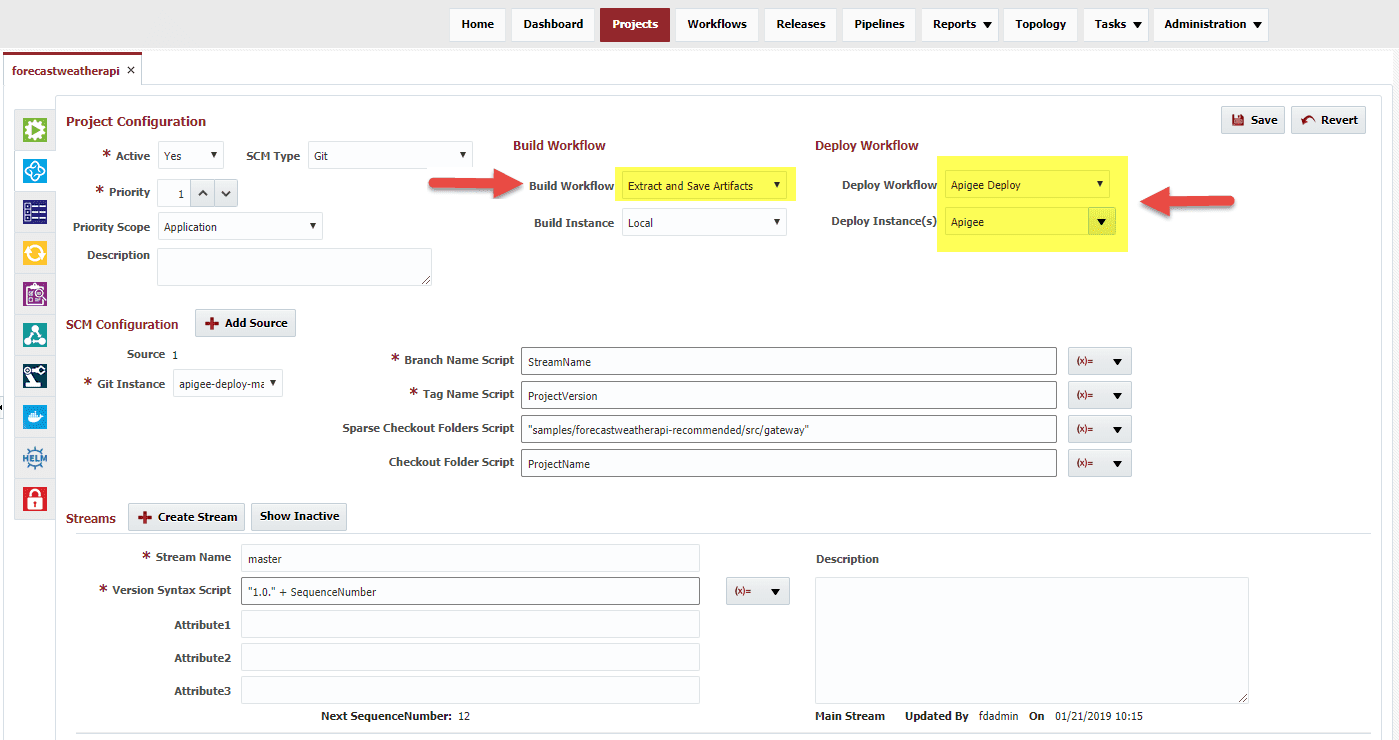
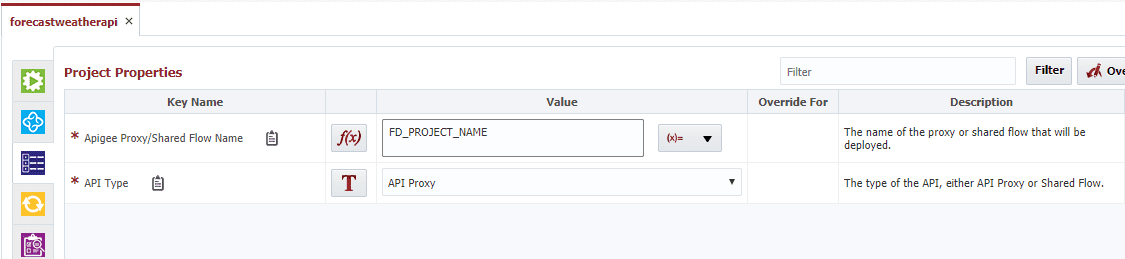
Create a project in FlexDeploy for your API proxy. In this example, I created a forecastweatherapi FlexDeploy project and set up the configurations and project properties as shown below. Each proxy and shared-flow will be created as projects in FlexDeploy.


Build and deploy Apigee API proxy
I have now completed setting up all the properties with appropriate values required to deploy the API proxy to Apigee platform. Keep in mind that POM files in your code will be ignored and you can also use any of the above properties in your config.json file for supporting Continuous Integration across multiple cloud environments. The FlexDeploy Apigee plugin will generate correct POM and config.json for your deployment.
Now, let’s run the build and deploy workflows and take a look at the properties during the execution run time.
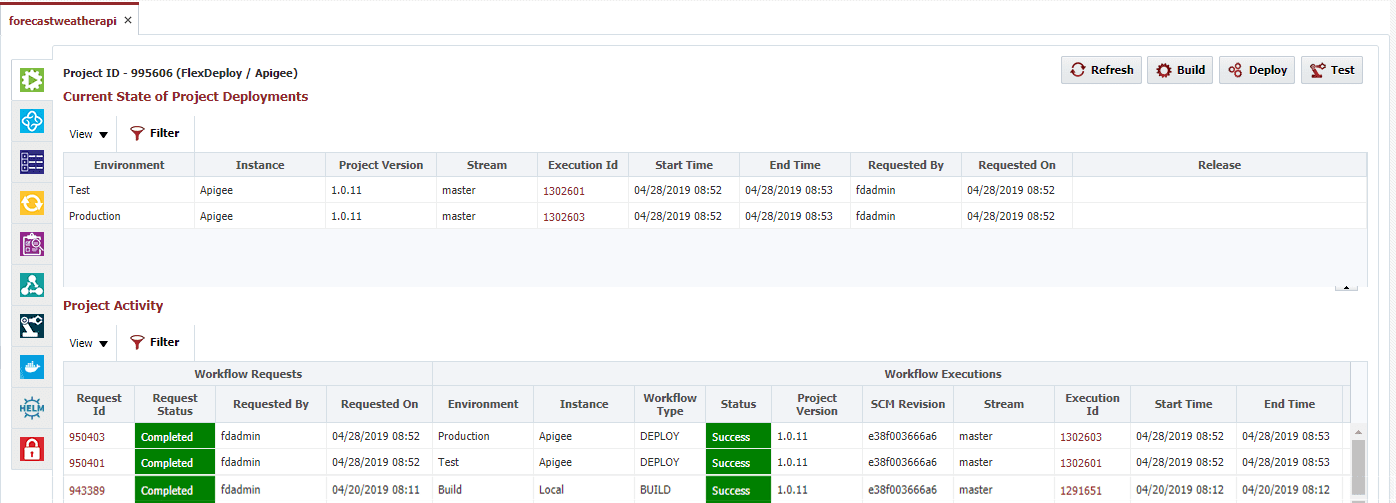
‘Extract and Save Artifacts’ Build workflow will copy your code from SCM (in this example, it is GitHub) to FlexDeploy Artifacts repository.
 ‘Apigee Deploy’ workflow will replace values in config.json files based on different Apigee FlexDeploy properties if config.json is prepared as per property replacement support for FlexDeploy.

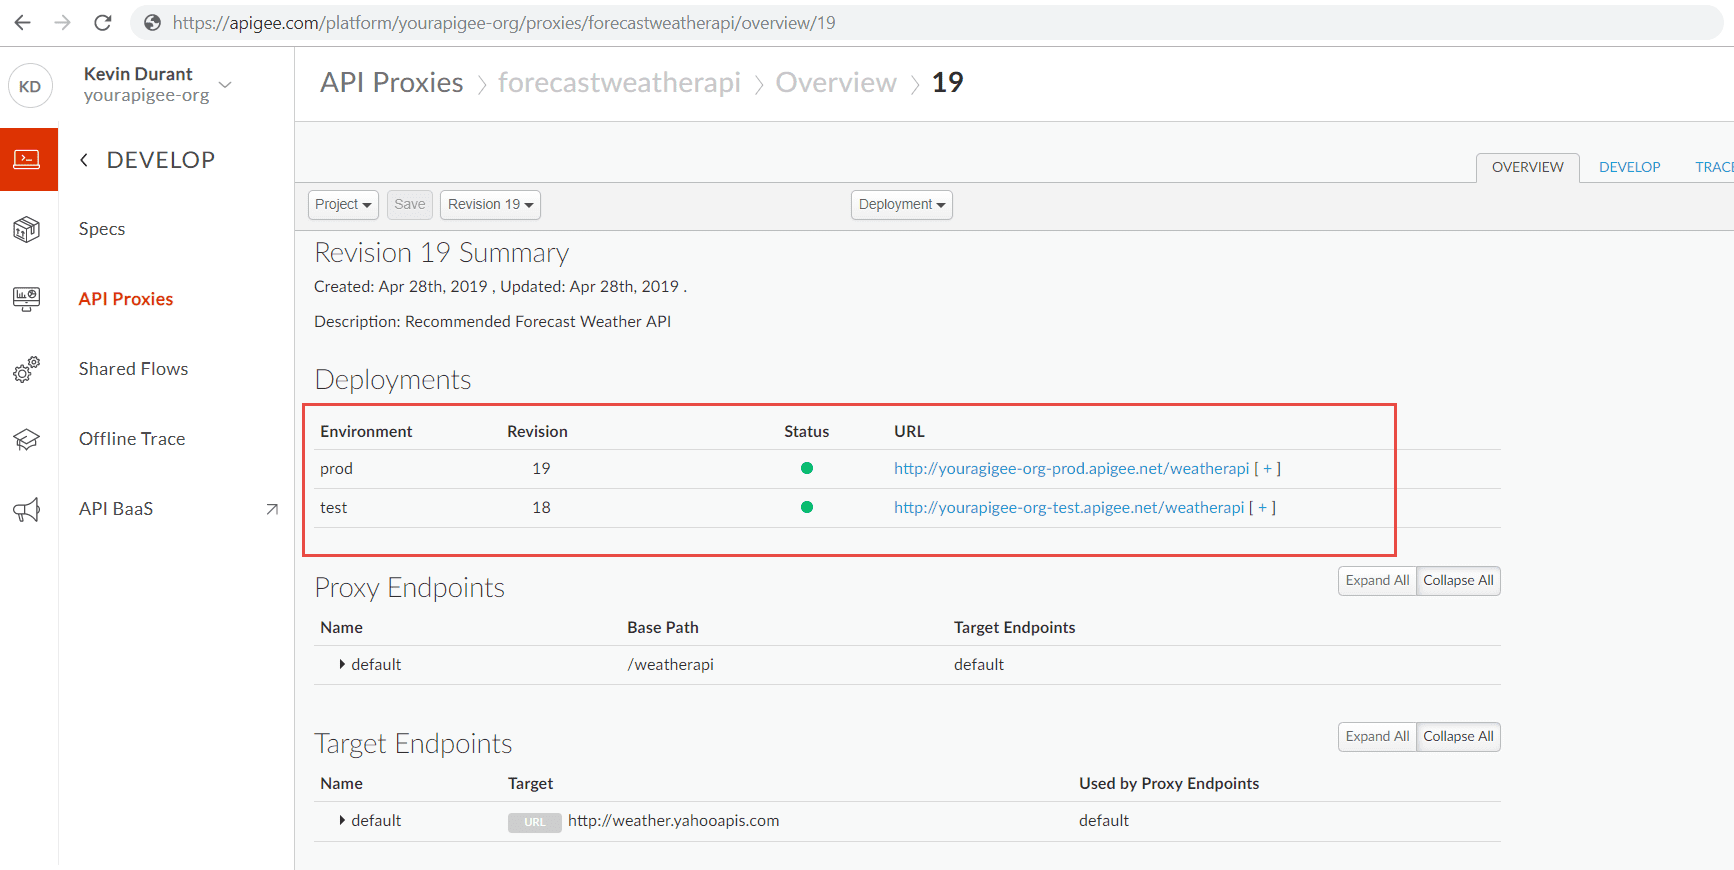
 Verify in Apigee Platform
FlexDeploy deploys the Apigee API proxy based on the generated POM and config.json files to Apigee API platform using FlexDeploy Apigee Plugin
 Conclusion
As you can see, FlexDeploy comes with robust features to simplify the Apigee API proxy deployments; you will no longer need to worry about managing the configuration files to deploy across various cloud environments. More importantly, FlexDeploy is the real deal to achieve seamless CI/CD features for Apigee API proxy development. In addition to the automation capabilities, FlexDeploy makes it easy to configure the controls and governance of your deployment and release processes while providing out of the box visibility via dashboards, reports, notifications, and more.