
Visual Studio Code, one of the most popular code editors on the market at the time of writing, Slack, (almost) the defacto team collaboration software, and the desktop version of WhatsApp all have something in common. They were all built with Electron.js. With these powerful companies adopting Electron.js over native desktop software development methods, Electron.js has established itself as a trustworthy framework for developing desktop applications. In this tutorial, I will demonstrate how to test Electron.js apps and take that a step further by automating our testing process.
Prerequisites
To follow this tutorial, a few things are required:
- Basic knowledge of JavaScript
- Node.js installed on your system (>= 11)
- A CircleCI account
- A GitHub account
With all these installed and set up, let’s begin.
Scaffolding an Electron app
To get started, we need to scaffold a new Electron.js application. So that we won’t have to craft a new Electron.js app from scratch, we will be using npx with the create-electron-app package to set it up. Run the following command to create the new application:
npx create-electron-app electron-test-app
This will scaffold a new app inside an electron-test-app folder. This folder can be any name you want.
Once the process is done, go into the root of the project (cd electron-test-app) and run the following command to run the application:
npm start
This will generate a temporary build of the application based on your OS platform and boot up the app.
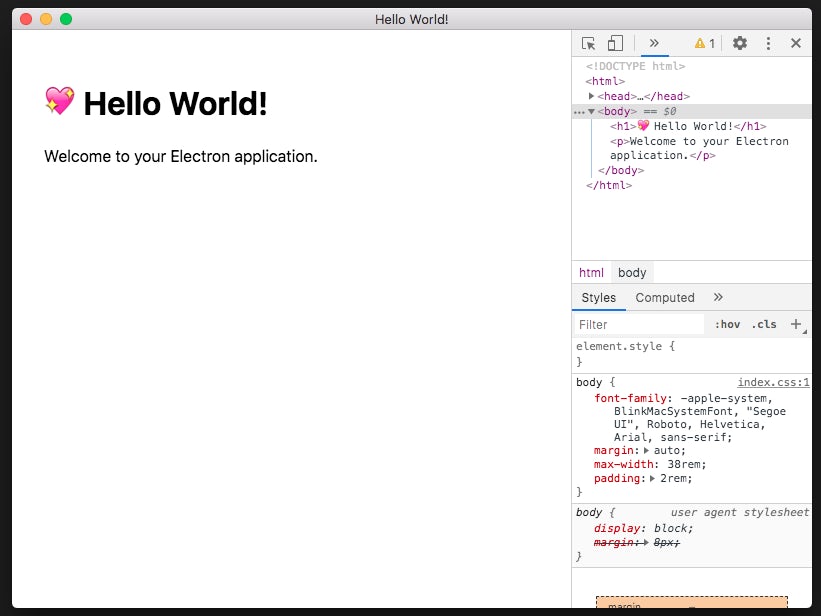
As seen, both the application window and the Devtools open. We don’t want the Devtools exposed, so terminate the application by running Ctrl + C in the same CLI window where the app was run. Then go to the src/index.js file and comment out the line below.
mainWindow.webContents.openDevTools();
Now run the app again with npm start. This time, only the application screen is displayed with a header containing a heart emoji, the text Hello World!", and a paragraph with the text Welcome to your Electron application.. I am taking my time to describe the contents of the page as we will be testing for these elements soon.
Setting up testing with Jest and Spectron
Next on our list of steps is to set up the testing frameworks required to perform end-to-end testing of our app. We are going to need two major testing libraries to achieve this. They are:
- Jest: A JavaScript testing framework for running our tests
- Spectron: An Electron.js testing framework for writing end-to-end tests. Spectron has been deprecated.
Install these two libraries as development dependencies at the same time with the following command:
npm install --save-dev jest spectron
Once these two are installed, let’s go ahead and add a test script to the package.json file:
{
    ...,
    "scripts" : {
        ...,
        "test" : "jest"
    }
}
Now we have all we need to run tests on our Electron.js application.
Adding tests
It is now time to add tests to our application.
Inside the src folder, create a new folder named __tests__. Any file jest finds in this folder will be run as a test suite. Inside the __tests__ folder, create a new file named AppTest.js, and paste the following code in it:
const Application = require("spectron").Application;
const electronPath = require("electron");
const path = require("path");

let app;

beforeAll(() => {
  app = new Application({
    path: electronPath,

    args: [path.join(__dirname, "../../")]
  });

  return app.start();
}, 15000);

afterAll(function () {
  if (app && app.isRunning()) {
    return app.stop();
  }
});

test("Displays App window", async function () {
  let windowCount = await app.client.getWindowCount();

  expect(windowCount).toBe(1);
});

test("Header displays appropriate text", async function () {
  const headerElement = await app.client.$("h1");

  let headerText = await headerElement.getText();

  expect(headerText).toBe("💖 Hello World!");
});
In the test file above, we start by requiring the Application object from the spectron package as well as electron from the binaries included with node_modules.
We then declare an app variable to which we assign a new instance of our application in the beforeAll function. After creating a new instance of our application in beforeAll, we start it up by calling app.start(). This will boot up a new instance of our application before any of our tests run. We also provided a timeout of 15000 milliseconds to beforeAll to give our application enough time to boot up just in case the application start-up time exceeds the 5000 milliseconds (the default timeout for jest test suites).
Next, we call the afterAll function and pass it a function that stops our application after all of our tests are done.
Then we add two tests. The first test checks to see that our application window is open by counting the number of windows open once the application starts up. If the Devtools were open as seen when we first ran our app, we should have two windows. But because we disabled the Devtools window, we should have only one window open which is our application start screen.
The second test checks to see if we have a header (h1) containing the string "💖 Hello World!".
Save the test file and run the created tests by running the test script at the root of the project:
npm run test
As the tests run, you will see the application boot up and flash the start up screen then go off in a matter of seconds. Once the application screen disappears, the tests are done running.
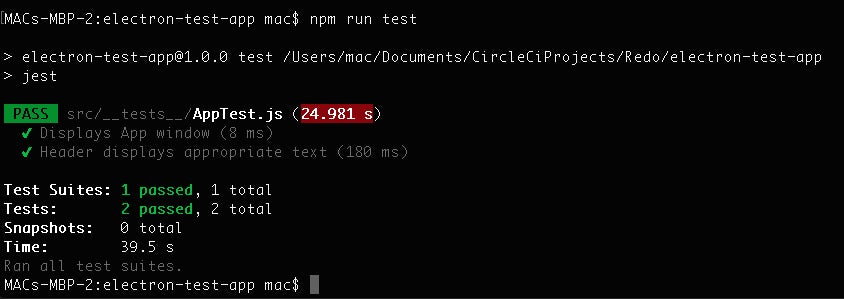
All of our tests run fine and are passing.
Connecting the project to CircleCI
Our next task is to get our Electron.js project set up on CircleCI. Begin by pushing your project to GitHub.
Next, go to the Add Projects page on the CircleCI dashboard to add the project.
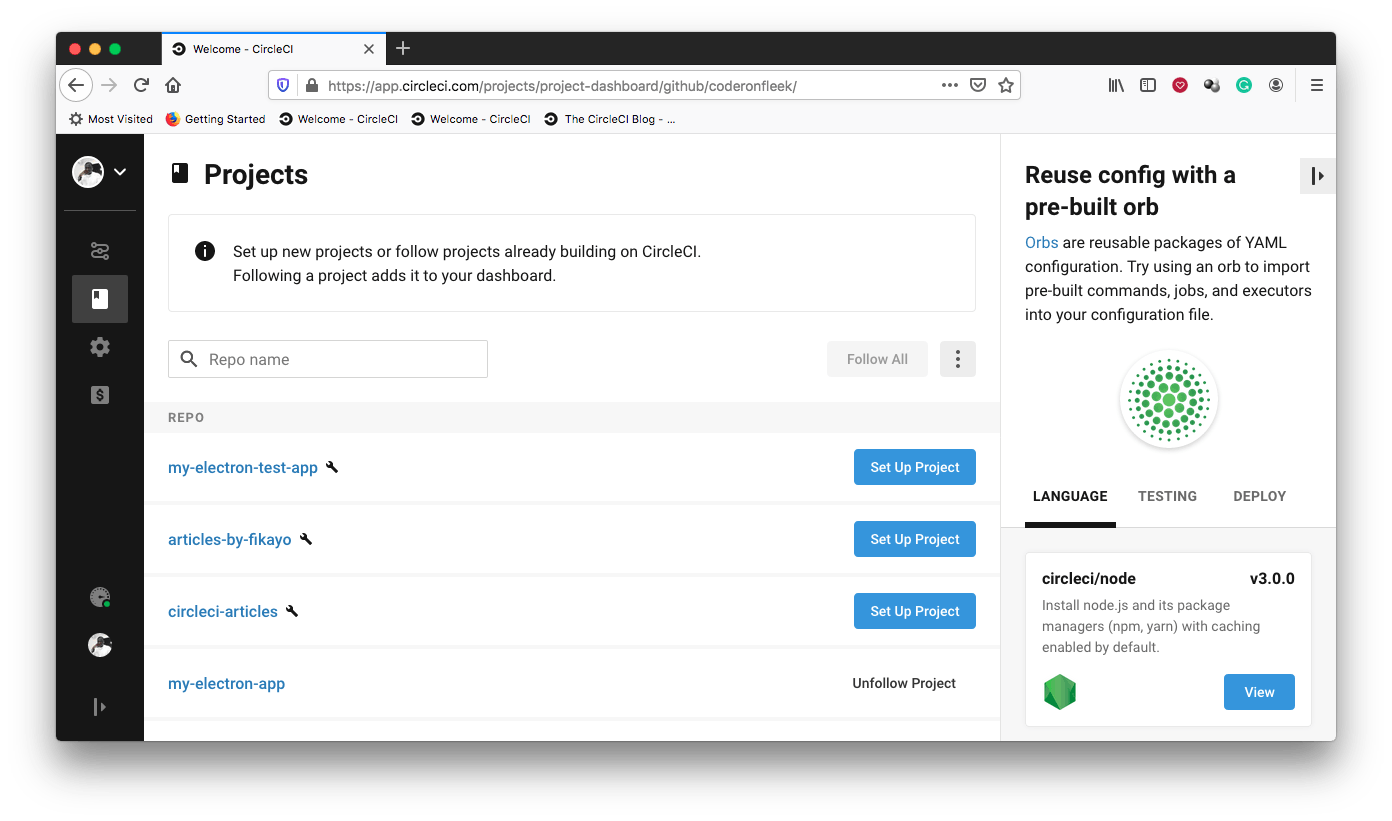
Click Set Up Project to begin.
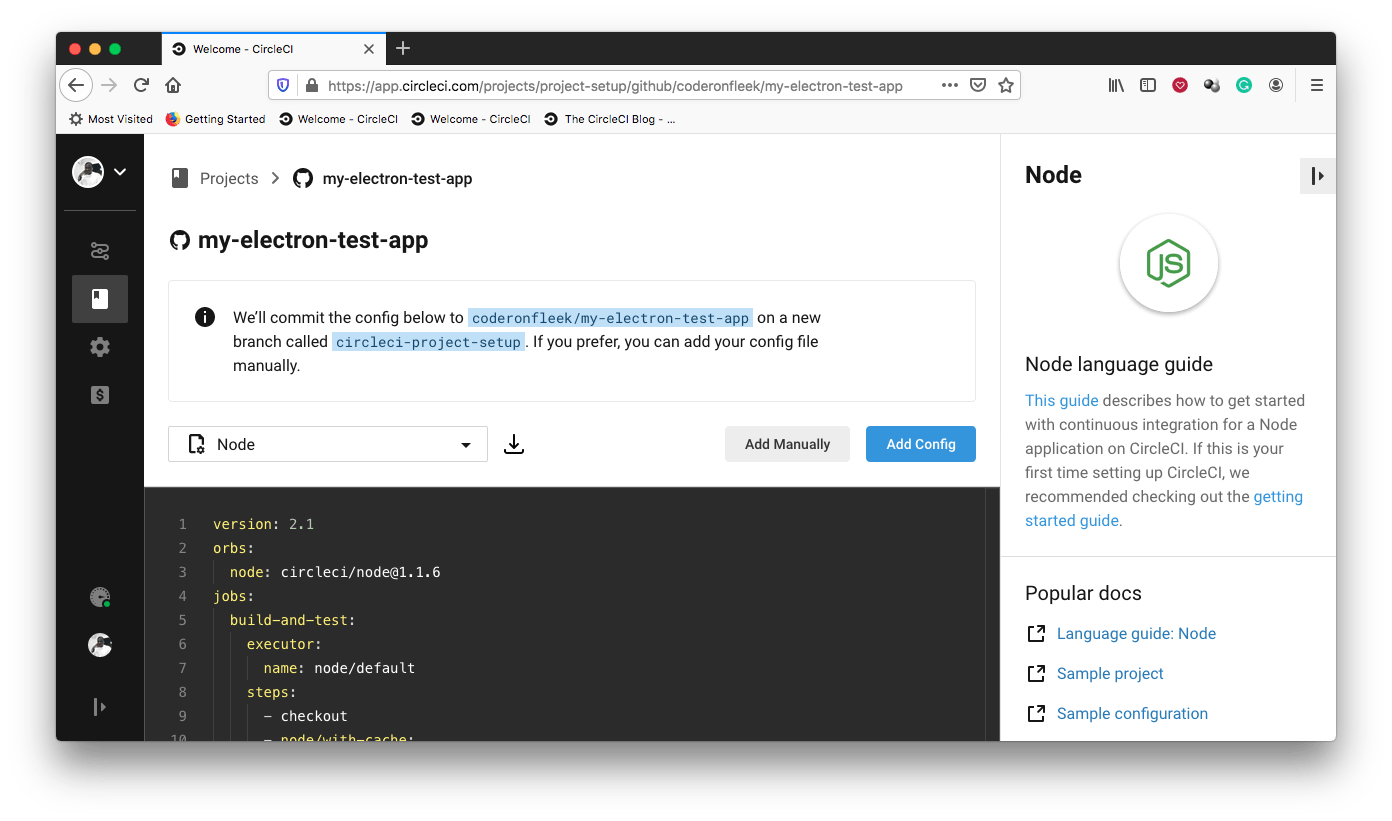
On the setup page, click Add Manually to instruct CircleCI that we would be adding a configuration file manually and not using the sample displayed. Next, you get a prompt to either download a configuration file for the pipeline or start building.
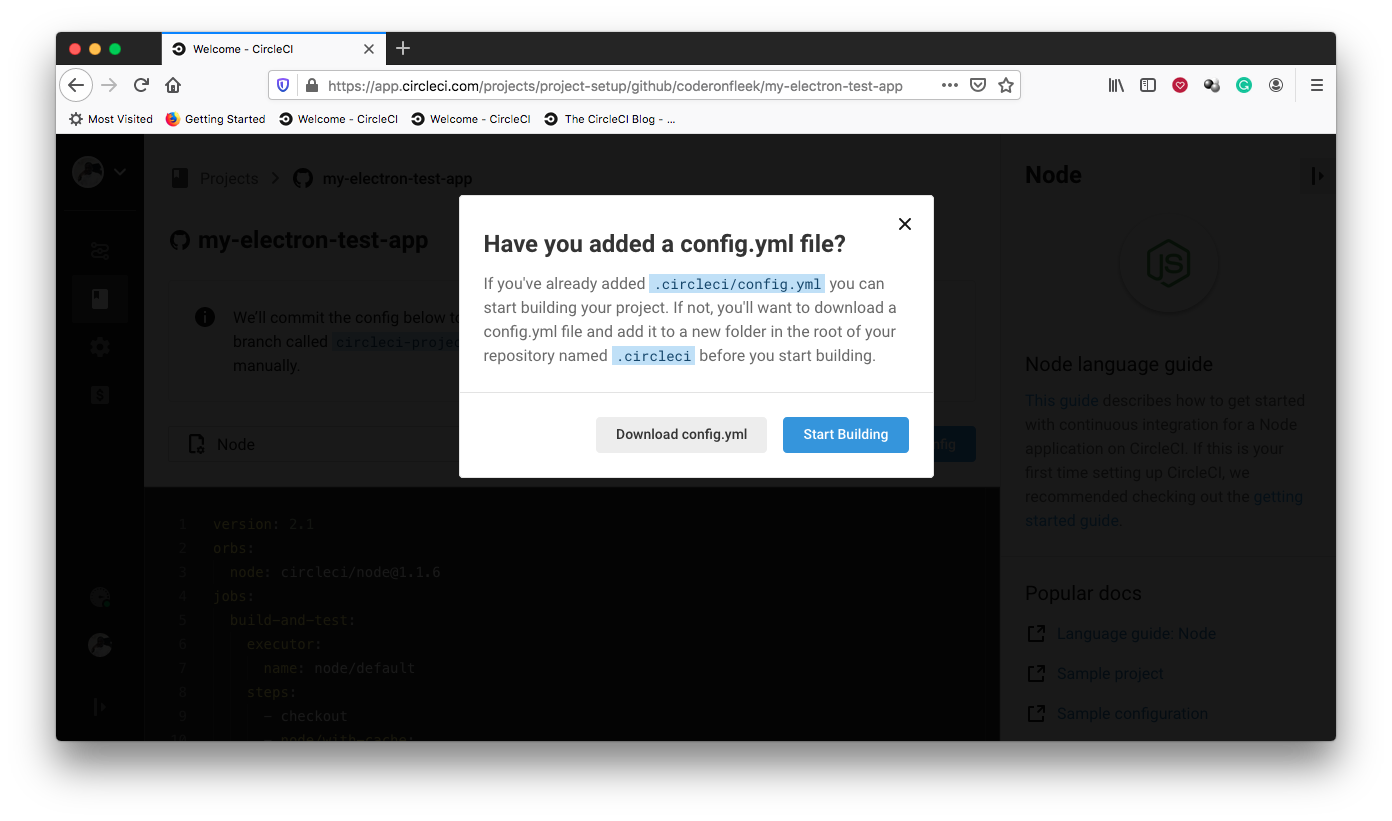
Click Start Building. This build will fail because we have not set up our configuration file yet. This we will do later on.
Automating our tests
Time to write our continuous integration (CI) pipeline that automates our testing process. Inside the root of the project, create a new folder named .circleci. Within this folder, create a file named config.yml and enter the following code into it:
version: 2.1
jobs:
  build:
    working_directory: ~/repo
    docker:
      - image: circleci/node:11-browsers
    steps:
      - checkout
      - run:
          name: Update NPM
          command: "sudo npm install -g npm"
      - restore_cache:
          key: dependency-cache-{{ checksum "package-lock.json" }}
      - run:
          name: Install Dependencies
          command: npm install
      - save_cache:
          key: dependency-cache-{{ checksum "package-lock.json" }}
          paths:
            - ./node_modules
      - run:
          name: Run tests
          command: npm run test
In the file above, we pull in a Node.js Docker image. Note that we are using an image with a -browsers suffix to provide an environment with browsers installed. This is because Spectron is built on top of WebdriverIO, which makes use of Chrome/chromedriver. The image specified ensures that we have everything configured in our environment to get the Chrome driver working.
Then we update npm to ensure that we have the most current version running.
Next, we install our dependencies and cache them. With all dependencies in place, we then run our tests.
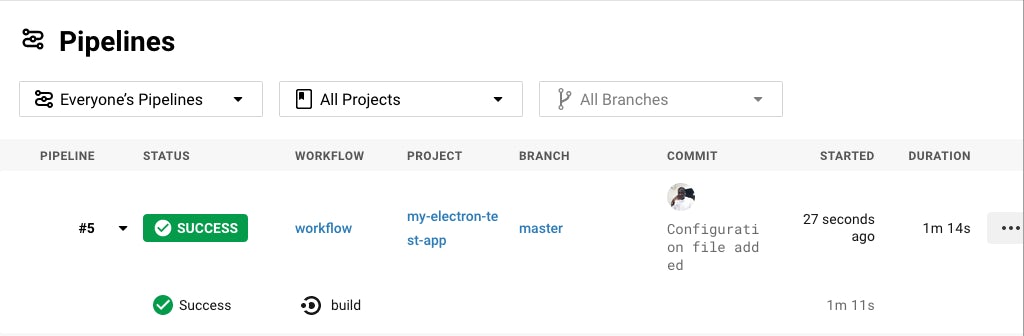
Commit and push these changes to your GitHub repository. This will trigger the pipeline to go into action and run. This can be viewed on the Pipelines page of the CircleCI dashboard.
To view the process details, click build.
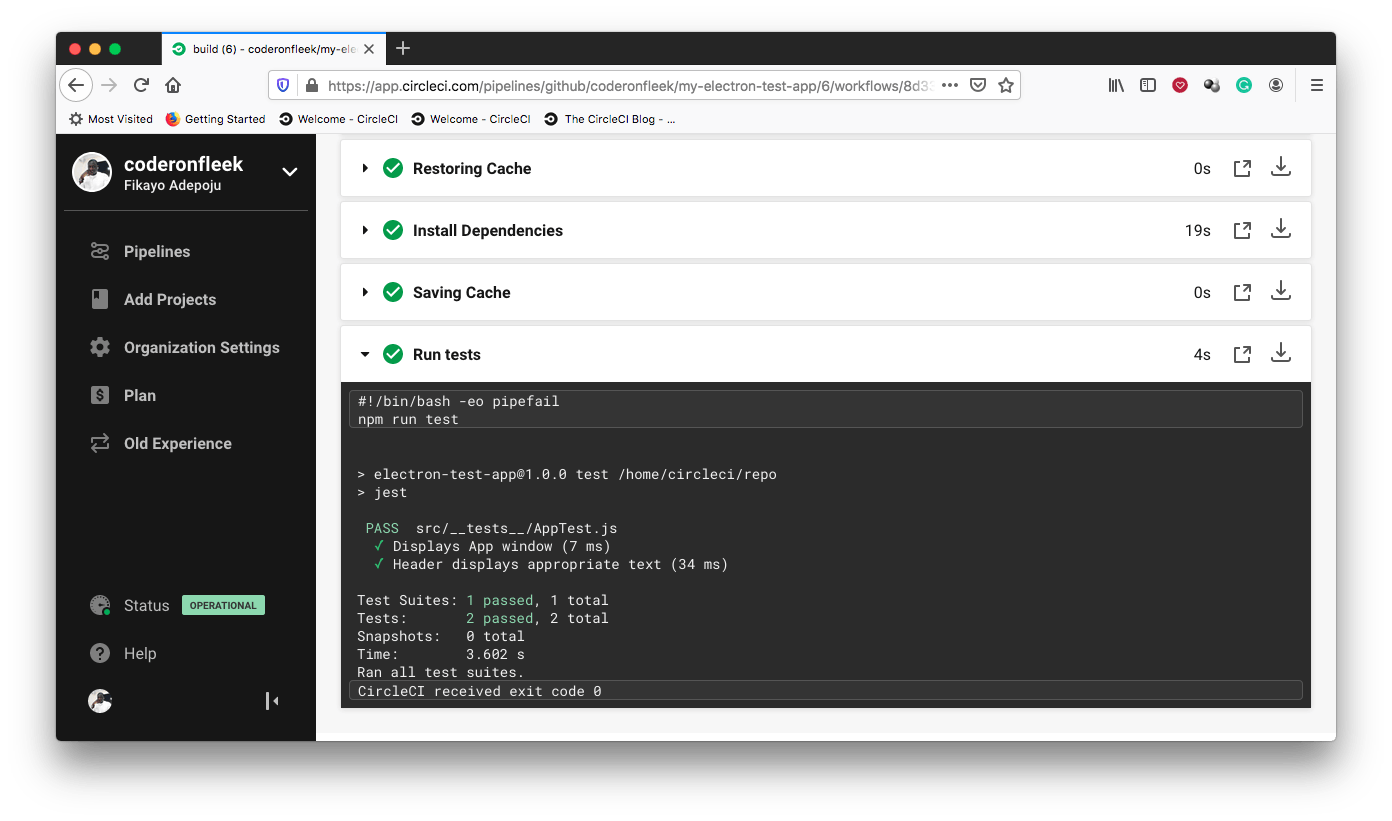
Our tests are running perfectly. Awesome!
Now we can add more tests as we add more features to our application and with every push to our repository, we trigger our pipeline to run all our tests automatically. When a test fails, we are notified by CircleCI and we get visibility into why our tests are failing.
Conclusion
Test-driven development (TDD) combined with continuous integration is one sure way to sleep well at night knowing that you have not pushed any bugs to your production environment. In this tutorial, we have demonstrated how to test our Electron.js applications and have our testing process automated using CircleCI.
Happy Coding!
Fikayo Adepoju is a LinkedIn Learning (Lynda.com) Author, Full-stack developer, technical writer, and tech content creator proficient in Web and Mobile technologies and DevOps with over 10 years experience developing scalable distributed applications. With over 40 articles written for CircleCI, Twilio, Auth0, and The New Stack blogs, and also on his personal Medium page, he loves to share his knowledge to as many developers as would benefit from it. You can also check out his video courses on Udemy.


