If you’ve enjoyed gaming using an Oculus Rift S or Sony PlayStation headset, then you’ve had a hands-on experience of VR. Nowadays, the concept of virtual reality or VR is finding across-the-board applications, including healthcare, defense, aerospace, and many other industries. However, no other sector makes use of VR as much as the gaming industry.
In this article, we will walk you through the basics of ‘how to make a body or object in VR?”. We’ll take you through the integrated steps of creating 3D objects and bodies abounding in the VR point-and-click adventure gaming. This tutorial will guide you on how to create a basic version of a simple point-and-click adventure game, albeit in VR. What you’ll need is a computer or laptop. It doesn’t have to be a powerful PC or VR ready laptop as only the basic stuff will be covered.
This guide mainly introduces you to 3D programming and serves as a standalone starter tutorial for setting up a web-based VR model. In the first part, we will instruct you on how to create by exploiting webVR, which is the perfect platform for playing VR games with or without using a VR headset. In the latter section, you’ll learn to create a mirrored framework for playing the game on your desktop or smartphone.
In other words, every move a gamer makes on his smartphone will be reflected on the desktop sample. Consequently, you and the player are connected in real-time, enabling you to watch all his moves, document the game, and offer guidance if necessary.
How to Make a Body or Object in VR (Virtual Reality)?
What you’ll need to get started?
At the outset, you’ll need a VR headset (use Google Cardboard available at $15.00 apiece) and net access, particularly to glitch.com. You’ll need to access Mac OSX when you come to the 2nd part of the tutorial.
1st Step: Putting Together a VR Model
At the first stage, you’ll be building a website with the help of a single static HTML page for coding directly from a desktop. Coding from the desktop computer also allows you to deliver to the website mechanically. Once you create the site, you’ll be able to upload it on your smartphone and, after that, place it inside the Google Cardboard VR headset.
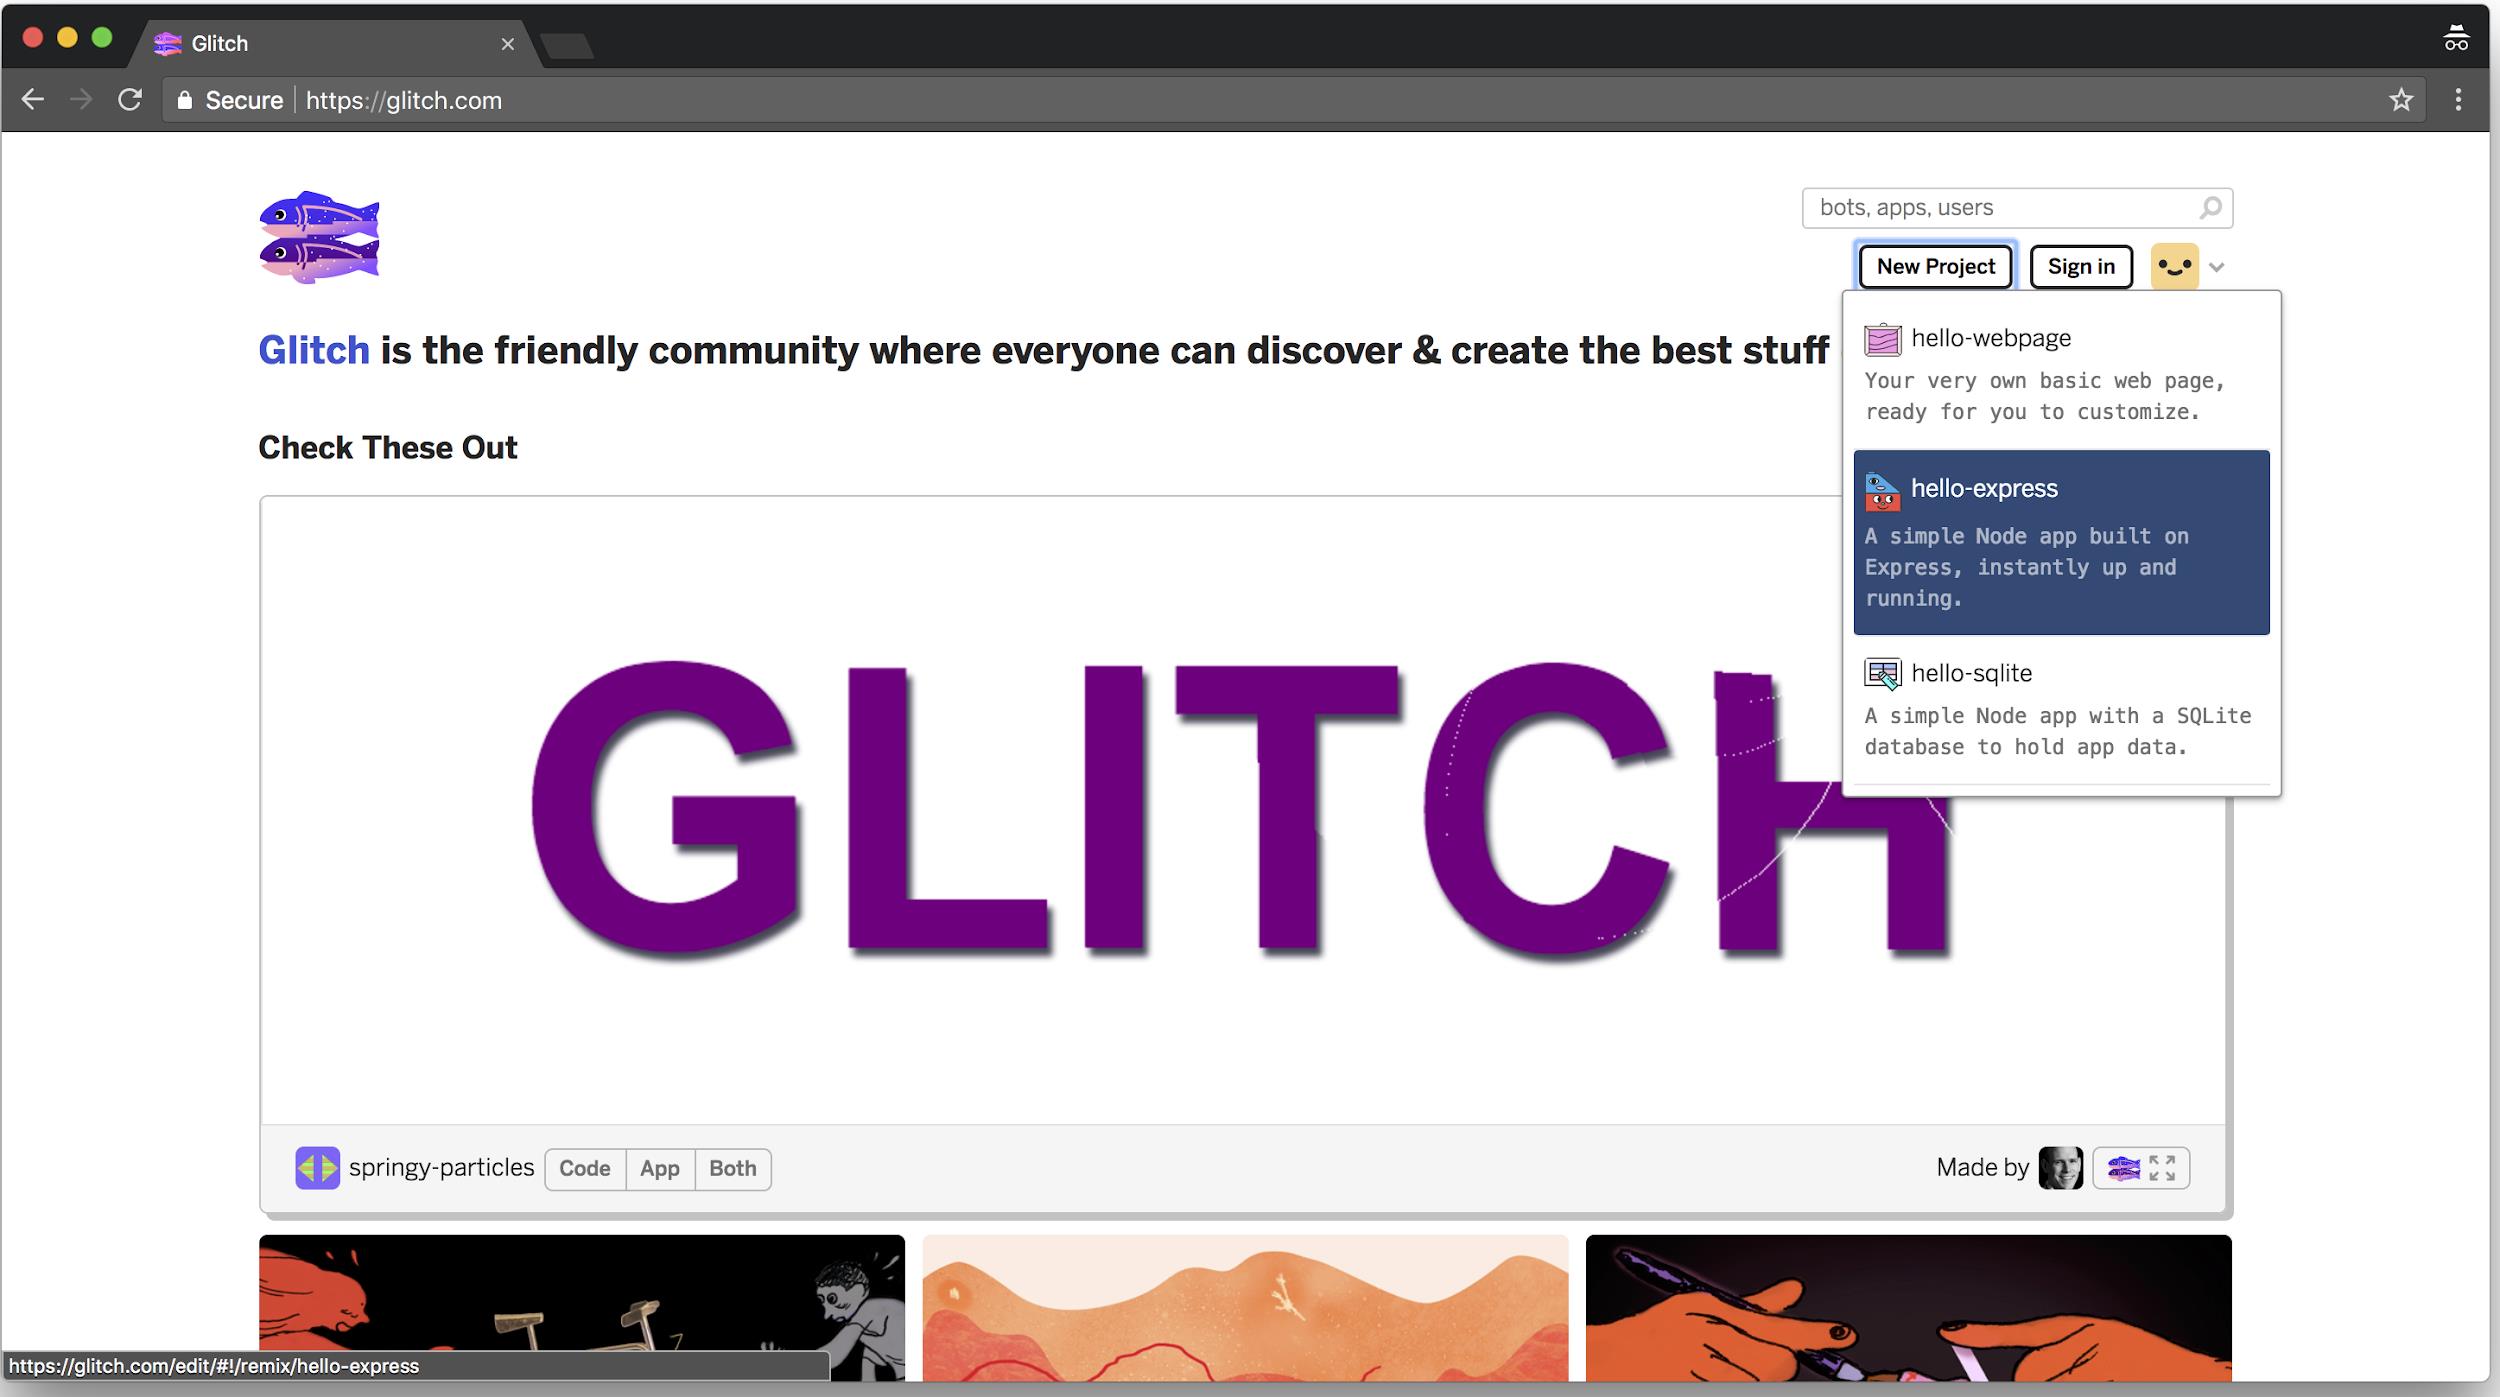
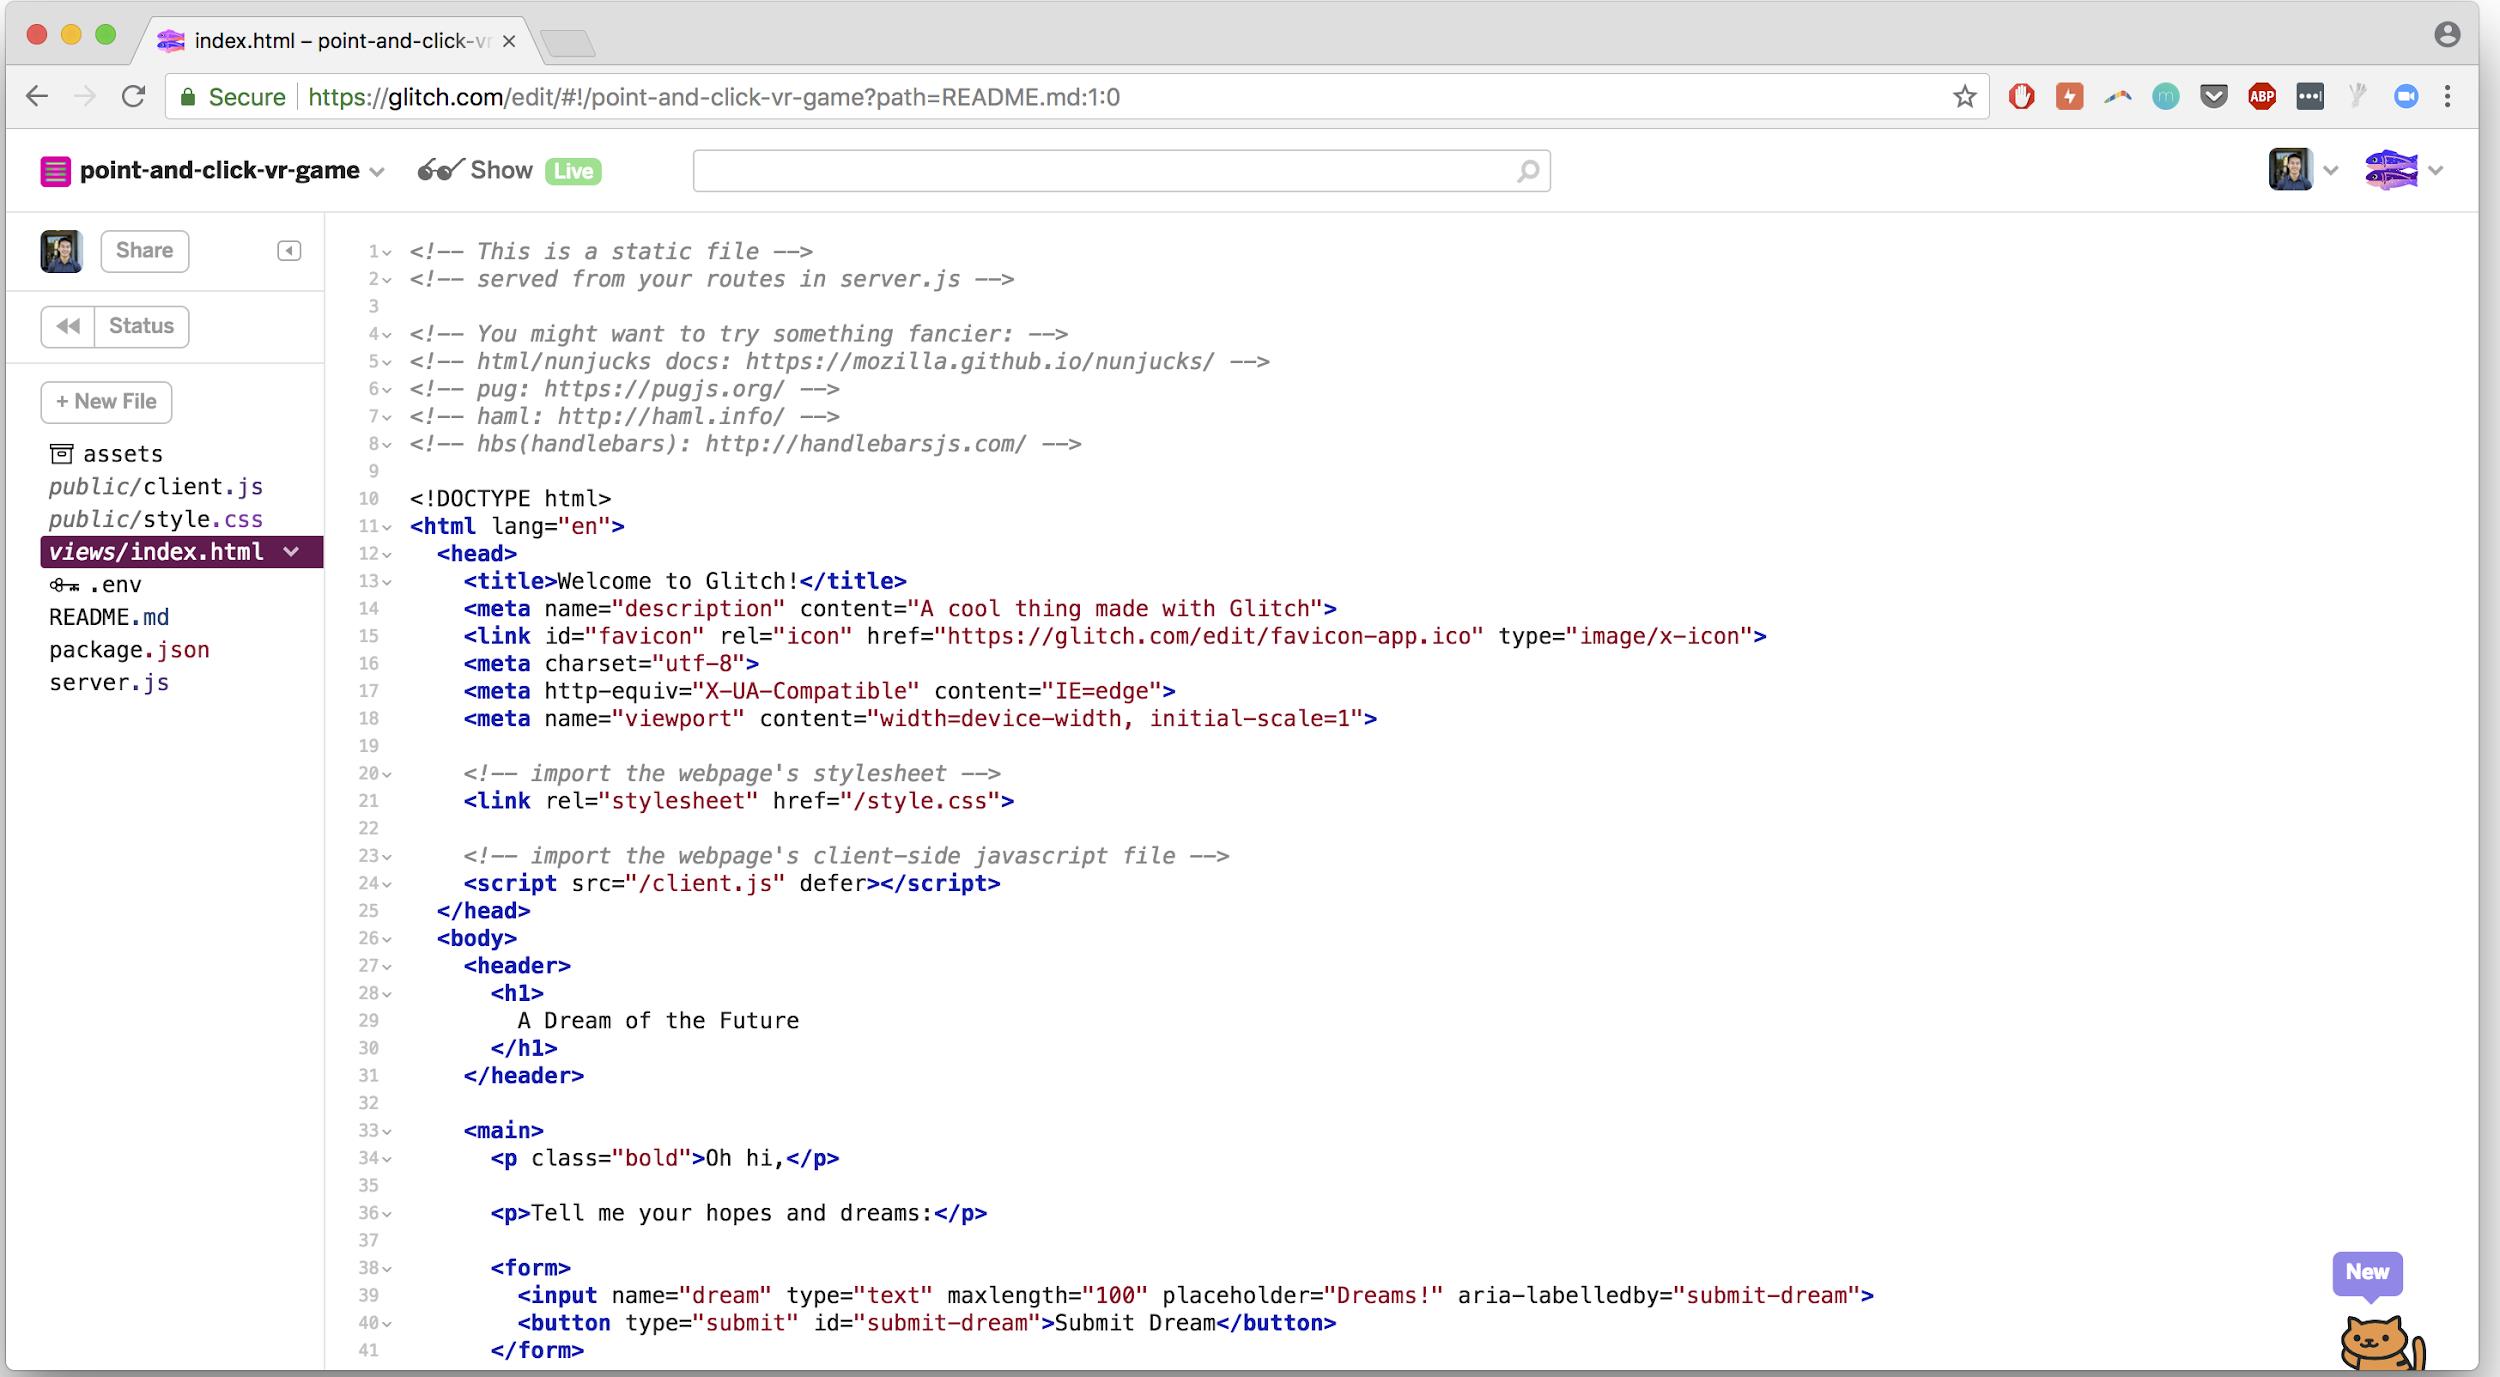
On the other hand, you can use the VR headset for uploading the deployed website. You can start by logging in at glitch.com. Once you’re on the landing page of glitch.com, you’ll have to click over “New Project” and “Hello-Express” on the top right and drop-down, respectively. Next, you’ll need to take your mouse to the left sidebar and click on “views/index.html, which is usually known as the “editor.”
Click on “preview” on the top left to see a sample of the webpage which you can call your preview. Whatever changes you make in the editor will be automatically mirrored on this webpage except for unsupported browsers and bugs. Revert to the editor to restore the existing HTML with the ensuing boilerplate for uploading a VR model.
To view this display on the VR headset, you’ll need to log in at the URL in the omnibar. After completing this action, you’ll have created your website URL.
2nd Step: Creating a Tree Model
This step entails setting up your basic VR model for which you’ll have to create a tree specimen with the help of primitives from aframe.io. Primitives are regulated entities that Aframe has programmed in advance for the convenience of use. There are three entities associated with bodies for carrying on the communication around ‘transformation axes,’ ‘relative transformations,’ and ‘geometry and material.’
For coding every 3D object, you’ll invariably need material and geometry, which are the two essential building blocks. While geometry specifies the shape or form of the object (like a pyramid, cuboid, sphere, and so on), the material typifies the physical properties like reflectiveness, color, and so on.
Secondly, you have three transformational axes to create or build your object. The x and y axes run horizontally and vertically as you shift right and upwards. The third axis-z-moves out of the display screen, and as we approach you, its value goes up. You can scale up or down, turn, and translate primitives or entities along these transformational axes.
For instance, you increase an object’s x value for translating it, and for rotating it, you spin it all along the y-axis. Keep in mind that all changes or transformations are indicated as <x>, <y>, <z>, implying that you’ll have to raise the corresponding second value to increase the cost. All objects are preprogrammed to be situated at o, o, o.
Finally, all conversions or translations are considered by their parents. Attach a tube or roll within the above sphere to attach a trunk to the tree model. This is to make sure that the trunk’s position or location is about the sphere’s situation. Add two green orbs to the tree model to impart a semblance of shrubbery to it.
You’ll be able to view the below tree when you go back to the preview. Upload the show of the website again on the VR headset and look at the tree model you have created. The next step will instruct you on how to make the tree useful for a two-way flow of information.
3rd Step: Inserting Click interface to the VR model
You’ll have to append an animation and activate it on clicking to make an entity communicative. As the end-user is involved with a VR headset, you’ll simply need to look intently to click. Simply put, gawking at an object or body will initiate click action. For introducing these transformations, you’ll have to begin with the cursor.
After that, you’ll have to select an animation and click on it for activating it. To end this step, you’ll need to revert to your website preview and draw the cursor to the tree. When a black circle comes to position itself on the tree, the latter will shift to the right and go back to its original position. So, now you’re done with creating a simple point-and-click adventure game in VR.
In the subsequent step, you’ll be building a primary nodeJS server, which will function as your stationary demo.
4th Step: Setting up NodeJS Server
Now you’ll be building a straightforward and practical but straightforward nodeJS server, which will be indispensable for your current VR model. Select package.json on the left sidebar of your editor. Begin by obliterating lines 2 through 4 and ascribe a new name-mirrors.
Select dependencies to insert socket.io. Now upgrade the archived URL to make it compatible with your existing glitch.com. The specimen glitch project is known as point-and-click-VR-game. Substitute that name with the name of your glitch project. Now alter the “glitch” icon to “VR” and repeatedly check to ensure that your package.json corresponds with the following:-
Also, doubly ensure that your code from the earlier components matches up with the following in views/index.html. Next, alter the current server.js. And get going by importing numerous NodeJS functions like Express, socket.io, and HTTP.
You also activate the ExpressJS application when you import the above utilities. After the services are uploaded, the available server now guides the server to restore index.html as the homepage. At last, the current source code informs the application to connect and listen to a port.
After you are through with editing, Glitch reloads the server on its own. To take a sneak peek at your application, simply click on “show” in the top-left. Now your website preview is ready to deliver.
5th Step: Enabling Interaction of the Client with the Server
In the 5th step, you’ll have to employ the client to establish a link with the server. The client will let the server know whether it is a desktop or a smartphone. To begin, import the would-be Javascript file to your views/index.html. Once you’re done with line 4, bring in an altogether new script and append camera listener to the properties list on line 14.
After that, go to the public/client. Js on the left sidebar and remove all Javascript code in this file. Next, specify a utility function for checking out whether the client device is a mobile one. Yet again, you’ll need to upload the preview onto the desktop and after that on your smartphone.
As soon as the mobile device is connected, the server instantly starts logging in the position and rotational information of the camera via the server to the client.
6th Step: Making the Server Interact with the Client
In the ultimate step, you’ll transmit the host camera’s data to all the reflectors for which you’ll have to open up the server file, server.js. Alter the onMove event handler to the following:-
The broadcast modifier guarantees that the server conveys this info to all clients linked with the socket barring the original client. Once a client receives this information, you’ll have to set up a reflector’s camera correspondingly. Now open the client script- public/client.js. Next, check whether it is a desktop that is the client and, if so, then obtain the shift data and log inappropriately.
Upload the website preview both on your smartphone and your desktop. Unlock and open the developer platform on the browser of your desktop. The moment your smartphone uploads the app, the developer console on the desktop will light up to indicate the camera’s rotational position.
You’ll need to open up the client script once again at public/client.js. Based on the data transmitted, you regulate the client’s camera. Change the event handler for the sake of the move event.
For the last time, upload the app on the phone as well as the desktop. Whatever movement is there on the mobile device is mirrored on the desktop. Now you can have a view or instead preview of everything that the smartphone user sees.