
Oracle Container Engine for Kubernetes (OKE) is a Developer Service in Oracle Cloud Infrastructure that expedites the provisioning and managing of 1 or more Kubernetes Clusters. In effect, this allows deploying and running an application on a cloud provided K8s engine a snap. To demonstrate just how quick it can be the following post is going to install FlexDeploy on OKE Engine from scratch.
In order to get FlexDeploy up and running on OKE we only need to perform a few simple steps:
- Provision a Kubernetes Engine cluster on OCI
- Add the new cluster to our kubectl context
- Install FlexDeploy with Helm
Provision a Kubernetes Engine
A few button clicks is all it takes to get a K8s Engine up and running in OCI, however we need to make sure we create it with Helm/Tiller enabled.
- In the OCI dashboard you can find ‘Container Cluster (OKE)’ under Developer Services.
- Click the Create Cluster button and choose Quick Create to launch the following page:
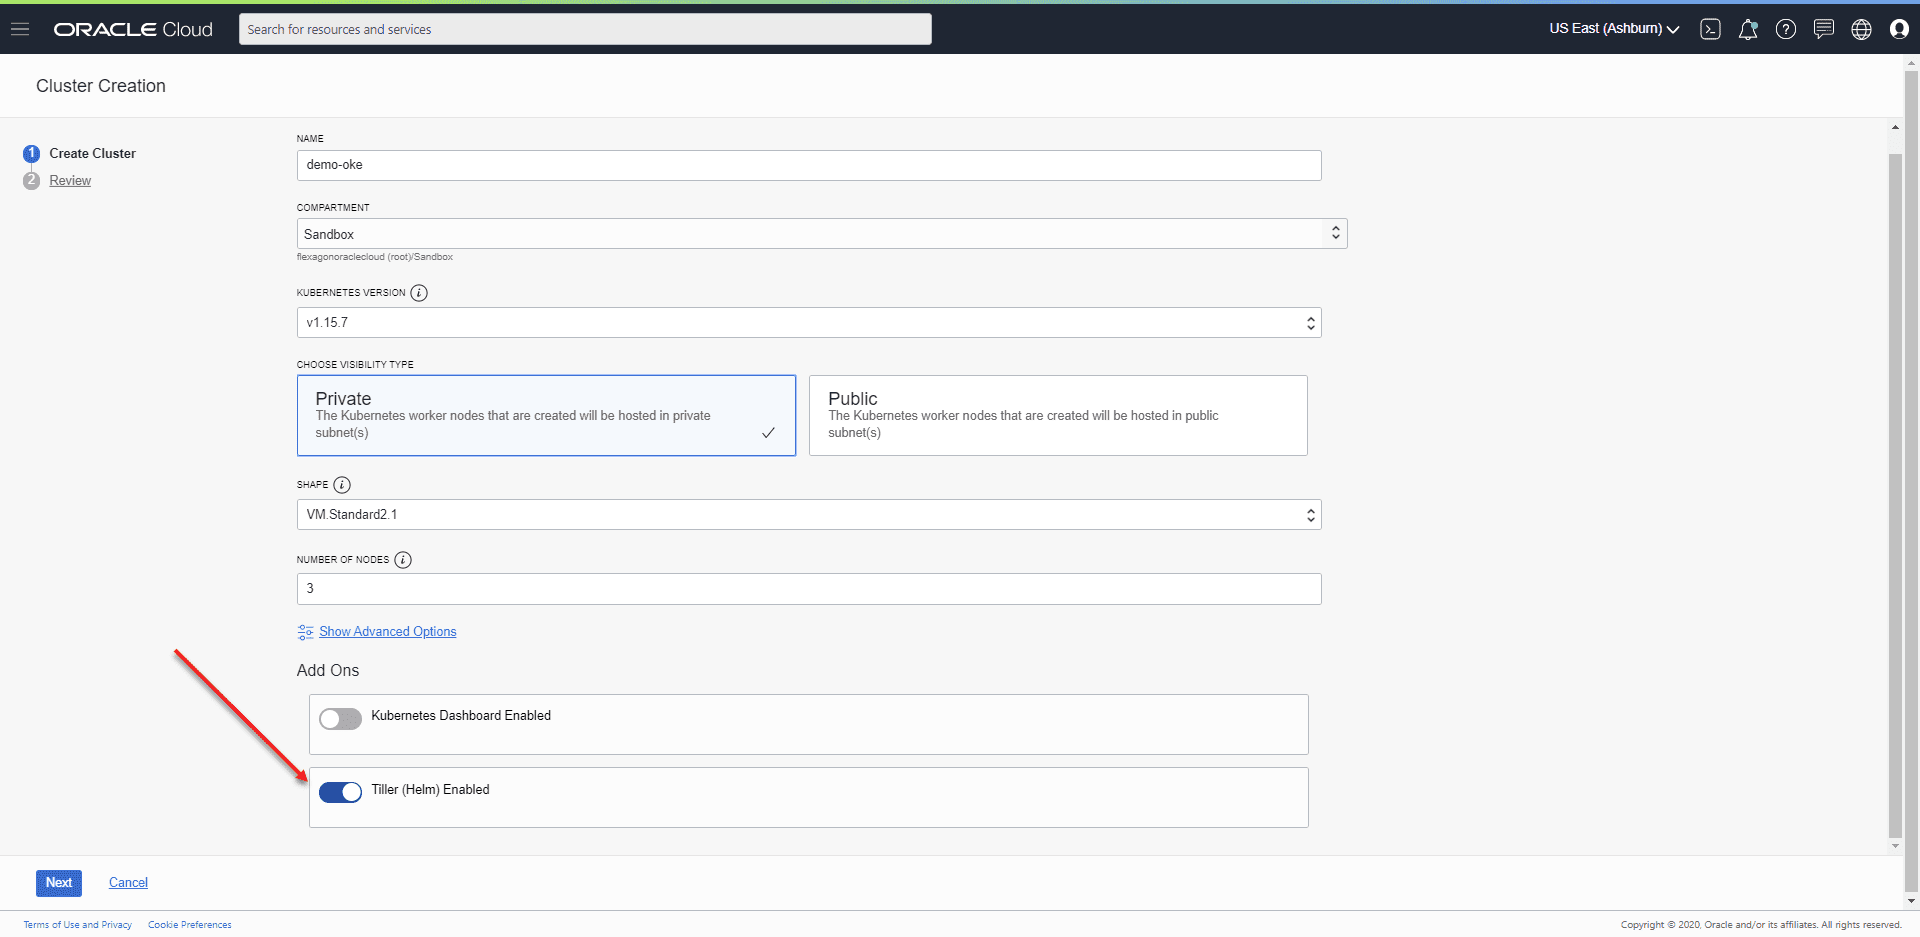
Be sure to enable Helm otherwise we will run into issues later on! It will take a few minutes for the cluster to create but we can mark step 1 as done.
Updating the kubectl context
To make use of helm we need to update our K8s context. To do so we are going to use Oracle’s Cloud Shell. Although feel free to use whatever K8s client you wish.
- In order to open an OCI Cloud Shell session, click Quick Start on the cluster summary page and then Access Cluster.
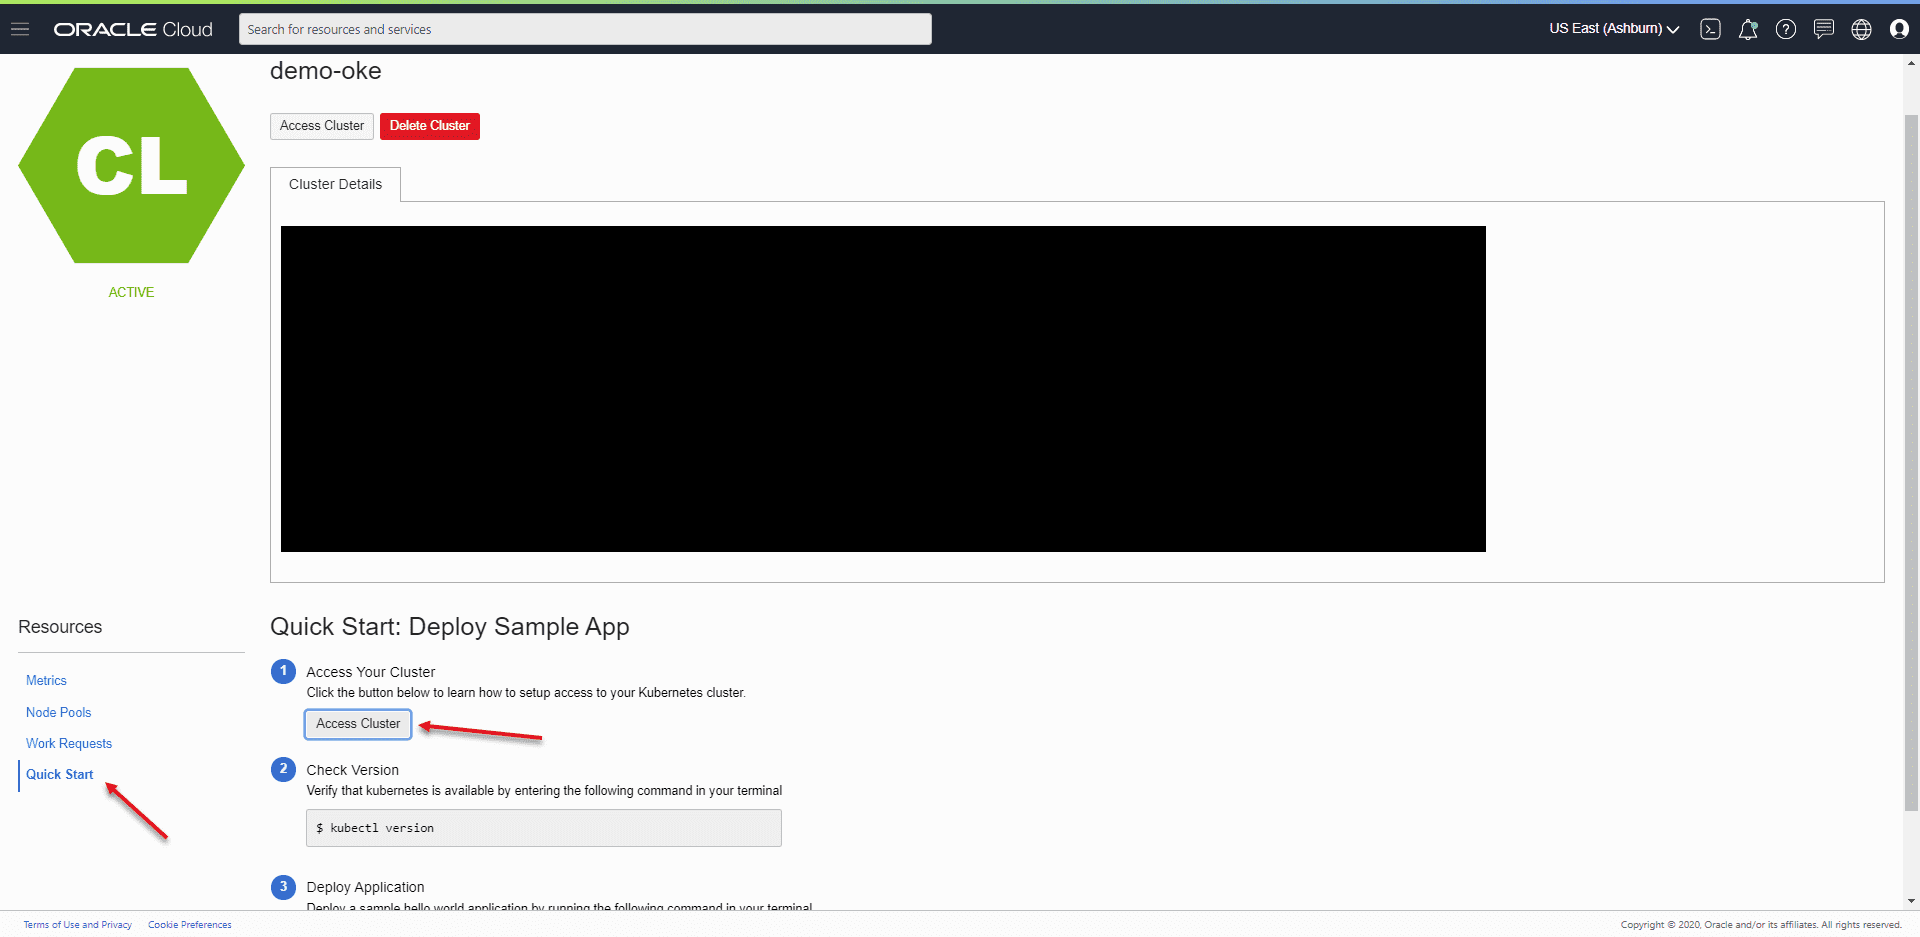
This will launch a popup where you can open a Cloud Shell session.
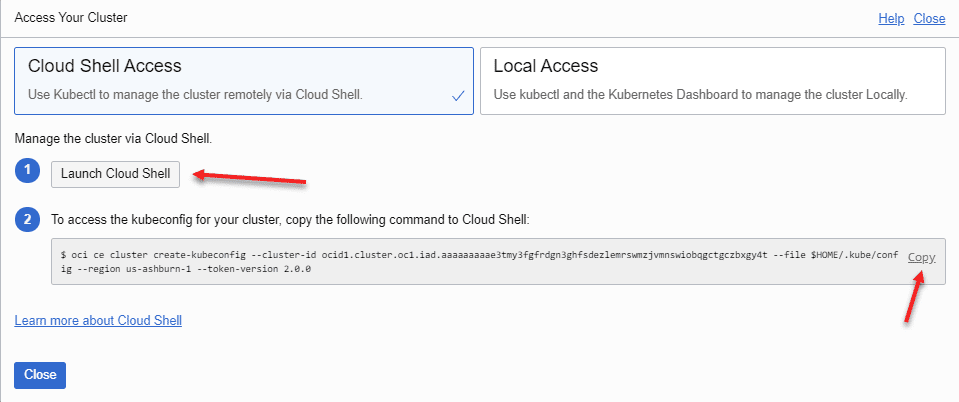
- Be sure to copy the command listed in step 2, after which you can launch the Cloud Shell.
- Simply run the copied command and do some verification. Step 2 – done!
oci ce cluster create-kubeconfig --cluster-id ocid1.cluster.oc1.iad.aaaaaaaaae3tmy3fgfrdgn3ghfsdezlemrswmzjvmnswiobqgctgczbxgy4t --file $HOME/.kube/config --region us-ashburn-1 --token-version 2.0.0
kubectl config current-context
Install FlexDeploy with Helm
- The final step is to install FlexDeploy via the flexdeploy-demo helm chart:
helm repo add flexdeploy https://flexagon.com/downloads/charts/flexdeploy
helm install flexdeploy flexdeploy/flexdeploy-demo
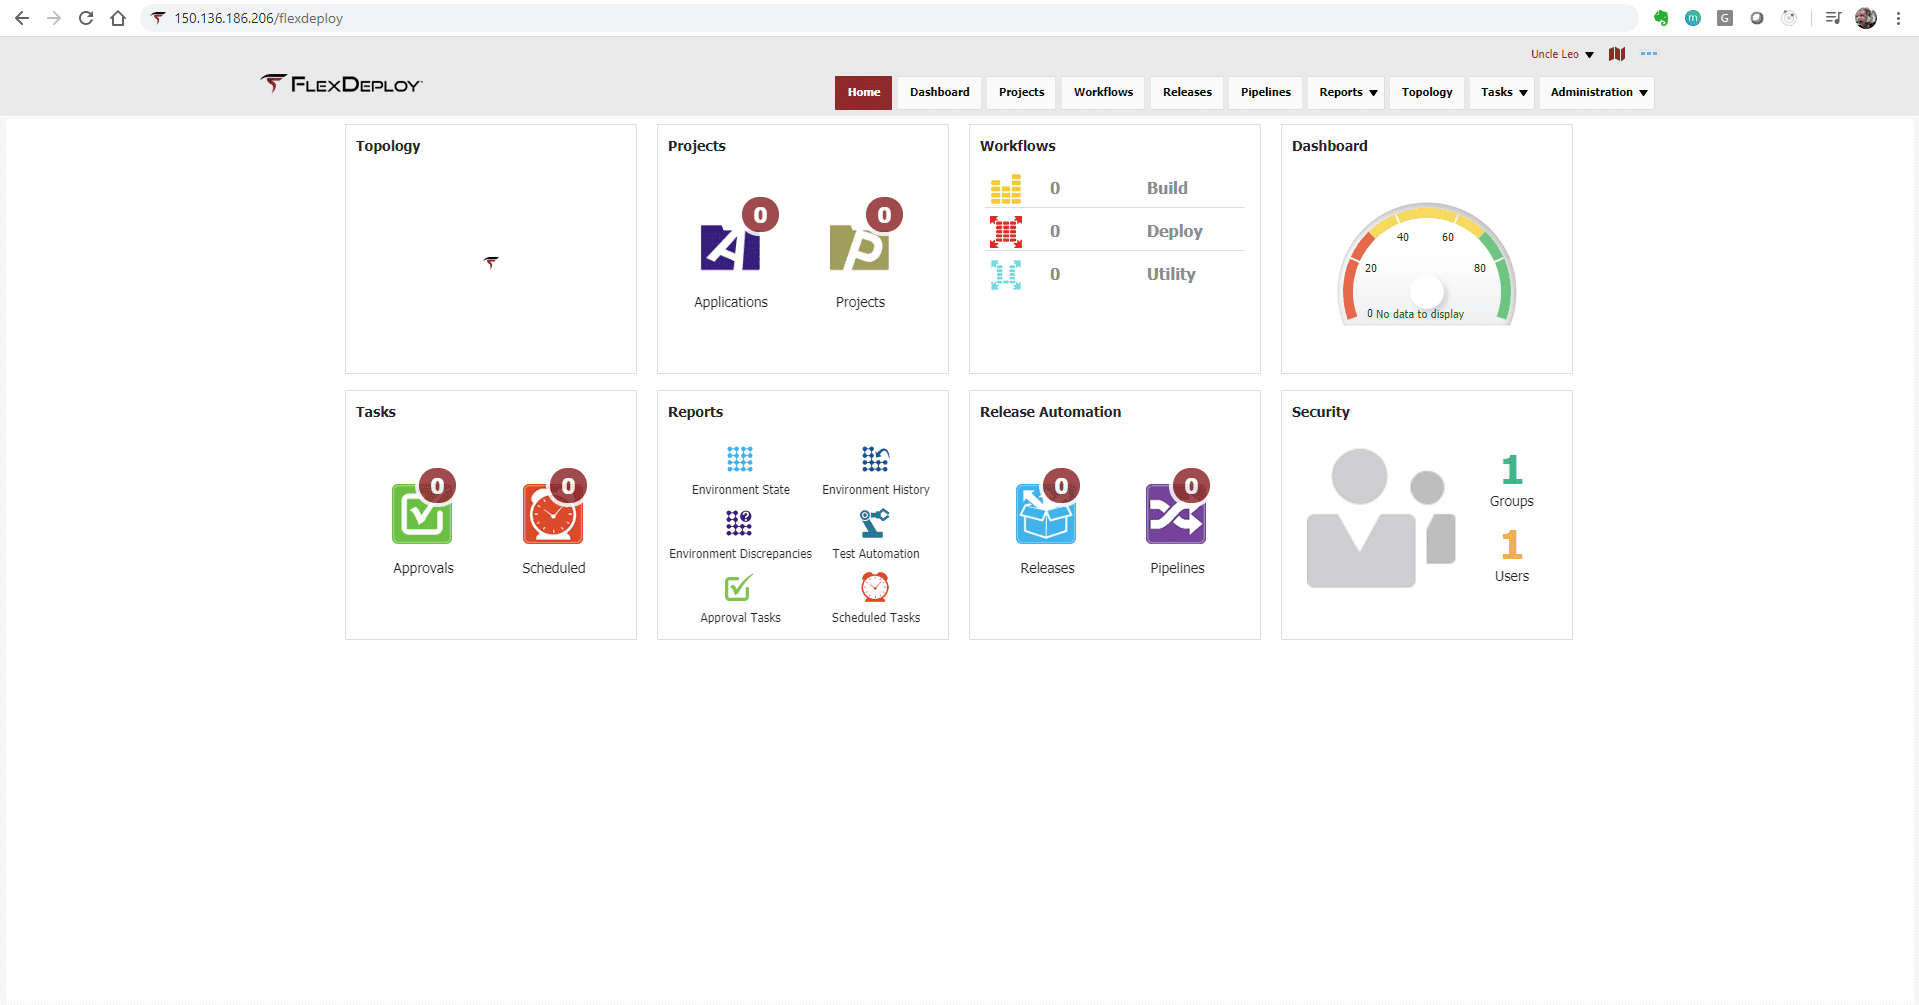
Give the pods a few minutes to start and you now have a running FlexDeploy installation in a matter of a few minutes. The application runs on port 80 by default. Therefore all you need to access from a browser is the IP address. Which can be found by running:
kubectl get svc --namespace default flexdeploy-flexdeploy-demo --template "{{ range (index .status.loadBalancer.ingress 0) }}{{.}}{{ end }}"
Just open http://%IP%/flexdeploy in a browser and away you go! Note that the first time opening the application you will be prompted to create the Admin account after which you will be redirected to the login page.
In my next post, I’ll walk through deploying to Oracle Kubernetes Engine with FlexDeploy.