
This article will explore Test case creation in Katalon Studio record, manual, and script modes. We will, step by step, create a test case for the login functionality of a sample website. Additionally, we will create a Test Suite and Test Suite Collection.
Sample Website used: https://katalon-demo-cura.herokuapp.com/profile.php#login
Katalon Studio is a versatile and user-friendly test automation tool designed to streamline the testing process for web and mobile applications. With its intuitive interface and powerful features, Katalon Studio empowers testers and developers to efficiently create, execute, and manage automated test cases. It supports both web and mobile testing, making it a valuable asset for software quality assurance across different platforms.
Test Creation in Katalon Studio: Record Mode
This is the easiest and most convenient mode of creating a test case. After completing the installation process of the Katalon Studio application on your device, follow the below steps:
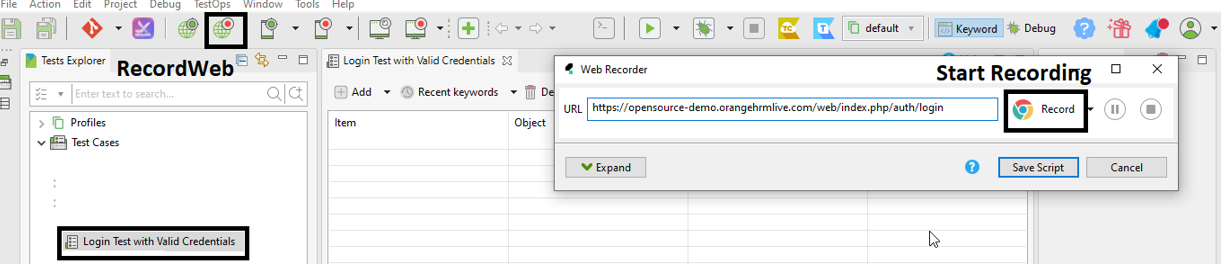
- Navigate to Test Explorer in Katalon Studio.
- Right-click on Test Cases > New > Test Case > Name as “Login Test with Valid Credentials“ > OK
- Click “Record Web” > Enter URL > Record (Start Recording)
- The website will open in the default browser selected.
- Enter username: “John Doe” and password: “ThisIsNotAPassword” (sample login details shown on the login page) > Click Login
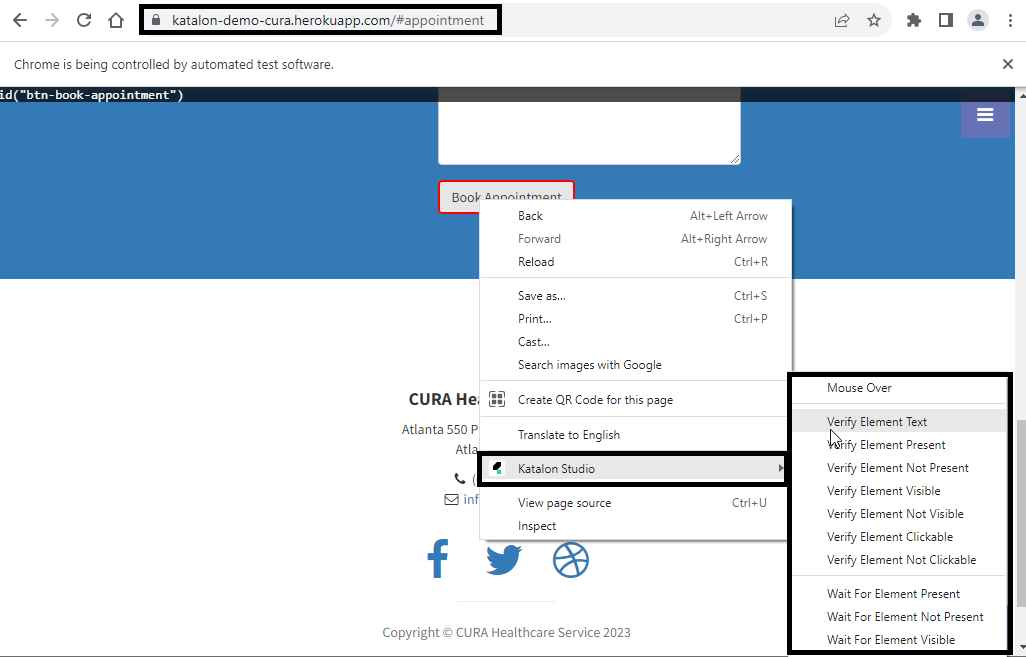
- We will verify the text element “Book Appointment” > Right-click on it > Katalon Studio > Verify Element text.
- Click Logout > Close the browser.
- We can expand the recorder window and see the steps recorded and objects captured
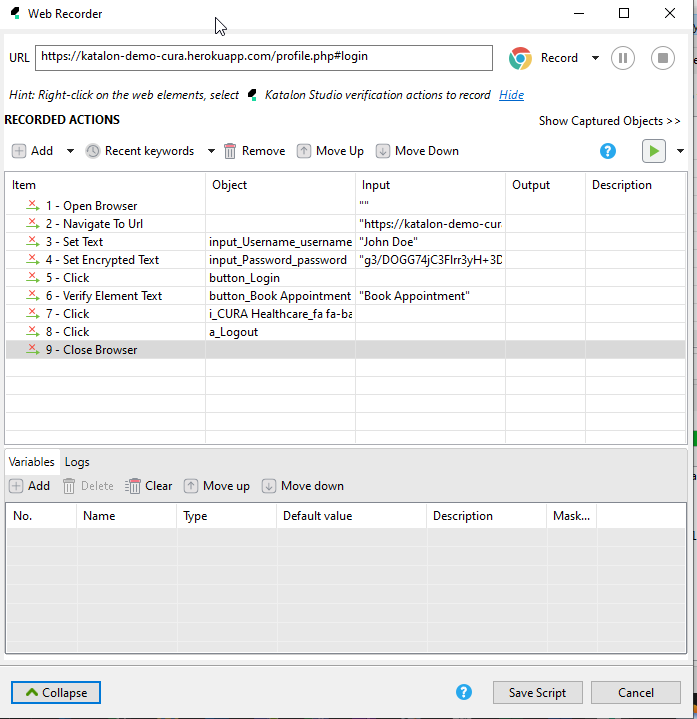
- Save the scripts.
- Object captured are stored under “Object Repository” in Katalon.
- Run the test using the “Run” button”; it will execute the test on the default browser. We can also select other browsers and servers from dropdown.
- We can see the logs in Logs, Job progress, and console for the execution in Katalon

Test Creation in Katalon Studio: Manual Mode

To create a Test case manually, we will add each step of the test and use “Keywords “(in-built, custom) which can be found in Keyword Browser. We can drag and drop the desired keyword into steps.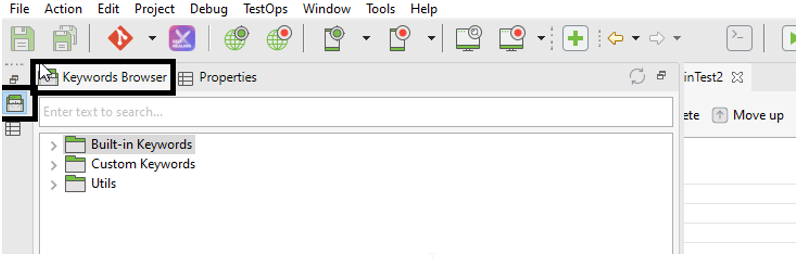
OR click on “Add”, then type keywords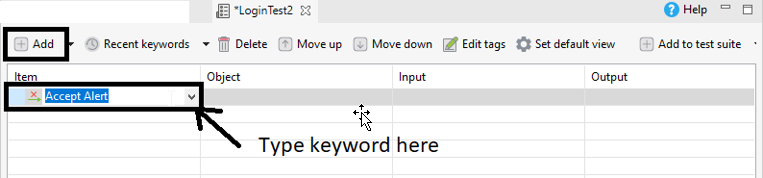
We will also require Objects (locators of web elements) of the website to perform action on. Capture objects; we will use the “Spy Web” feature.
-
- Create a new Test Case as “Login Test2”.
- Click “Spy Web” > Enter URL (same as in the last section) > Start.
- The website will open in the default browser selected.
- Hover over elements and click the hotkeys (Alt+`) to capture objects. In the same way, perform a login and logout action
Note: To Check/Set the Object Capturing Hotkeys, Go to Katalon Studio > Window > Preferences > Katalon > Object Spy > Hotkeys Settings. - Save the objects.
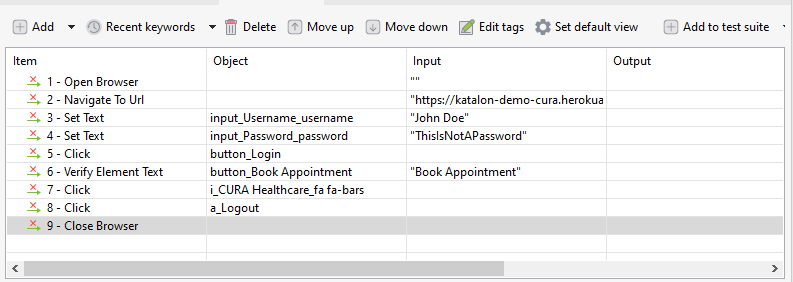
- Go to our test case, “Login Test2,” and add steps.
- Add Keywords, drag and drop the required objects to perform the action on from the object repository, and enter input where necessary. Below is the image of the test case:
Note: Password can be encrypted using the inbuilt feature, Katalon Studio > Help > Encrypt Text > Enter text, copy generated encrypted text, and use it as input in the test. - Our test case is ready. We can run the test and verify.
Test Creation in Katalon Studio: Script Mode
We have the “WebUI” class in Katalon for web testing, the “Mobile” class for mobile testing, and the “WS” class for API testing. We will continue with our sample website and create another login test case using the script method.
-
- Create a new test case, “Login Test Script Mode”.
- Change the tab to Script Mode
- Use WebUI class methods for our login process steps. (We can refer to the class declaration or documentation on the official website for more details) .
- We will need Objects (locators of web elements saved ) of the website for script mode as well, which we can create using the same method as in manual mode; for now, we will be using the same objects from the object repository we created. In the “findTestObject” method we have to provide Object ID > Go to Object Repository > Right Click the Object desired > Copy ID.
- Save the script > run and verify the test
Below is the script for our login test:
WebUI.openBrowser('')

WebUI.navigateToUrl('https://katalon-demo-cura.herokuapp.com/profile.php#login')

WebUI.setText(findTestObject('Object Repository/Page_CURA Healthcare Service/input_Username_username'), 'John Doe')

WebUI.setEncryptedText(findTestObject('Object Repository/Page_CURA Healthcare Service/input_Password_password'), 'g3/DOGG74jC3Flrr3yH+3D/yKbOqqUNM')

WebUI.click(findTestObject('Object Repository/Page_CURA Healthcare Service/button_Login'))

WebUI.verifyElementText(findTestObject('Object Repository/Page_CURA Healthcare Service/button_Book Appointment'), 'Book Appointment')

WebUI.click(findTestObject('Object Repository/Page_CURA Healthcare Service/i_CURA Healthcare_fa fa-bars'))

WebUI.click(findTestObject('Object Repository/Page_CURA Healthcare Service/a_Logout'))

WebUI.closeBrowser()
Creating Test Suites and Test Suite Collections
Test Suite
In Test Explorer > Right-click on Test Suite > New > Test Suite > enter Name and save. Using the “Add” button, add the test cases we created. We can add multiple test cases and duplicate test cases as well. We can run the test suite as a whole or select Test Cases inside it. In “Execution Information,” we have options for implicit timeout, retry, and mail recipients to send results.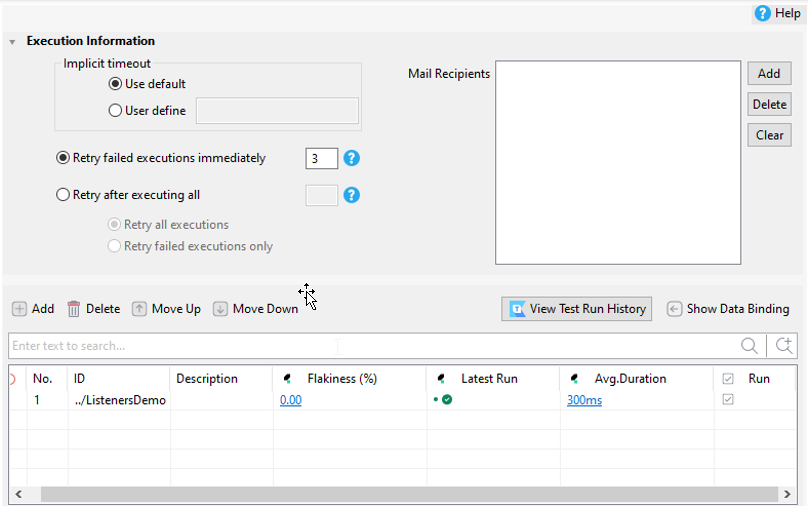
Test Suite Collection
In Test Explorer > click on Test Suite > New > Test Suite Collection > enter Name and save. Using the “Add” button, add the test suites we created. We can add multiple test suites and duplicate test cases as well. In the “Execution Information” section in the collection, we have an execution mode option that can be used to run test suites in parallel or sequentially. 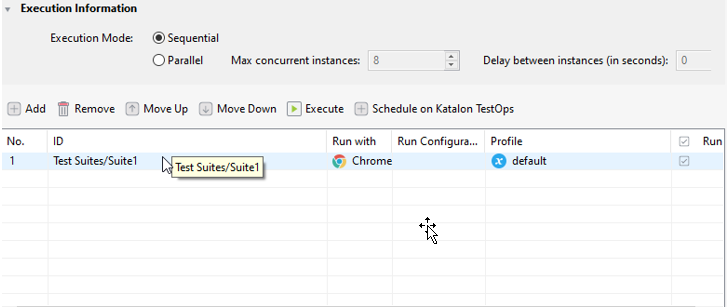
Conclusion
In this comprehensive blog, we’ve delved into all the essential steps for test case creation using the three modes in Katalon Studio. We’ve uncovered the process of capturing objects, harnessed the power of Katalon Keywords, and navigated through the scripting with various classes. Additionally, we’ve demystified Test Suites and Test Suite Collections, exploring their powerful features in Katalon Studio.