
Introduction to Vue.js:
Vue.js is a user-friendly and progressive JavaScript framework that simplifies the process of building dynamic web applications. Furthermore, it’s known for its flexibility and ease of integration, making it a popular choice for developers.
Now, let’s embark on a straightforward guide to creating a Vue.js application.
Prerequisites:
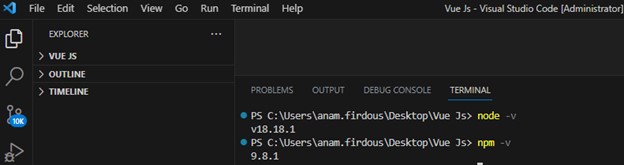
Before starting the creation of a Vue.js application, ensure you have Node.js version 10.6.0 or higher installed on your computer. You can download Node.js from the official website: nodejs.org. After installation, verify the versions of Node.js and npm (Node Package Manager) by executing the following commands in your terminal.
Once Node.js and npm are successfully installed, you can move forward with the installation of the Vue CLI, which is used to create Vue.js applications.
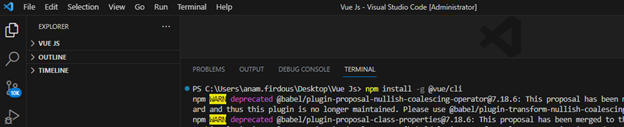
Step 1: Downloading Vue CLI 3
Vue.js has a handy tool called Vue CLI for making and handling Vue.js projects. You can set it up globally using this command: npm install -g @vue/cli
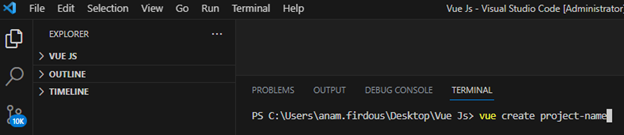
Step 2: Create a Vue.js Project
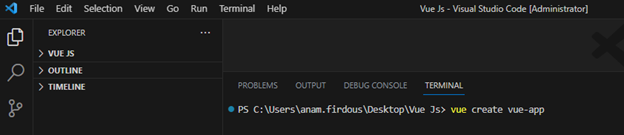
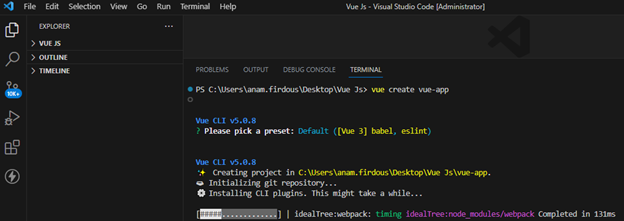
After successfully installing Vue CLI, you’re ready to initiate a new Vue.js project. Begin by opening your terminal, navigate to the folder where you intend to create your project, and then use this command: vue create project-name
Replace “project-name” with your chosen project name. For instance, in my case, I’m naming the project “vue-app.”
Vue CLI will prompt you to pick a preset. You have the option to choose either the default preset or manually select features tailored to your project’s specific requirements.
Default Preset:
Once you’ve chosen the Default Preset, simply press ENTER, and Vue CLI will initiate the application creation process.
Manually Preset:
Selecting “Manually select features” in Vue CLI will lead to a set of questions that let you customize your project according to your likes and needs. These questions cover various aspects of your project.
I have made selections that match my specific project requirements.
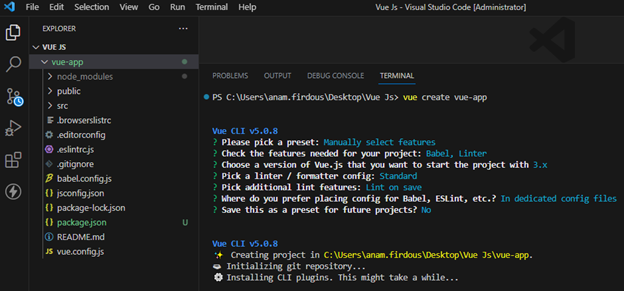
In my case, I’m developing a project using manual preset.
Step 3: Project Setup
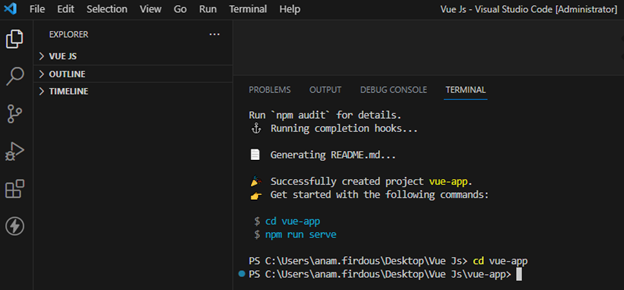
After creating the project, navigate to the project directory by using this command: cd vue-app
Step 4: Setting Up a Development Server for Vue.js Application Preview
To preview your Vue.js application, launch a development server by using this command: npm run serve
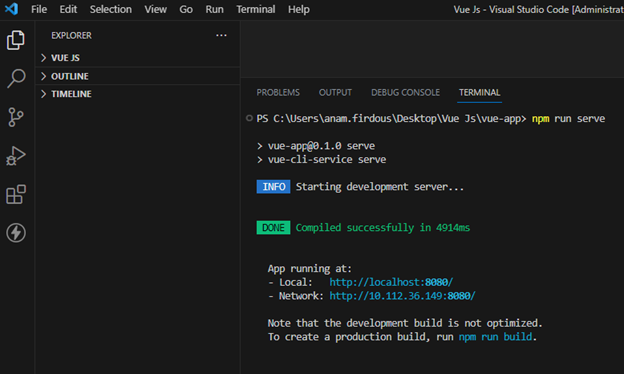
When you execute the above command, it will initiate the development server, enabling you to open your Vue.js application in a web browser by accessing the provided URL, typically http://localhost:8080. If a different port is used, the CLI will notify you.
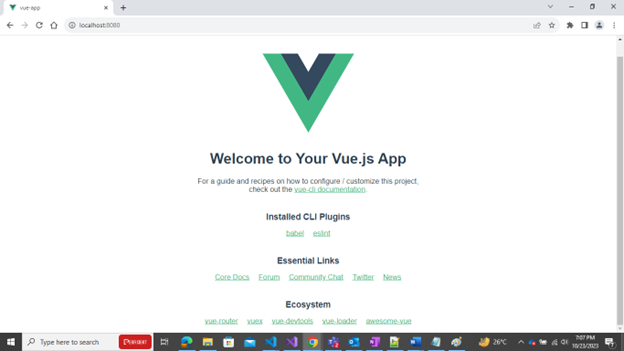

To see your newly created project, simply open your preferred web browser and enter http://localhost:8080 in the address bar. There, you will be greeted with a welcome screen featuring the Vue logo and the technologies you chose in earlier steps.
Step 5: Build and Deploy
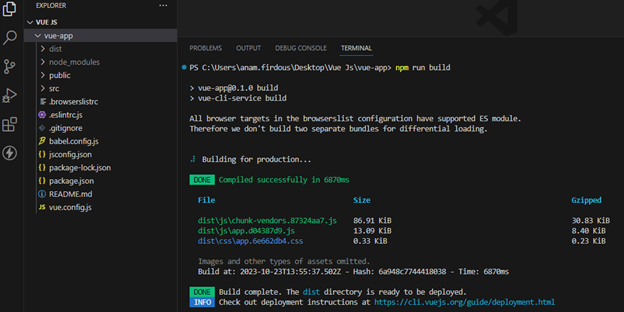
When you’re prepared to publish your Vue.js application, you can generate a production-ready build by using the following command: npm run build
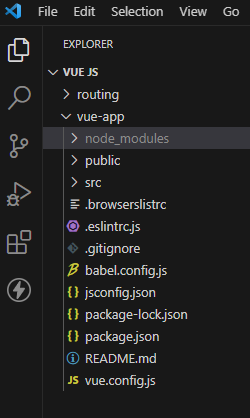
Before you execute the command ‘npm run build,’ the structure looks like this.
Executing this command will generate a “dist” directory that holds the optimized code and production-ready assets.
Step 6: Further Customization
- Moreover, for additional customization, you can make adjustments to your Vue.js project by modifying project files, including the “src” directory for your source code.
- Furthermore, you have the flexibility to configure additional dependencies like Vue Router and Vuex as required.
That’s all there is to it! You’ve successfully installed and configured a Vue.js application on your system. You’re now ready to begin the development of your Vue.js application, leveraging Vue’s components and features in your project.
Folder Structure in a Typical Vue.js App
Let’s explore the common folder structure of a Vue.js application:
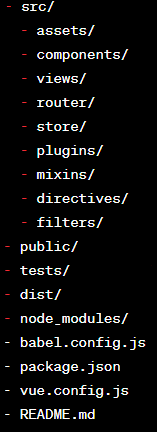
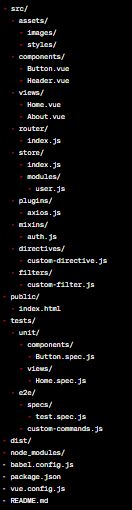
1) src Directory:
At the core of your Vue.js application, this directory serves as the starting point.
- assets: Designate this directory for static resources like images, fonts, and CSS files.
- components: Use these Vue components in your app, either for the entire application or for specific parts of it.
- views: This folder typically contains top-level Vue components for various views or pages in your application.
- router: This is where you define your application’s routing configuration using Vue Router.
- store: Use this directory to organize your store modules if you’re employing Vuex for state management. You might have an index.js file for the root store and separate module files for different parts of your app’s state.
- plugins: You can place Vue.js plugins, whether they are third-party libraries or custom utilities, in this directory.
- mixins: For common functionality that you want to reuse across multiple components, you can place them in this directory as mixins.
- directives: Define and store custom directives for enabling low-level DOM manipulations.
- filters: This is where you define custom filters for formatting or transforming data in your templates.
2) public Directory:
This directory is for static assets that don’t need to go through the build process. These assets are directly accessible via the web server. For example, you might place your index.html file in this directory.
3) tests Directory:
For unit tests, often written using tools like Jest, you can organize them by mirroring the structure of your src directory.
4) dist Directory:
After you build your Vue app, this directory holds the production-ready code. You usually generate it automatically when you run the build command.
5) node modules Directory:
Store all the project’s dependencies and packages in this directory, typically managed by package managers such as npm or Yarn.
6) babel.config.js:
Configure Babel, which transpiles your JavaScript code, in this configuration file.
7) package.json:
The package.json file contains essential project metadata, scripts, and dependency information.
8) vue.config.js:
This optional configuration file for Vue CLI allows you to customize the build process, configure proxy settings, and make project-specific adjustments.
9) README.md:
Documentation for your project.
Remember that this is just a common convention, and the actual folder structure can vary based on the specific needs of your project. Vue’s flexibility allows you to adapt the structure to suit your application’s requirements.