
Introduction
Microsoft’s Azure OpenAI offers a variety of AI tools and services that make artificial intelligence available to a wider range of users.
This article provides a step-by-step guide.
- How to create an Azure OpenAI service.
- Deploy a model.
- And use the playground for interactive testing and experimentation.
The aim of this guide is to make it easier for users to access and utilize the power of AI, by simplifying the process of creating and deploying models.
Creating an Azure OpenAI Service
You can create resources in Azure in several different ways:
- The Azure portal
- The REST APIs, the Azure CLI, PowerShell, or client libraries
- Azure Resource Manager (ARM) templates
The article explains how to use the Azure portal to create and deploy resources and provides guidance on the process.
Note: Access to Azure OpenAI Service requires submission of an application. To apply, please complete this form.
1: Login to the Azure Portal
To start, you need to log in to your Azure account. If you don’t have one, you can create it on the Azure website.
Navigate to https://portal.azure.com.
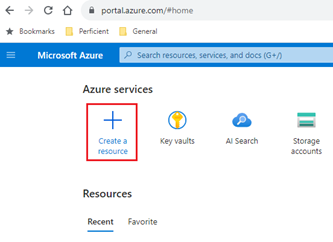
2: Create a New Resource
Once logged in, locate, and click on the “Create a resource” button on the left-hand menu.
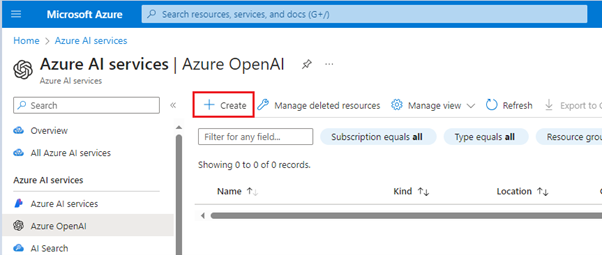
3: Search for OpenAI
In the marketplace, type “OpenAI” in the search bar. Click on the OpenAI service from the search results.

4: Create OpenAI Service
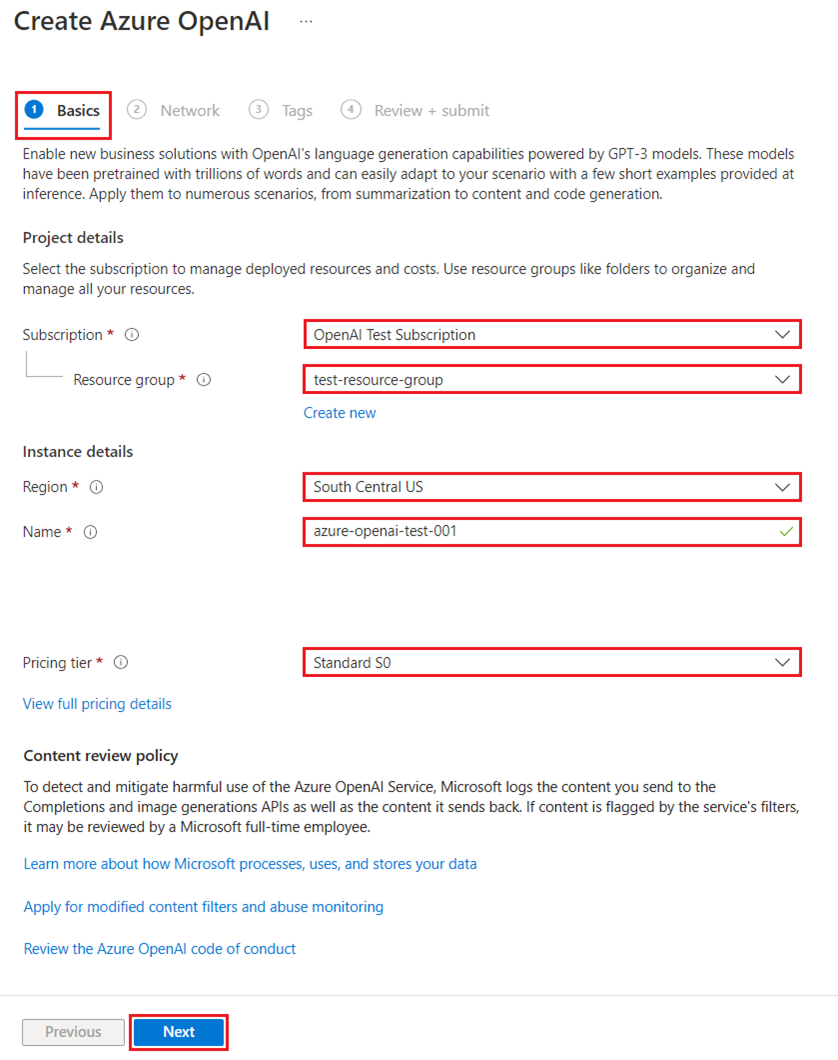
Click on “Create” and provide the required details, including name, subscription, resource group, and location. After you’ve filled these in, click on “Review + Create”, and then “Create” again to finalize the creation of the service.

On the “Create Azure OpenAI” page, fill in the required information on the Basics tab and click “Next”.
5: Configure the Network Security Options on the Network Tab:
- All networks, including the internet, can access this resource.
- Selected networks can access this resource, and you can configure network security settings accordingly.
- No networks can access this resource. However, you can configure private endpoint connections as an exclusive way to access it.
6: Click “Next” to Add Any Tags to the Resource, if Desired.
7: Click “Next” Again to Move to the Final Stage: Review + Submit.
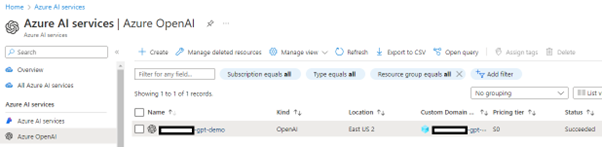
Confirm your configuration settings and click “Create”. The Azure portal will display a notification when the new resource is available as shown in the screenshot.
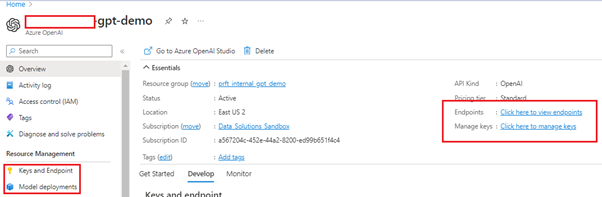
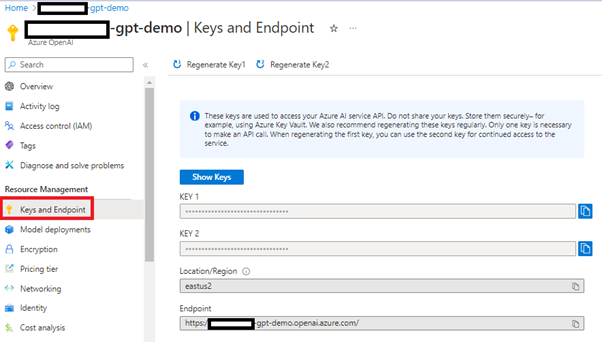
After registering the model, click on “Key and Endpoints” from the left-hand menu. You will see the Keys and Endpoints are generated for creating a custom application.
Deploying a Model in Azure OpenAI
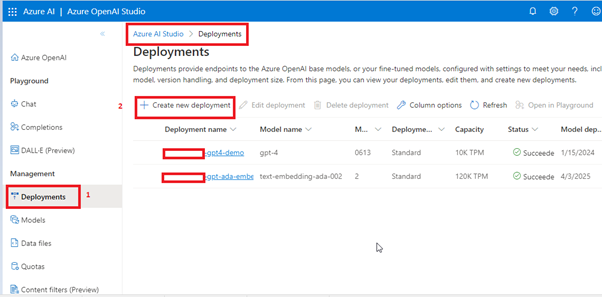
Azure OpenAI offers a web-based interface called Azure OpenAI Studio, which allows you to deploy, manage, and explore machine learning models. To generate text or inference, it is necessary to deploy a model first. In Azure OpenAI Studio, you can choose from a variety of available models.
Follow the steps below to deploy a model:
- Log in to Azure OpenAI Studio.
- Choose the subscription and Azure OpenAI resource to work with and click on “Use resource.”
- Under “Management,” select “Deployments.”
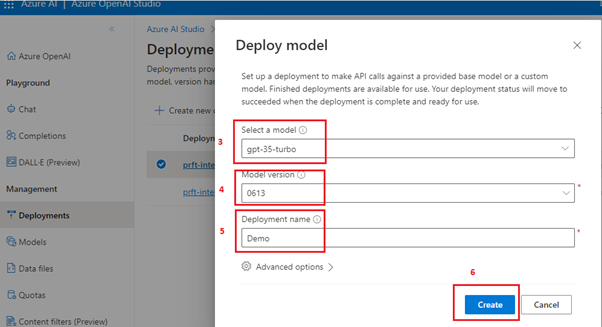
- Click on “Create new deployment” and configure the following fields:
- Select a model from the dropdown list.
- Enter a deployment name to help you identify the model.
- For your first deployment, leave the advanced options set to default.
- Click on “Create.”
After the deployment is complete, the model deployment status will change to “succeeded.”
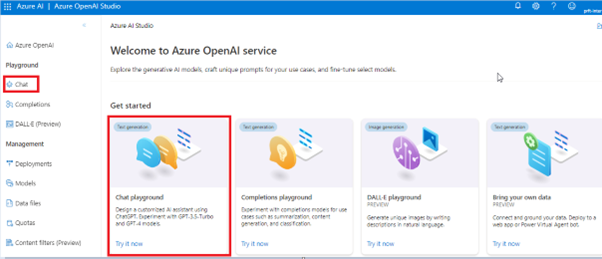
Using the Azure OpenAI Playground
The Chat Playground offers a chatbot interface for GPT models 3.5 and higher. It uses the ChatCompletions API instead of the older Completions API.
To complete the task, follow these steps:
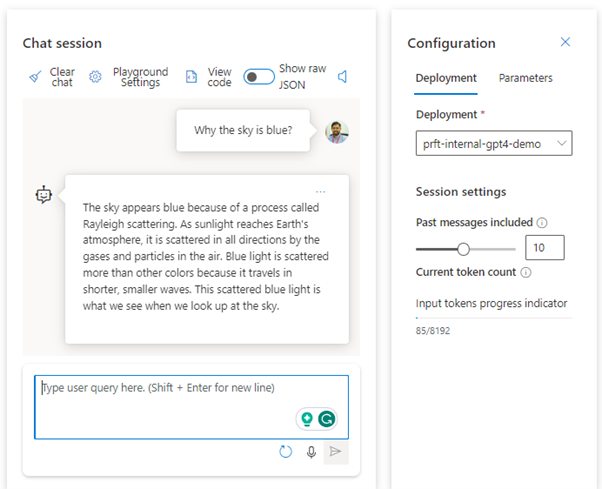
- Go to the Playground section and select the Chat page. Make sure that you have chosen your desired model in the configuration pane.
- Navigate to the Assistant setup section and replace the existing text in the System message box with the following statement: “The system serves as an AI-powered teacher that assists individuals in learning about AI.”
- Below the System message box, click on “Add few-shot examples” and enter the given message and response in the designated fields:
User: “Why the sky is blue?”
Assistant: “The sky appears blue because of a process called Rayleigh scattering. As sunlight reaches Earth’s atmosphere, it is scattered in all directions by the gases and particles in the air. Blue light is scattered more than other colors because it travels in shorter, smaller waves. This scattered blue light is what we see when we look up at the sky.”

Conclusion
Deploying a model, creating an Azure OpenAI service, and using the playground are simple processes that open the doors to the powerful world of AI. With Azure OpenAI, you have the necessary tools to build, deploy, and test AI models, bringing the power of artificial intelligence right at your fingertips. As Azure continues to evolve and improve, it is always recommended to refer to the official Microsoft Azure documentation for the most accurate and up-to-date information.
Reference
https://learn.microsoft.com/en-us/azure/ai-services/openai/faq
https://learn.microsoft.com/en-us/azure/ai-services/openai/how-to/create-resource?pivots=web-portal

