
In this blog post, my objective is to provide a comprehensive walkthrough of the elements required for effectively implementing Azure Infrastructure with Terraform using an Azure DevOps Pipeline.
The main purpose is to assist you in grasping the concept of automating the deployment and maintenance of your cloud infrastructure residing in Azure.
Before delving into the provided examples, taking a step back and comprehending the underlying reasons for the aforementioned concepts would be beneficial.
Undoubtedly, we are incorporating various technologies in this context, each with its own advantages and disadvantages. The purpose of this article, I believe, is to enhance our fundamental understanding of each aspect and strive for a deployment approach that is repeatable, secure, and reliable.
What’s the Rationale Behind Choosing “GitHub”?
GitHub serves as a publicly accessible Source Code control platform. I have established a “public” repository to make my code accessible for this article.
Keep in mind that GitHub is not the only option available, as Azure DevOps Repos offers similar Git functionality. I won’t delve into the reasons for using Git here, as there are numerous articles that explain it much better. However, it is generally agreed upon that having a source code repository for control, auditing, and version management is highly beneficial.
Why Opt for “Azure”?
As a cloud platform, Azure provides businesses with opportunities for growth and scalability while effectively managing costs and capacity. The advantages of cloud computing are vast, and although I won’t delve into the specifics here, let’s assume that Azure is a favorable environment to work in.
Why Choose “Terraform”?
Terraform, in simple terms, allows IT professionals and developers to utilize infrastructure as code (IaC) tools in a single language to effortlessly deploy to various cloud platforms. These platforms, referred to as “Providers” in Terraform, encompass a wide range of options, and Terraform boasts hundreds of providers, including Azure.
Terraform simplifies the deployment, destruction, and redeployment process by utilizing a “tfstate” file, which we will discuss further in this article. This file enables Terraform to keep track of the deployment’s state since the last update and implement only the necessary changes implied by code updates. Additionally, Terraform includes a feature called “PLAN” that provides a report on the anticipated changes before you proceed to “APPLY” them.
Furthermore, Terraform inherently offers benefits such as source control and version control by allowing you to define your infrastructure as code.
Why Opt for “Azure DevOps”?
Azure DevOps is a collection of technologies designed to enhance business productivity, reliability, scalability, and robustness when utilized correctly. DevOps is a complex concept that requires thorough understanding, as evident in my other blog posts. From my perspective, DevOps revolves around three fundamental principles: people, process, and technology. Azure DevOps primarily falls under the “Technology” aspect of this triad.
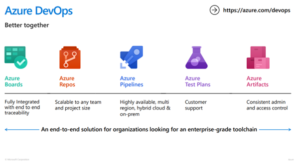
Azure DevOps provides a range of tools, and for the purpose of this article, we will be utilizing “Pipelines.” This tooling, combined with Azure DevOps, offers features that automate infrastructure deployment with checks based on triggers. Consequently, it ensures that our code undergoes testing and deployment within a designated workflow, if necessary. By doing so, it establishes an auditable, repeatable, and reliable mechanism, mitigating the risk of human errors and other potential issues.
Let’s Outline Our Plan:
By bringing together the four key components discussed in this article (GitHub, Azure, Terraform, and Azure DevOps), we can harness a set of technologies that empower us to design and automate the deployment and management of infrastructure in Azure. As IT professionals, we can all appreciate the value and advantages of streamlining the design, deployment, and automation processes for any company.
We will focus on deploying a foundational landing zone into our Azure Subscription. Here are the essential components required to achieve this:
1. GitHub Repository: We’ll utilize a GitHub repository to store our code and make it accessible.
2. Azure Subscription: We need an Azure Subscription to serve as the environment where we will deploy our infrastructure.
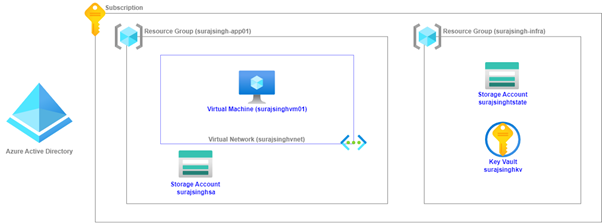
3.1. Terraform Code (local deployment): We’ll use Terraform code, executed from our local machine (surajsingh-app01), to deploy the following Azure infrastructure components:
- Resource Group
- Virtual Network
- Virtual Machine
- Storage Account
3.2. Terraform Code (shared state deployment): Additionally, we’ll employ Terraform code that deploys Azure infrastructure while utilizing a shared state file.
Azure DevOps Organization: We’ll set up an Azure DevOps Organization, which provides a platform for managing our development and deployment processes.
Azure DevOps Pipeline: Within our Azure DevOps Organization, we will configure a pipeline to automate the deployment of our infrastructure.
By following this approach, we can establish a solid foundation for our Azure environment, allowing for efficient management and automation of infrastructure deployment.
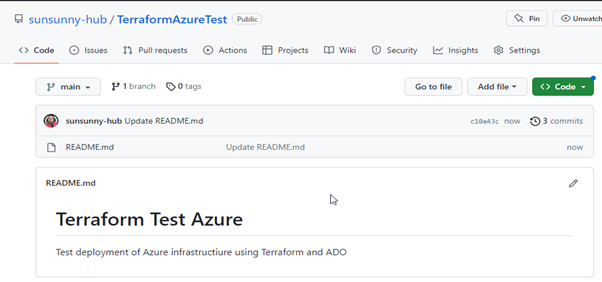
1.1 – Establish Your GitHub Repository and Duplicate It to Your Local Computer
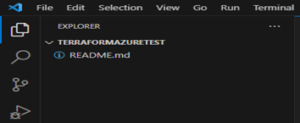
After logging into github.com, I successfully created a basic repository containing a README.md file. You can access the repository at the following URL: https://github.com/sunsunny-hub/AzureTerraformDeployment.
1.2 – Duplicate the Repository to Your Local Machine for Utilization in VSCode
To facilitate interaction and modification of your Terraform code on your local computer, you can clone the recently created GitHub Repository and employ your local machine to edit files and commit changes back to the repository on GitHub.
- To begin, launch VSCode
- Press CTRL + Shift + p
- Enter the URL of your GitHub Repository. (Note: If you do not have the GitHub VSCode extension, you can install it from the extensions tab in VSCode.)

- Choose a location on your local machine for the cloned repository.
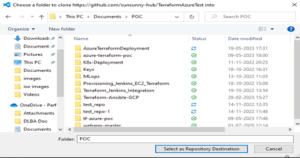
- Open the cloned repository on your local machine using VSCode.

2 – Azure Subscription
Ensure that you have the necessary permissions and access to an Azure Subscription that can be used for deploying infrastructure. If you do not currently possess a subscription, you have the option to sign up for a complimentary trial by visiting the AZURE FREE TRIAL page.
This free trial gives you the following:

3.1 – Terraform Code for Deploying Azure Infrastructure from Local Machine
Now, let’s proceed with creating our Terraform code. We will develop and test it on our local machine before making any modifications for deployment through Azure DevOps Pipelines. The steps below assume that you have already installed the latest Terraform module on your local machine. If you haven’t done so, you can refer to the provided guide for assistance. Additionally, it is assumed that you have installed the AZCLI (Azure Command-Line Interface).

To begin, open the VSCode Terminal and navigate to the folder of your newly cloned repository on your local machine. Once there, type ‘code .’ (including the period) to open our working folder in VS Code.
Next, enter the command ‘az login’ in the Terminal.
![]()
This action will redirect you to an OAUTH webpage, where you can enter your Azure credentials to authenticate your terminal session. It is important to note that, at this stage, we are authenticating our local machine in order to test our Terraform code before deploying it using Azure DevOps Pipelines.
In some accounts you have MFA enabled so you may need to log in with Tenant Id, use below cmd for logging in ‘az login –tenant TENANT_ID’.

After successful authentication, you will receive your subscription details in JSON format. If you have multiple subscriptions, you will need to set the context to the desired subscription. This can be done using either the Subscription ID or the Subscription name.
For example, to set the context for my subscription, I would use the following command: ‘az account set –subscription ” Subscription ID or Subscription name “‘
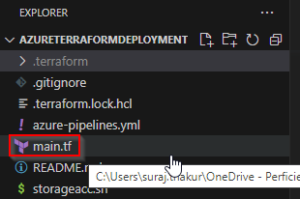
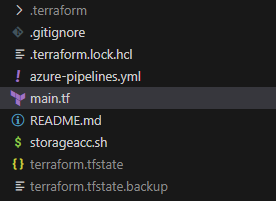
Now, let’s move on to our Terraform Code. In order to keep this deployment simple, I will store all the configurations in a single file named ‘main.tf’. To create this file, right-click on your open folder and select ‘New File’, then name it ‘main.tf’.
The initial Terraform code I will use to create the infrastructure is as follows:
main.tf
terraform {
required_providers {
azurerm = {
Specify what version of the provider we are going to utilise
source = “hashicorp/azurerm”
version = “>= 2.4.1”
}
}
}
provider “azurerm” {
features {
key_vault {
purge_soft_delete_on_destroy = true
}
resource_group {
prevent_deletion_if_contains_resources = false
}
}
}
data “azurerm_client_config” “current” {}
Create our Resource Group – surajsingh-RG
resource “azurerm_resource_group” “rg” {
name = “surajsingh-app01”
location = “UK South”
}
Create our Virtual Network – surajsingh-VNET
resource “azurerm_virtual_network” “vnet” {
name = “surajsinghvnet”
address_space = [“10.0.0.0/16”]
location = azurerm_resource_group.rg.location
resource_group_name = azurerm_resource_group.rg.name
}
Create our Subnet to hold our VM – Virtual Machines
resource “azurerm_subnet” “sn” {
name = “VM”
resource_group_name = azurerm_resource_group.rg.name
virtual_network_name = azurerm_virtual_network.vnet.name
address_prefixes = [“10.0.1.0/24”]
}
Create our Azure Storage Account – surajsinghsa
resource “azurerm_storage_account” “surajsinghsa” {
name = “surajsinghsa”
resource_group_name = azurerm_resource_group.rg.name
location = azurerm_resource_group.rg.location
account_tier = “Standard”
account_replication_type = “LRS”
tags = {
environment = “surajsinghrox”
}
}
Create our vNIC for our VM and assign it to our Virtual Machines Subnet
resource “azurerm_network_interface” “vmnic” {
name = “surajsinghvm01nic”
location = azurerm_resource_group.rg.location
resource_group_name = azurerm_resource_group.rg.name
ip_configuration {
name = “internal”
subnet_id = azurerm_subnet.sn.id
private_ip_address_allocation = “Dynamic”
}
}
Create our Virtual Machine – surajsingh-VM01
resource “azurerm_virtual_machine” “surajsinghvm01” {
name = “surajsinghvm01”
location = azurerm_resource_group.rg.location
resource_group_name = azurerm_resource_group.rg.name
network_interface_ids = [azurerm_network_interface.vmnic.id]
vm_size = “Standard_B2s”
storage_image_reference {
publisher = “MicrosoftWindowsServer”
offer = “WindowsServer”
sku = “2016-Datacenter-Server-Core-smalldisk”
version = “latest”
}
storage_os_disk {
name = “surajsinghvm01os”
caching = “ReadWrite”
create_option = “FromImage”
managed_disk_type = “Standard_LRS”
}
os_profile {
computer_name = “surajsinghvm01”
admin_username = “surajsingh”
admin_password = “Password123$”
}
os_profile_windows_config {
}
}
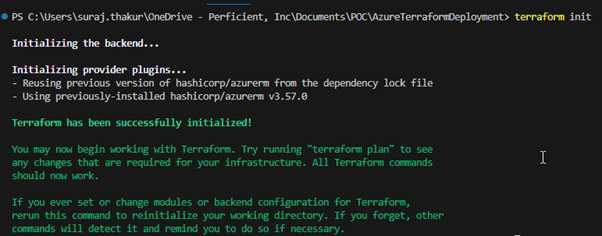
We will begin by executing the ‘Terraform INIT’ command.
Next, we will assess the actions that Terraform intends to perform in our Azure environment by running the ‘Terraform PLAN’ command. Although the actual output exceeds the content displayed in this screenshot, the provided snippet represents the initial portion, while the following snippet represents the concluding part.
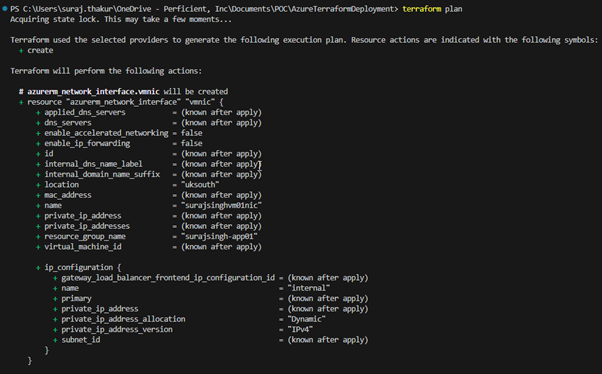
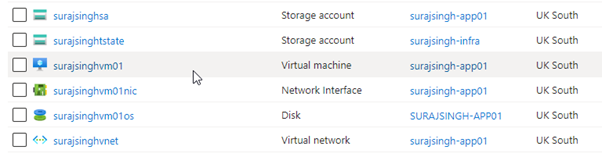
Upon examining the output, it becomes evident that the ‘PLAN’ command displays on the screen the operations that will be executed in our environment. In my case, it involves adding a total of 6 items.

Now, let’s test the successful deployment from our local machine using the ‘Terraform APPLY’ command. The execution of this command will take a couple of minutes, but upon completion, you should observe that all the expected resources are present within the resource group.
At this point, we have verified the functionality of our Terraform code, which is excellent news. However, it is worth noting that during the execution of the ‘Terraform APPLY’ command, several new files were generated in our local folder.
Of particular importance is the ‘terraform.tfstate’ file, which contains the current configuration that has been deployed to your subscription. This file serves as a reference for comparing any discrepancies between your Terraform code and the ‘main.tf’ file. Therefore, it is crucial to recognize that currently, making any changes to our environment requires the use of the local PC. While this approach suffices for personal or testing purposes in a small-scale environment, it becomes inadequate for collaboration or utilizing services like Azure DevOps Pipelines to execute commands. Consequently, there is a need to store the state file in a centralized location accessible to all stakeholders, ensuring the secure storage of credentials and appropriate updates to the Terraform code.
This is precisely what we will explore in the upcoming section. In preparation, we can leverage the ‘Terraform DESTROY’ command to remove all infrastructure from our subscription, thereby enabling us to focus on relocating our state file to a centralized location.
3.2 – Terraform Code for Deploying Azure Infrastructure with a Shared State File
The subsequent phase in this process involves segregating the Terraform State file and relocating it to a centralized location, such as an Azure Storage account.
This endeavor entails considering a few essential aspects:
- The storage account must be established prior to applying the Terraform code. To accomplish this, we will utilize a bash script as a one-time activity.
- Terraform accesses this Storage account through a Shared Secret key, which necessitates proper protection. It should not be stored within a script or, certainly, within a Git Repository. We will explore alternative options for securely storing this key.
To begin, our initial task is to create the storage account and container that will house our Terraform State File. This can be achieved by executing the following Bash script:
#!/bin/bash
RESOURCE_GROUP_NAME=surajsingh-infra
STORAGE_ACCOUNT_NAME=surajsinghtstate
CONTAINER_NAME=tstate
Create resource group
az group create –name $RESOURCE_GROUP_NAME –location uksouth
Create storage account
az storage account create –resource-group $RESOURCE_GROUP_NAME –name $STORAGE_ACCOUNT_NAME –sku Standard_LRS –encryption-services blob
Get storage account key
ACCOUNT_KEY=$(az storage account keys list –resource-group $RESOURCE_GROUP_NAME –account-name $STORAGE_ACCOUNT_NAME –query ‘[0].value’ -o tsv)
Create blob container
az storage container create –name $CONTAINER_NAME –account-name $STORAGE_ACCOUNT_NAME –account-key $ACCOUNT_KEY
echo “storage_account_name: $STORAGE_ACCOUNT_NAME”
echo “container_name: $CONTAINER_NAME”
echo “access_key: $ACCOUNT_KEY”
After executing the script, it is crucial to take note of the exported values for future use:
- storage_account_name: surajsinghtstate
- container_name: tstate
- access_key: UeJRrCh0cgcw1H6OMrm8s+B/AGCCZIbER5jaJUAYnE8V2tkzzm5/xSCILXikTOIBD6hrcnYGQXbk+AStxPXv+g==
The access_key attribute represents the name of our state file, which is automatically generated during the initial run. Take note of the forward slash (‘/’) within the path provided.
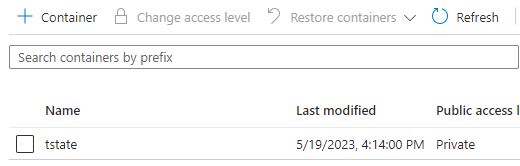
Upon checking our Azure subscription, we can confirm the successful creation of the storage account and container, which are now ready to accommodate our Terraform State file.

Configure State Backend in Terraform
Excellent! Our next objective is to modify the main.tf Terraform script to enable Terraform to utilize the shared state location and access it through the Key Vault. This can be achieved by configuring what is commonly referred to as the ‘state backend’. As mentioned earlier, one option would be to directly include the Storage Account access key in our Terraform file. However, this approach is not considered best practice since our main.tf file will be stored in a Git Repository, raising security concerns. Hence, the implementation of a Key Vault.
For now, until we transition to Azure DevOps Pipelines, we will create the backend configuration using the raw Access Key. This step is performed to showcase the process.
To achieve this, we simply need to add the following code snippet to our terraform main.tf file. By doing so, Terraform will be able to store the state file in a centralized location, namely our Azure Storage Account.
backend “azurerm” {
resource_group_name = “surajsingh-infra”
storage_account_name = “surajsinghtstate”
container_name = “tstate”
key = “UeJRrCh0cgcw1H6OMrm8s+B/AGCCZIbER5jaJUAYnE8V2tkzzm5/xSCILXikTOIBD6hrcnYGQXbk+AStxPXv+g==”
}
If we execute Terraform INIT and Terraform PLAN now, we should witness a successful creation of the plan:
![]()
In fact, our state file no longer exists locally. If we check the container within our Azure storage account, we can confirm its presence!
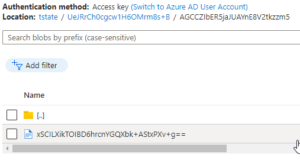
This is a success!
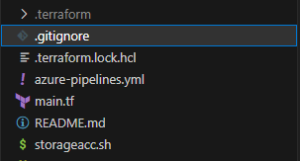
Ensure that you commit and push your changes to your GitHub Repo. For this particular step, I have included a ‘.gitignore’ file to prevent the upload of certain files, such as the Terraform Provider EXE, into GitHub.
4 – Azure DevOps Organization
Now that we have successfully deployed our infrastructure using a shared location for our Terraform State, our next step is to automate this process based on triggers from the ‘main’ branch of our GitHub repo.
Additionally, we need to remove the Storage Account Access Key as part of the following procedure.
To begin, we must set up an Azure DevOps Organization. Visit the following site:
I have set up my Organization as follows:
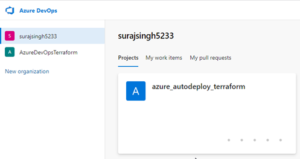
Surajsingh5233 and azure_autodeploy_terraform are the Organizations and Projects I have created for the purposes of this article.
5 – Azure DevOps Pipeline
Firstly, we need to create a Service Principal Name (SPN) to allow our Azure DevOps Organization project to deploy our environment.
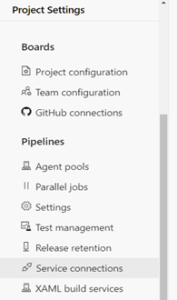
Within our Azure DevOps Project, navigate to Project Settings -> Service Connections.
Click on ‘Create Service Connection’ -> ‘Azure Resource Manager’ -> ‘Next’.
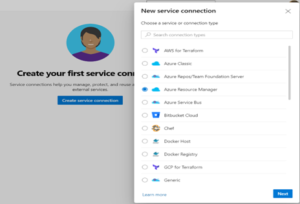
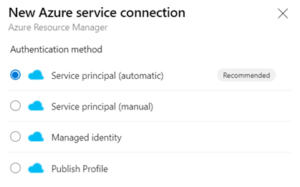
Then select ‘Service principal (automatic)’ -> ‘Next’.
These are the scope settings used for my SPN:
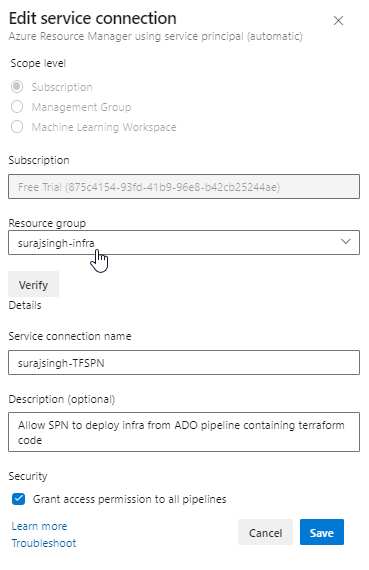
You can verify the configuration of your SPN by reviewing the following output:
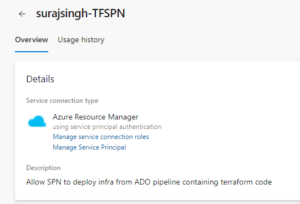
Here is our Managed Service Principal in Azure:
![]()
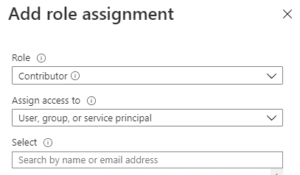
For the purpose of this article, I will grant this SPN Contributor access to my subscription.
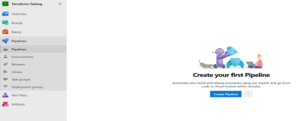
With all these components in place, it is now time to create our pipeline.
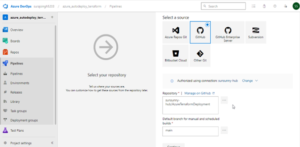
Select ‘Pipelines’ -> ‘Create Pipeline’.
For this example, I will use the classic editor as it simplifies the process for those unfamiliar with YAML files.
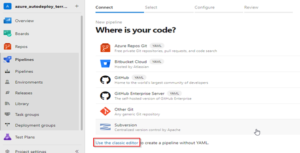
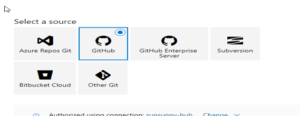
Select ‘GitHub’ and log in.
Log in to your GitHub Account.

Scroll down to ‘Repository Access’ and select your repo, then click ‘Approve and Install’.
This will authorize Azure DevOps to access your GitHub Repo. Next, we want to select ‘GitHub’.
For the purpose of this article, we will set up a single stage in our pipeline which will run the following tasks:
- Install Terraform
- Run Terraform INIT
- Run Terraform PLAN
- Run Terraform VALIDATE
- Run Terraform APPLY to deploy our infrastructure to our subscription.
This pipeline run will trigger a code commit to our ‘main’ branch in the repo.
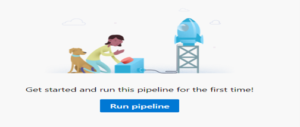
To begin creating our pipeline, select ‘Empty Pipeline’.
![]()
We are then presented with a pipeline to start building.
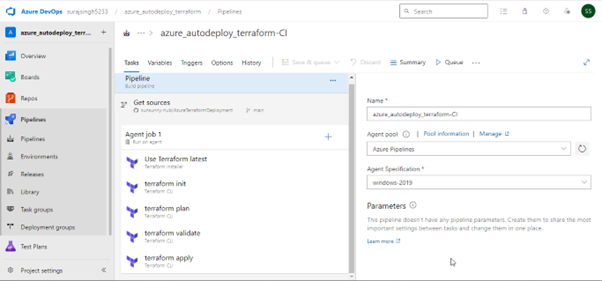
Next, we want to select each task and configure them as follows:
Install Terraform
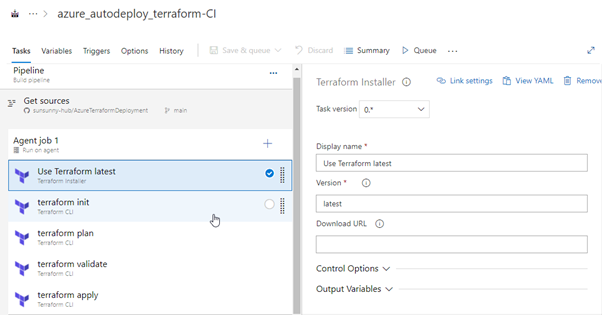
Terraform: INIT
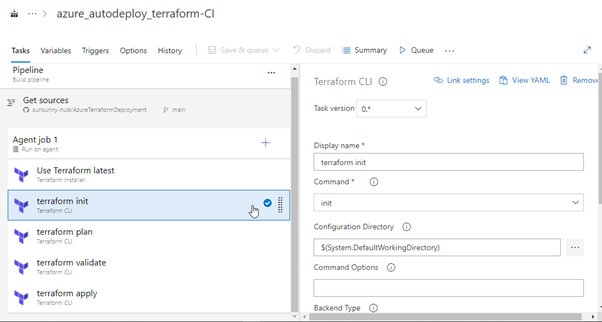
In this task, we can configure the Terraform backend that we have in our main.tf as follows:
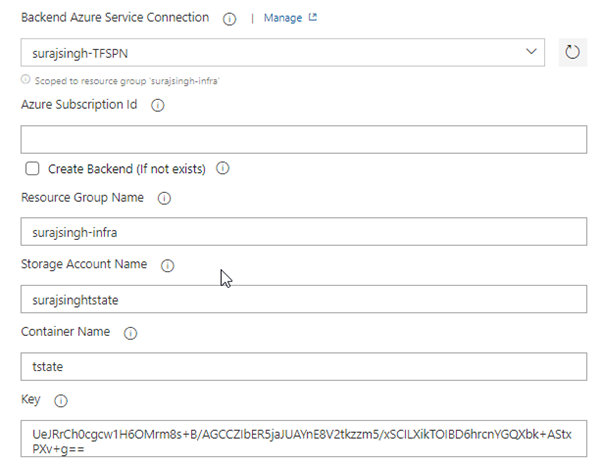
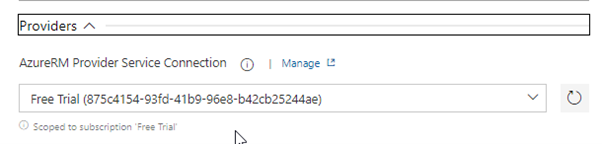
Terraform: PLAN

Make sure you provide the proper subscription in the Providers option.
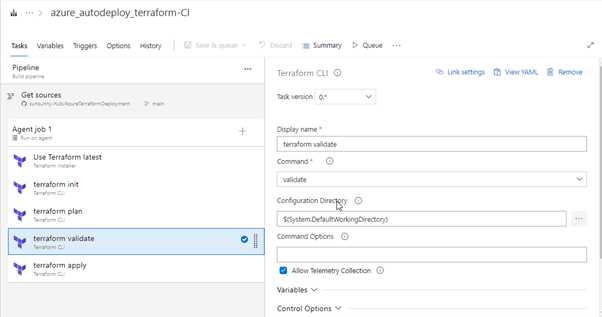
Terraform: VALIDATE
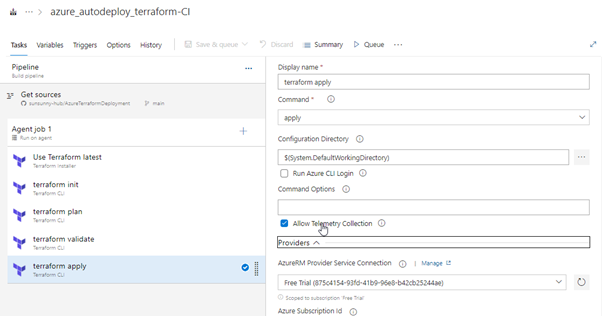
Terraform: APPLY
Once we have completed the configuration, we can save it, and a pipeline ready to run will be displayed.
To manually start the pipeline, we can select:
However, in the spirit of CI/CD, we can modify the CI-enabled flag on our pipeline.
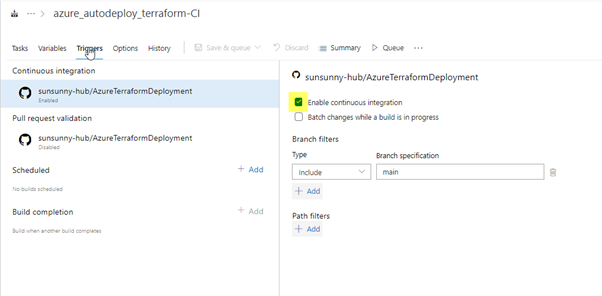
Now, when we modify our code and commit it to our ‘master’ branch in GitHub, this pipeline will automatically run and deploy our environment for us. I commit a change via VS Code and push it to my GitHub Repo.
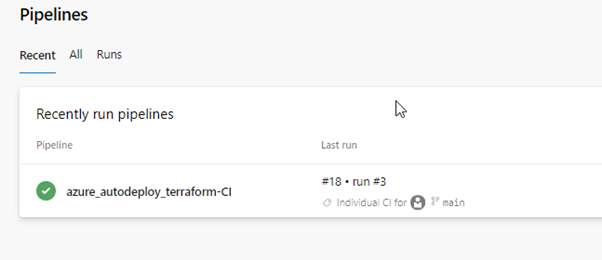
There we have it! Our pipeline is triggered by the commit and push.
We need to wait for all our tasks to complete and hope that there are no errors.
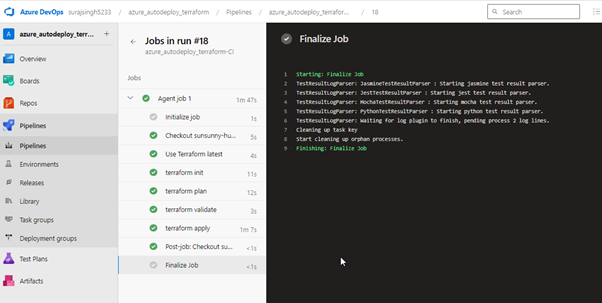
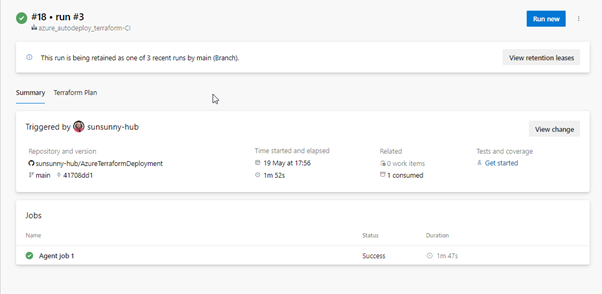
Our job has been completed successfully.
If we check our Azure Subscription, we can see that our application infrastructure has been deployed as expected.
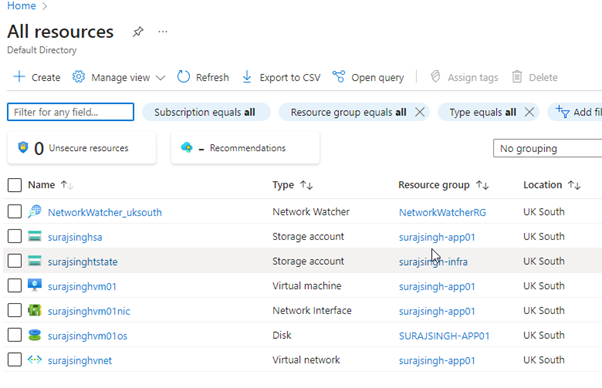
SUCCESS!
Conclusion
Congratulations on making it to the end of this article, and thank you for following along! I genuinely hope that this guide has been helpful in assisting you with creating your first Azure DevOps Pipeline.
Although we haven’t explored YAML in this article, it is worth mentioning that the pipeline is actually created as a file with a .yaml extension. This opens up even more intriguing concepts, which I won’t delve into here.
The next steps from here would be to explore YAML and the ability to check it into your Git Repo.
Additionally, we could delve into the capability of Azure DevOps to apply branch protection. In reality, you wouldn’t directly commit changes to the ‘main’ or ‘master’ branch. Implementing measures such as requiring approvals and using pull requests can help ensure that our main application isn’t accidentally overwritten. Once again, congratulations on reaching the end, and best of luck with your future endeavors!
Very good explanation
Very well explained Suraj !