
Automated testing is the foundation of your continuous integration practice. Automated testing clarifies the status of build processes for your team’s applications, ensures that tests run on every commit or pull request, and guarantees that you can make quick bug fixes before deploying to the production environment.
In this tutorial, I will show you how to automate the testing of an Angular application. Angular is a framework written entirely in TypeScript and popular for building Single Page Applications (SPA) of any size or complexity. Created and open-sourced by Google, Angular provides a standard structure for building web applications.
I will lead you through building a simple Angular application that retrieves a list of dummy users. The list comes from a free, fake RESTful API named JSONPlaceholder that is often used for testing and prototyping.
Prerequisites
For this tutorial, you will need:
- Node.js installed on your system
- Angular CLI installed globally
- A CircleCI account
- A GitHub account
- Basic knowledge of building web applications with Angular
- Familiarity with TypeScript
This tutorial was tested with these versions:
- Angular CLI: 13.2.2
- Node: 16.13.2
- Package Manager: npm 8.1.2
- OS: darwin x64
Our tutorials are platform-agnostic, but use CircleCI as an example. If you don’t have a CircleCI account, sign up for a free one here.
Getting started
To begin, scaffold a new Angular application by running this command:
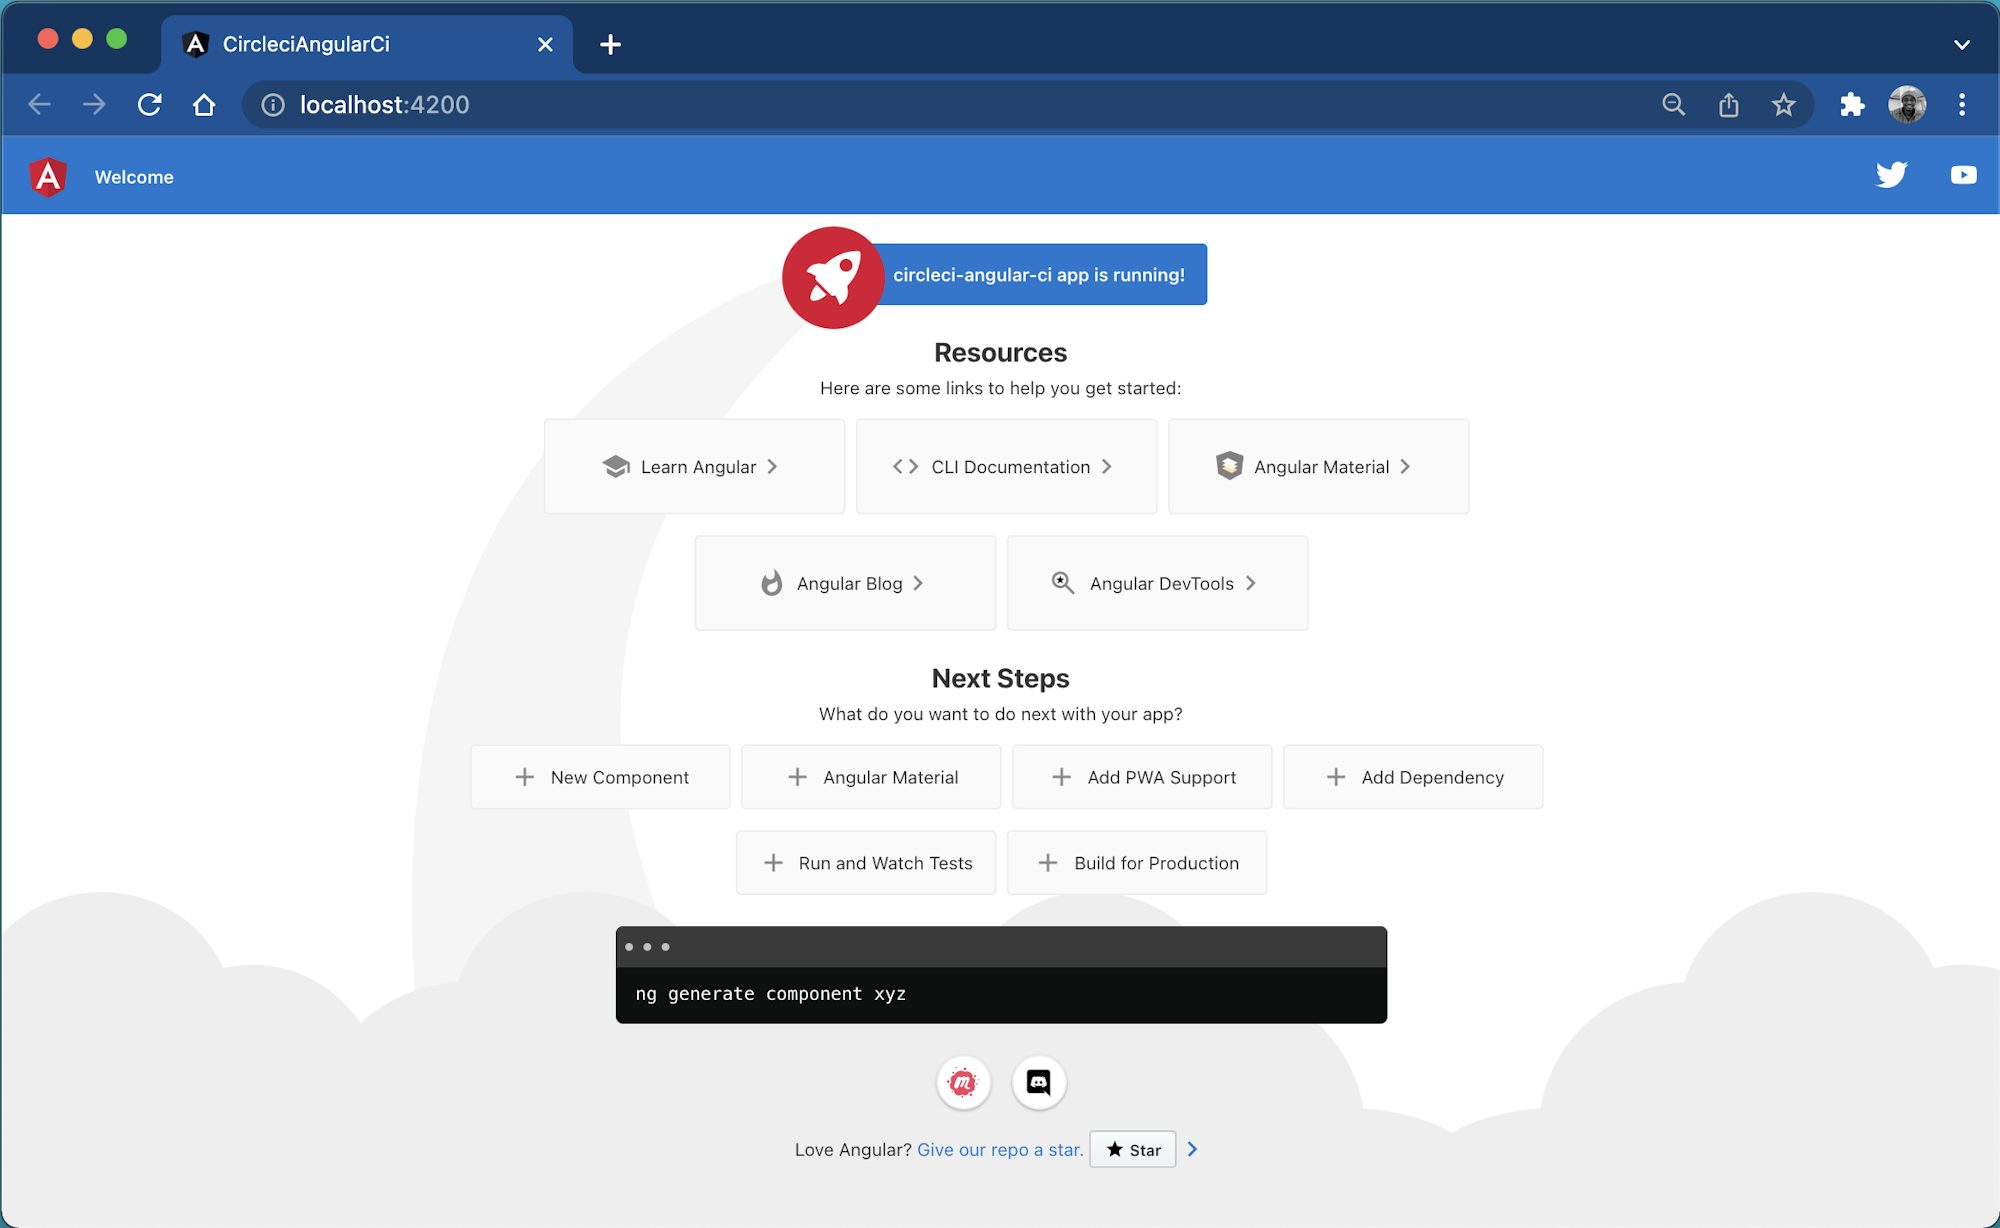
ng new circleci-angular-ci
You will be prompted to respond to some questions:
- Type No to ignore Angular routing. It is not needed for this tutorial.
- Select the CSS option as the stylesheet format.
- Press Enter and wait for the new application to be scaffolded by the Angular CLI.
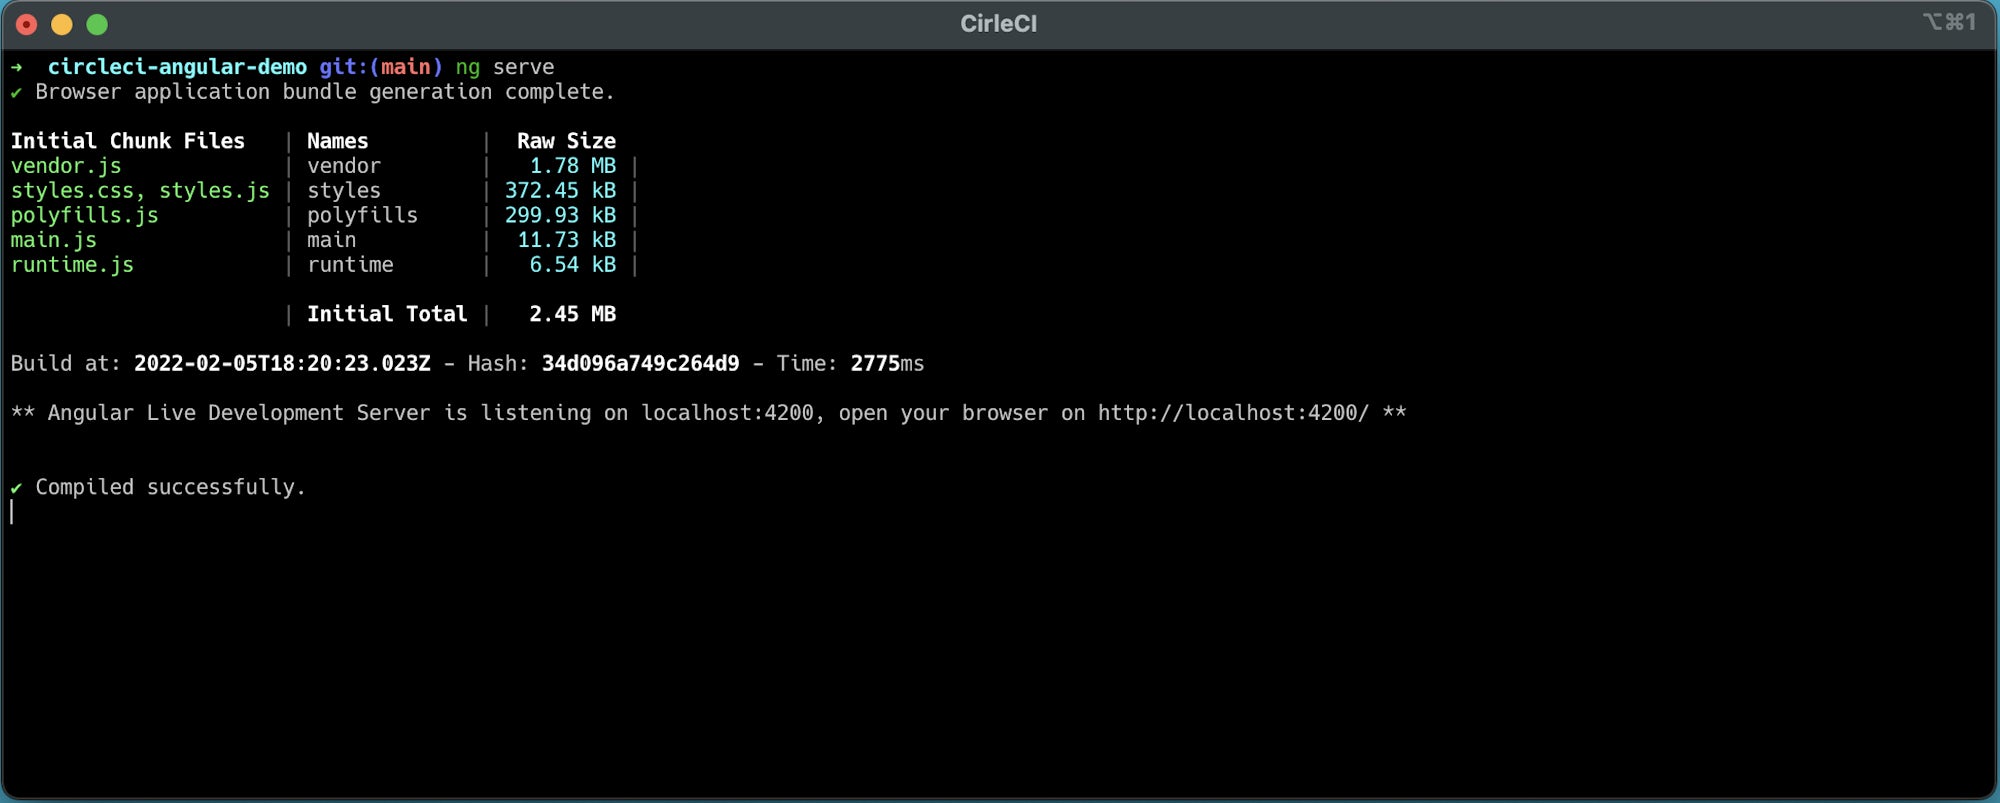
When the installation is completed, a new folder named circleci-angular-ci will be created in your development folder (or whenever you ran the previous command from). Go to the newly created Angular application and run it using these commands:
// navigate into the folder
cd circleci-angular-ci

// run the application
ng serve
Use a browser to go to the application on the default URL: http://localhost:4200.
Creating the user service
As I mentioned earlier, this demo application retrieves a dummy list of users from a third-party API. For an Angular application, standard practice is to abstract business logic and communication with a third-party API to a service. This practice promotes code reusability.
To create a service using the Angular CLI, run this command:
ng g service service/user
This command generates a new service named UserService within user.service.ts. It also creates a file for testing named user.service.spec.ts within the src/app/service folder.
Start by modifying the content of the src/app/service/user.service.ts file. Replace it with this:
import { HttpClient } from "@angular/common/http";
import { Injectable } from "@angular/core";
import { User } from "../user";

@Injectable({
  providedIn: "root",
})
export class UserService {
  apiURL: string = "https://jsonplaceholder.typicode.com/users";

  constructor(private httpClient: HttpClient) {}

  public getUsers() {
    return this.httpClient.get<User[]>(`${this.apiURL}`);
  }
}
These required packages were imported:
HttpClientis used in Angular to provide a client HTTP protocol that enhances communication between the client side and the server.Injectableis a decorator that makes a class available to be provided and injected as a dependency.
The endpoints where the lists of users will be retrieved from were defined, and a method named getUser() was created. This method will return the JSON results containing the list of users from the API.
Before you can use HttpClient for communicating with an API in your project, you need to import the HttpClientModule within the root AppModule. Open src/app/app.module.ts and modify it as shown here:
import { NgModule } from "@angular/core";
import { BrowserModule } from "@angular/platform-browser";
import { HttpClientModule } from "@angular/common/http";
import { AppComponent } from "./app.component";

@NgModule({
  declarations: [AppComponent],
  imports: [BrowserModule, HttpClientModule],
  providers: [],
  bootstrap: [AppComponent],
})
export class AppModule {}
Creating a user interface
In the previous section, we referenced a file named user.ts within the UserService. This is an interface that helps to identify the datatype of each of the properties expected to be returned by the API. Create a new file named user.ts within the src/app folder and populate it with this content:
export interface User {
  id: number;
  name: string;
  email: string;
  phone: string;
  website: string;
  address: {
    street: string;
    suite: string;
    city: string;
    zipcode: string;
  };
}
Modifying the app component
Modify the app component by injecting the UserService into it via dependency injection. Then, use it to retrieve the list of users.
import { Component } from "@angular/core";
import { User } from "./user";
import { UserService } from "./service/user.service";

@Component({
  selector: "app-root",
  templateUrl: "./app.component.html",
  styleUrls: ["./app.component.css"],
})
export class AppComponent {
  title = "List Of dummy users";

  constructor(private userService: UserService) {}

  users: User[] = [];

  ngOnInit(): void {
    this.userService.getUsers().subscribe((res) => {
      this.users = res;
      return this.users;
    });
  }
}
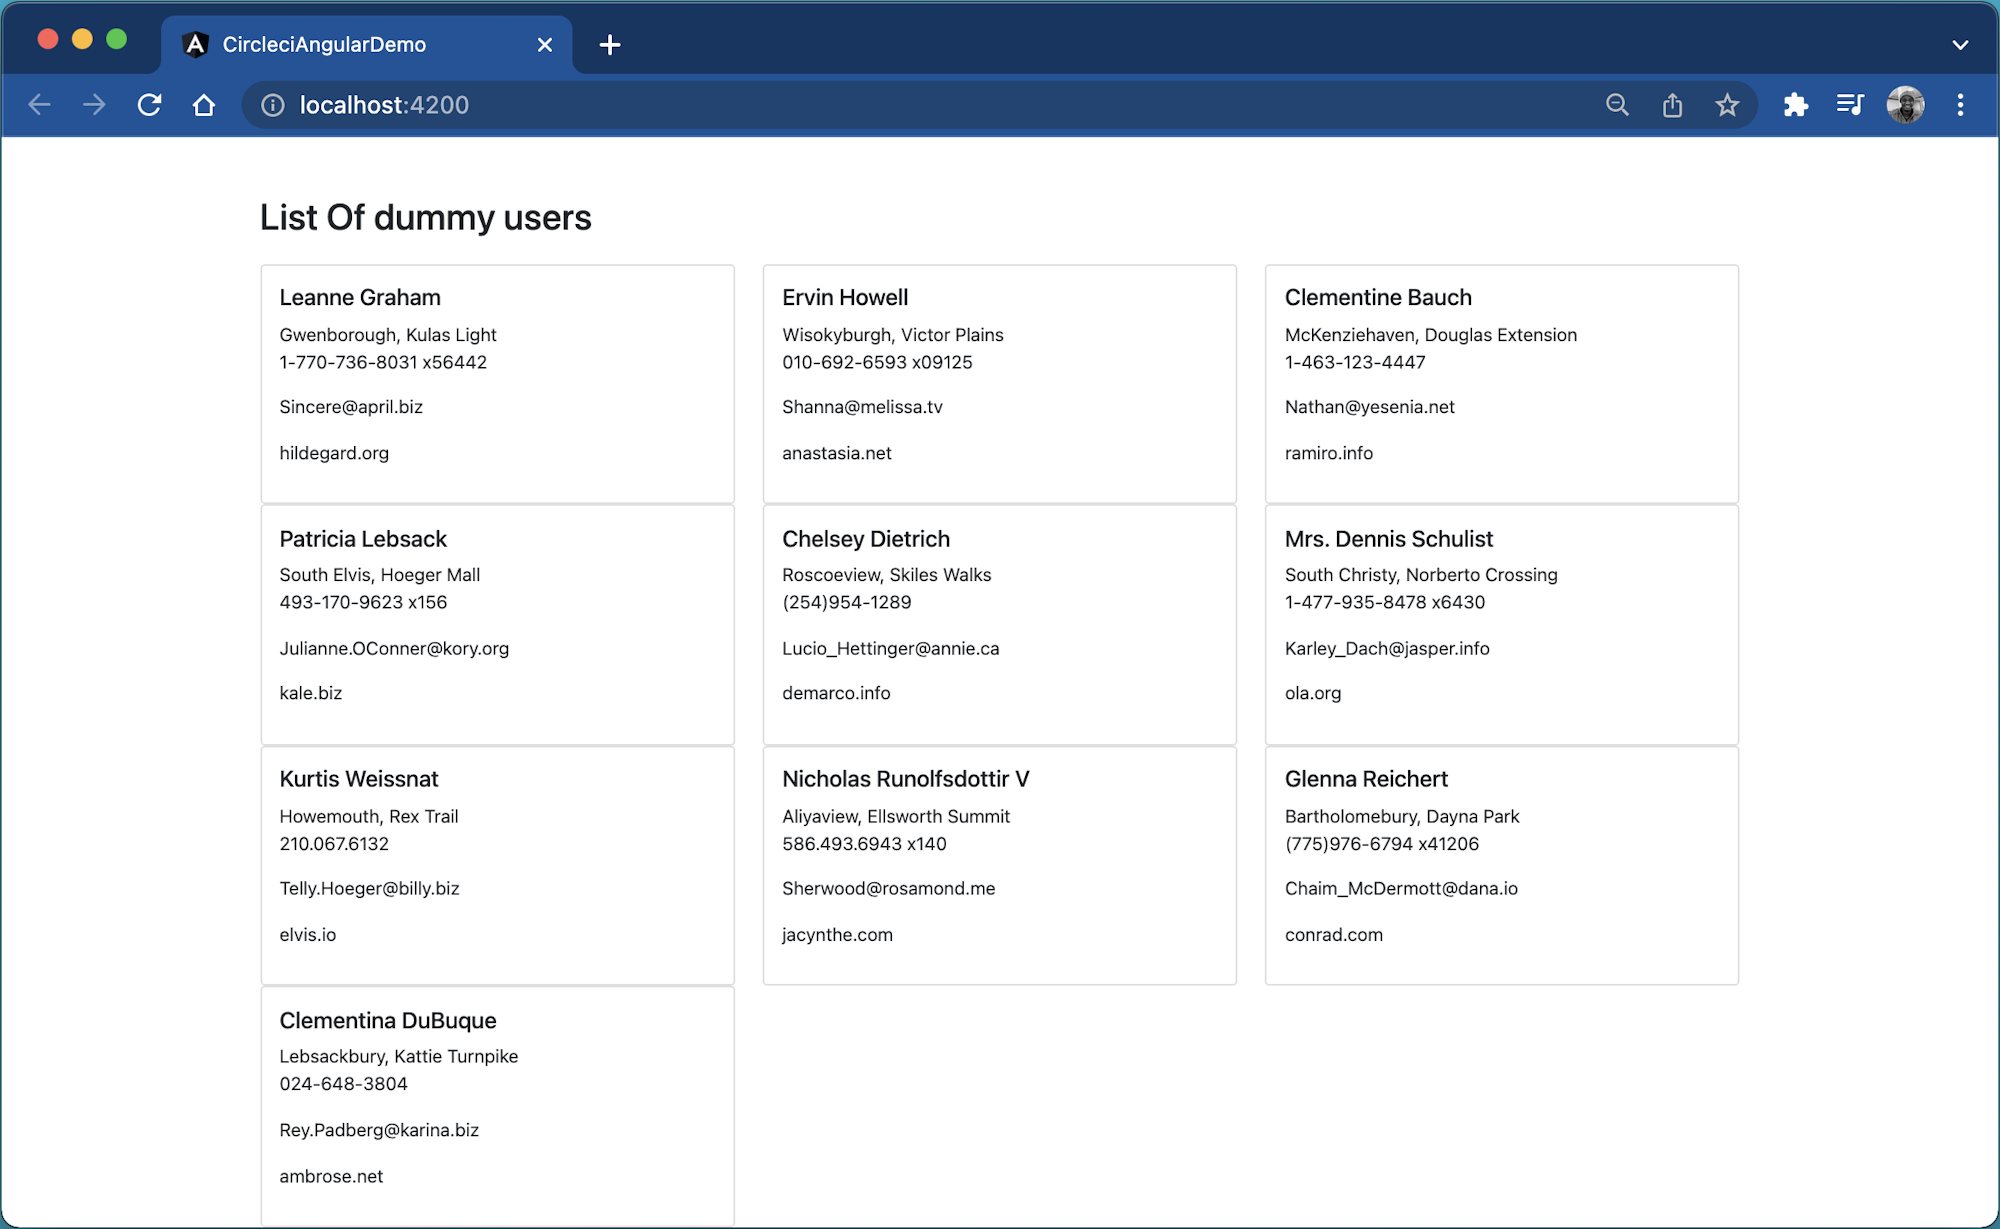
Displaying the list of users
Next, open the src/app/app.component.html file and replace its content with this:
<div class="page-content">
  <div class="container content-wrapper">
    <div class="page-title">
      <h2>{{ title }}</h2>
    </div>
    <div class="row">
      <div *ngFor="let user of users" class="col-md-4">
        <div class="card">
          <div class="card-body">
            <h5 class="card-title">{{ user.name }}</h5>
            <div class="card-text">
              <span>{{ user.address.city }}, {{ user.address.street }}</span>
            </div>
            <div>
              <p>{{ user.phone }}</p>
              <p>{{ user.email }}</p>
              <p>{{ user.website }}</p>
            </div>
          </div>
        </div>
      </div>
    </div>
  </div>
</div>
In this snippet, we iterated over the list of users and rendered it for display in HTML.
Adding style to the application
To style the application for this tutorial, we will use Bootstrap. Issue this command to install Bootstrap via NPM:
npm install bootstrap
After the installation, open the angular.json file. Include the bootstrap.css file in it as shown here:
"styles": [
      "./node_modules/bootstrap/dist/css/bootstrap.css",
      "src/styles.css"
],
Include extra custom style by opening style.css. Add this content:
.page-content {
  margin-top: 100px;
}
.content-wrapper {
  display: grid;
  grid-template-columns: repeat(auto-fill, minimax(305px, 1fr));
  grid-gap: 15px;
}
Stop the application by pressing CTRL + C from the terminal. Start it again with ng serve so the new stylesheet changes to take effect.
You have your list of users, complete with stylesheet changes.
Your Angular application is up and running. Now it is time to start writing scripts to test UserService and the AppComponent
Testing the user service and app component
Within the AppComponent, the app must be created and display the appropriate title. To make sure that happens, open src/app/app.component.spec.ts and replace its content with:
import { TestBed } from "@angular/core/testing";
import { AppComponent } from "./app.component";
import { HttpClientModule } from "@angular/common/http";
import { UserService } from "./service/user.service";

describe("AppComponent", () => {
  beforeEach(async () => {
    await TestBed.configureTestingModule({
      declarations: [AppComponent],
      providers: [UserService],
      imports: [HttpClientModule],
    }).compileComponents();
  });

  it("should create the app", () => {
    const fixture = TestBed.createComponent(AppComponent);
    const app = fixture.componentInstance;
    expect(app).toBeTruthy();
  });

  it(`should have as title 'List Of dummy users'`, () => {
    const fixture = TestBed.createComponent(AppComponent);
    const app = fixture.componentInstance;
    expect(app.title).toEqual("List Of dummy users");
  });
});
Next, UserService will test that the *getUsers()* method returns the list of users as expected. To demonstrate that, you will create an array of user objects with the structure we are expecting from the API.
Replace the content of src/app/service/user.service.spec.ts with:
import { TestBed } from "@angular/core/testing";
import { UserService } from "./user.service";
import { HttpClientModule } from "@angular/common/http";
import { User } from "../user";

describe("UserService", () => {
  let service: UserService;

  beforeEach(() => {
    TestBed.configureTestingModule({
      imports: [HttpClientModule],
      providers: [UserService],
    });
    service = TestBed.inject(UserService);
  });

  it("should be created", () => {
    expect(service).toBeTruthy();
  });

  it("should be able to retrieve the list of users", () => {
    const dummyUsers: User[] = [
      {
        id: 1,
        name: "Oluyemi",
        email: "yem@me.com",
        phone: "43434343",
        website: "me.com",
        address: {
          street: "sample street",
          suite: "29",
          city: "Abuja",
          zipcode: "23401",
        },
      },
      {
        id: 1,
        name: "Temi",
        email: "tem@me.com",
        phone: "55242",
        website: "tems.com",
        address: {
          street: "Tems street",
          suite: "45",
          city: "LAgos",
          zipcode: "23401",
        },
      },
    ];

    service.getUsers().subscribe((users) => {
      expect(users.length).toBe(10);
      expect(users).toEqual(dummyUsers);
    });

    expect(dummyUsers).toHaveSize(2);
  });
});
This code imported all the packages needed to provide an environment to run all the tests. It also initialized the component under test with its dependencies in the “beforeEach” method. For the getUsers() method, we expect the length to be 10 and the structure of each object within the users list to be equal to that of the *dummyUsers* array.
Running the test locally
Next, confirm that the tests you defined are working as expected. Issue this command from the terminal:
npm run test
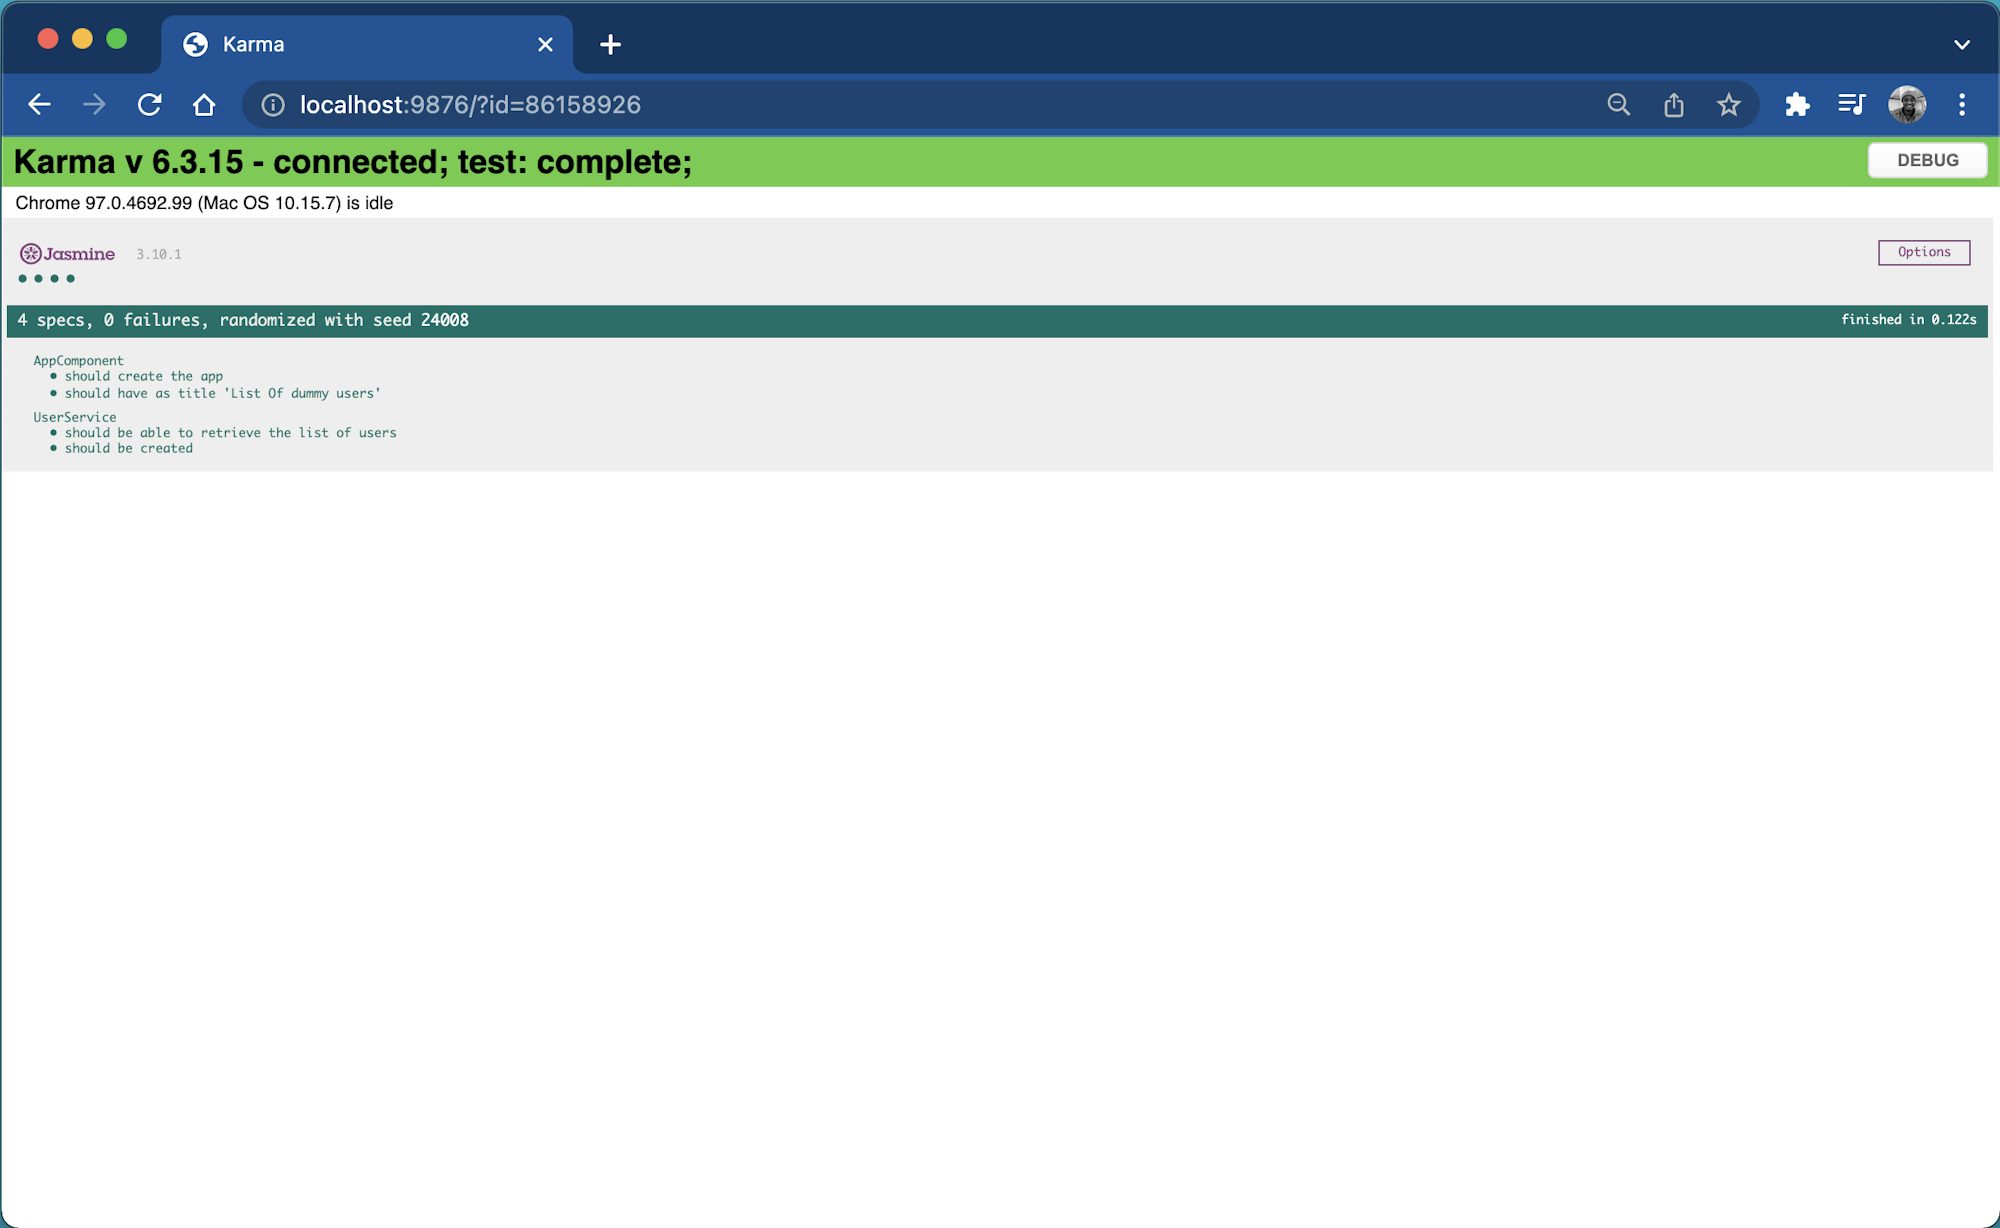
This will build the application in watch mode and launch the Karma test runner. It also opens a Chrome browser to display the test output.
While this might be acceptable locally, you probably do not want to launch a browser when automating tests with CircleCI. To adjust this, you can use Headless Chrome, which is a way to run the Chrome browser in an environment without the full browser UI. Update the scripts object within the package.json file like this:
  "scripts": {
    "ng": "ng",
    "start": "ng serve",
    "build": "ng build",
    "watch": "ng build --watch --configuration development",
    "test": "ng test --no-watch --no-progress --browsers=ChromeHeadless"
  },
You can stop the test from running by pressing CTRL + C. Run it again using the npm run test command.
This is the terminal output:
> circleci-angular-demo@0.0.0 test
> ng test --no-watch --no-progress --browsers=ChromeHeadless

03 01 2022 06:35:55.412:INFO [karma-server]: Karma v6.3.9 server started at http://localhost:9876/
03 01 2022 06:35:55.414:INFO [launcher]: Launching browsers ChromeHeadless with concurrency unlimited
03 01 2022 06:35:57.432:INFO [launcher]: Starting browser ChromeHeadless
03 01 2022 06:36:00.426:INFO [Chrome Headless 96.0.4664.110 (Mac OS 10.15.7)]: Connected on socket wXEU2YE-5tONdo2JAAAB with id 10965930
Chrome Headless 96.0.4664.110 (Mac OS 10.15.7): Executed 4 of 4 SUCCESS (0.026 secs / 0.059 secs)
TOTAL: 4 SUCCESS
The test was successful.
Automating the test
Now that your application is ready and its test was successful, you need to create the process for automating the test in CircleCI. To begin, create a new folder named .circleci and create a config.yml file within it. Add this content to the new file:
version: 2.1
orbs:
  browser-tools: circleci/browser-tools@1.2.3
jobs:
  build:
    working_directory: ~/ng-project
    docker:
      - image: cimg/node:16.13.1-browsers
    steps:
      - browser-tools/install-chrome
      - browser-tools/install-chromedriver
      - run:
          command: |
            google-chrome --version
            chromedriver --version
          name: Check install
      - checkout
      - restore_cache:
          key: ng-project-{{ .Branch }}-{{ checksum "package-lock.json" }}
      - run: npm install
      - save_cache:
          key: ng-project-{{ .Branch }}-{{ checksum "package-lock.json" }}
          paths:
            - "node_modules"
      - run: npm run test
The browser-tools orb has tools for browser testing, such as Chrome and ChromeDriver. The cimg/node:16.13.1-browsers Docker image was pulled from the CircleCI image registry and installed all the dependencies for the project running the test.
Next, set up a repository on GitHub and link the project to CircleCI. Review Pushing your project to GitHub for instructions.
Now, log into your CircleCI account. If you signed up with your GitHub account, all your repositories will be available on your project’s dashboard.

Click the Set Up Project button. You will be prompted about whether you have already defined the configuration file for CircleCI within your project.
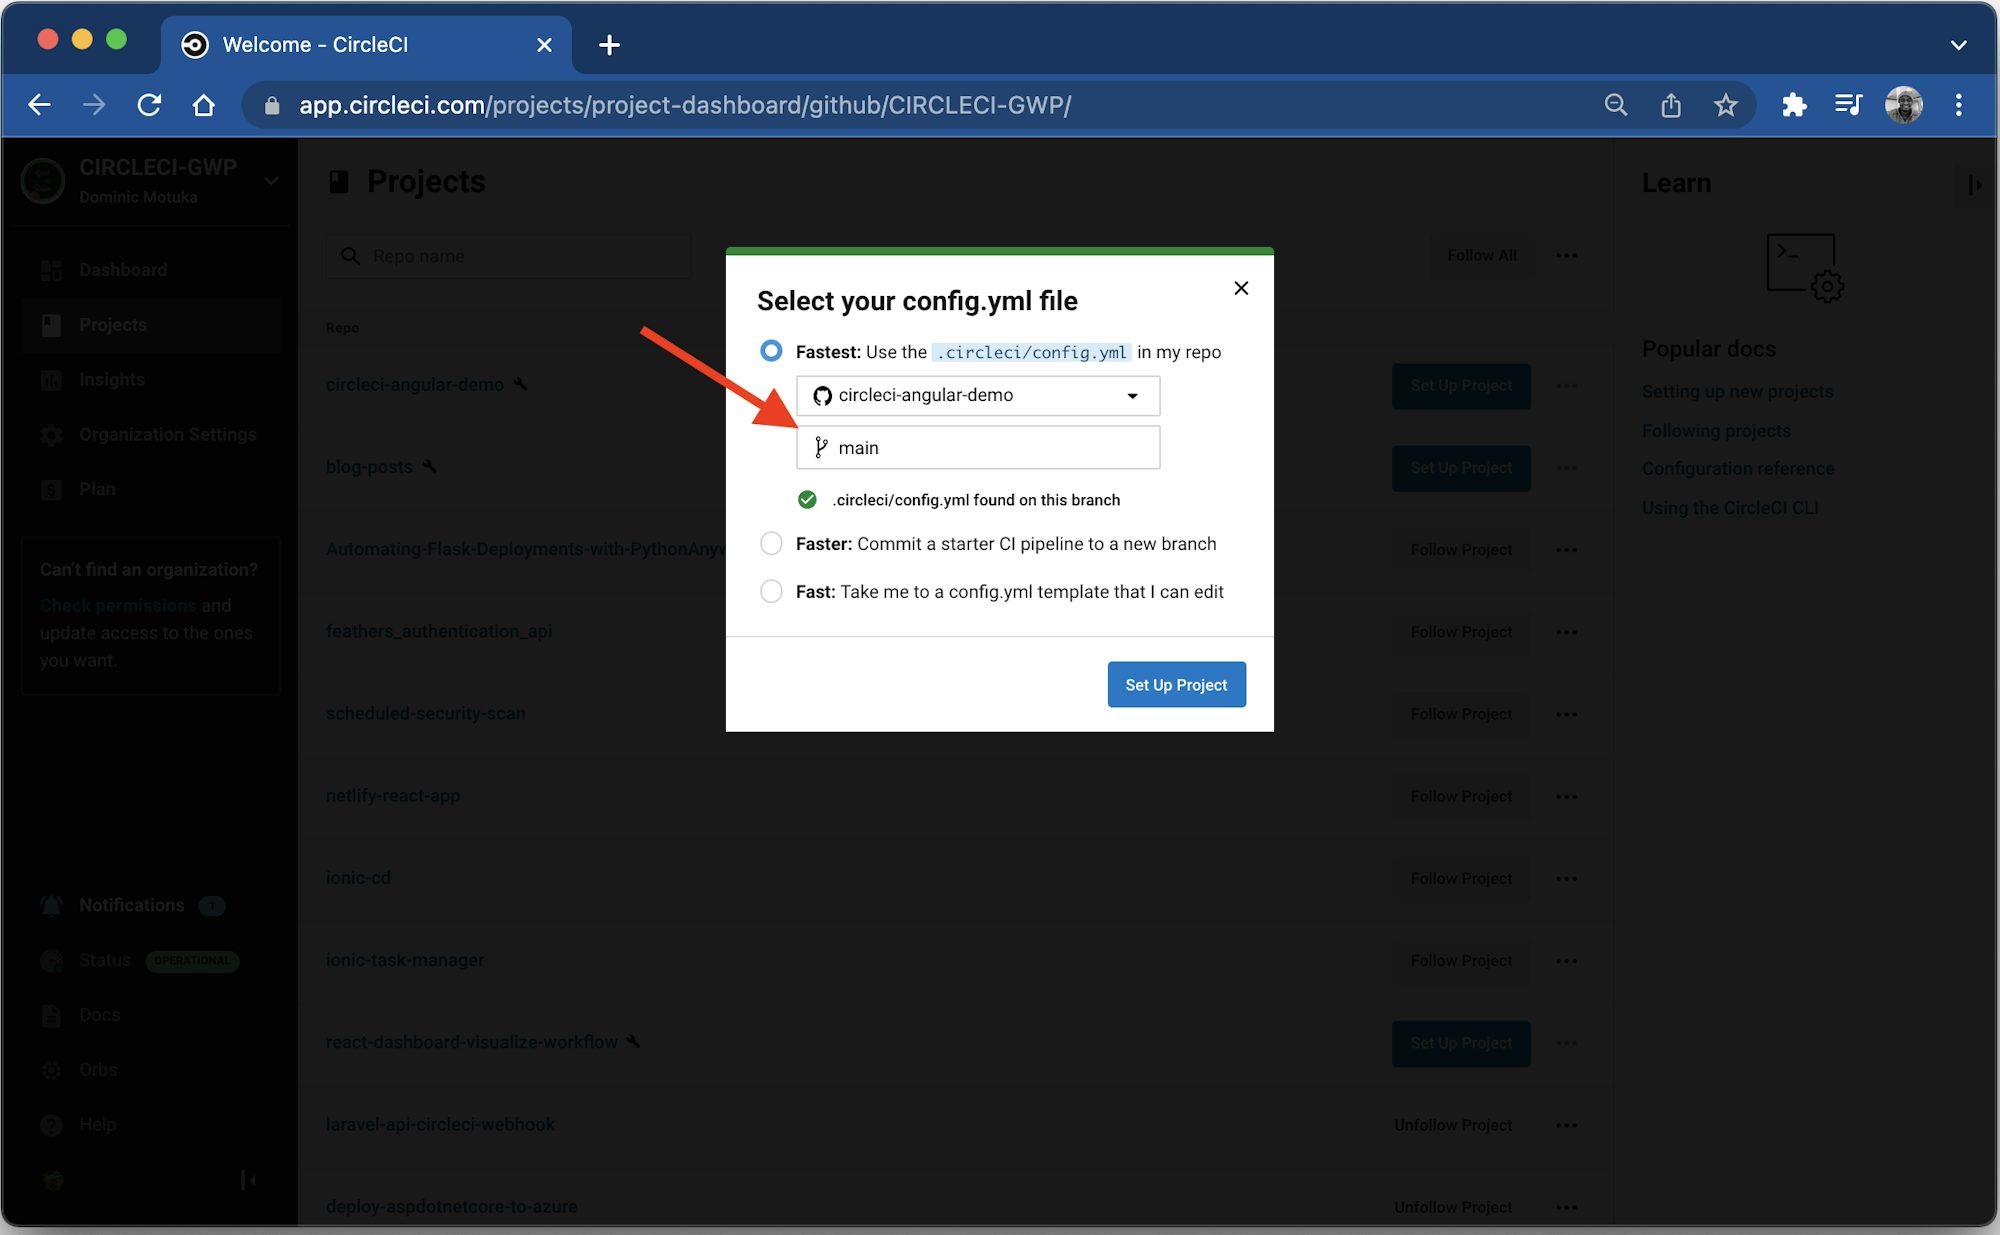
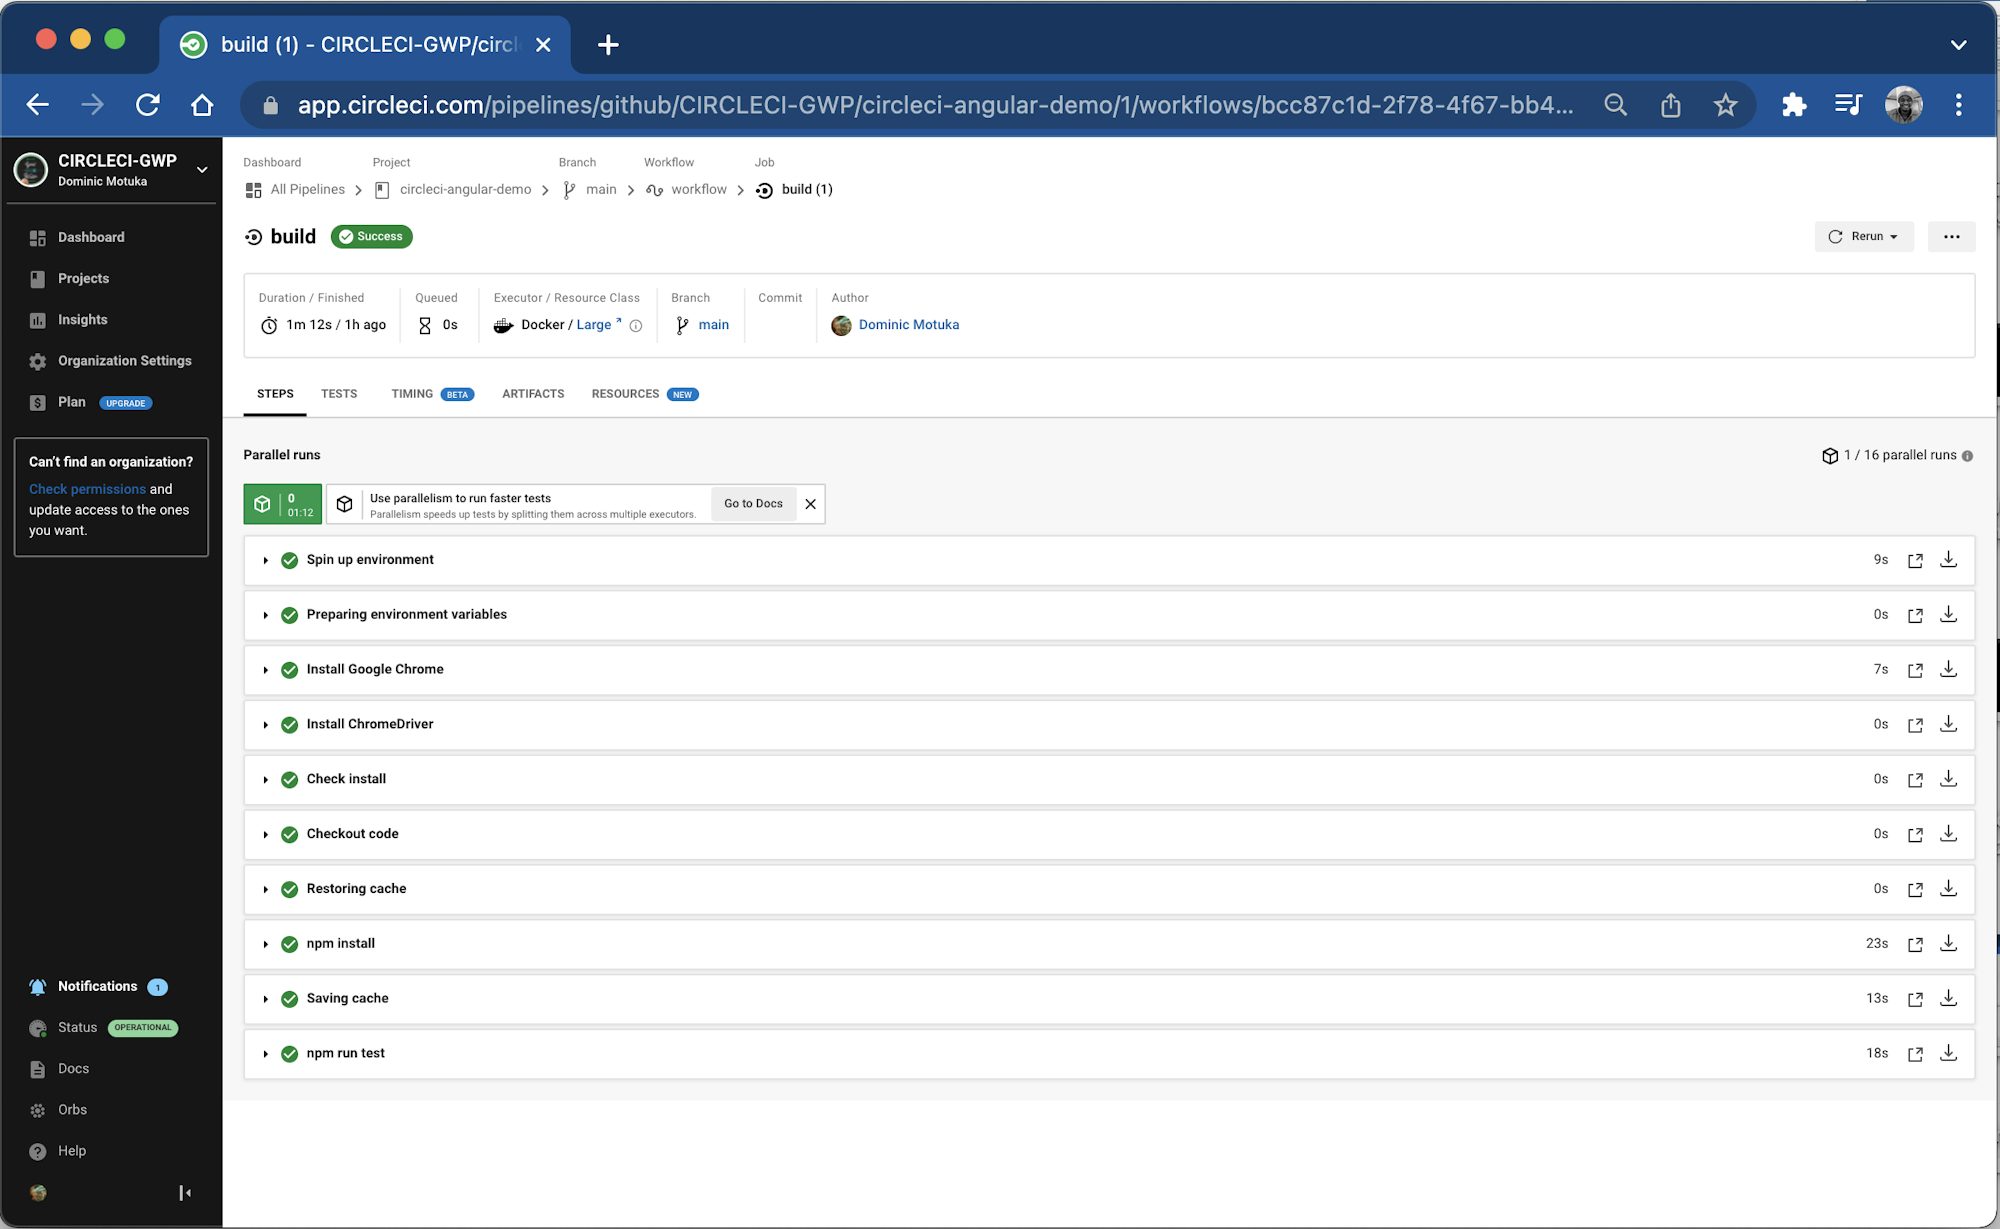
Enter the branch name (for the tutorial, we are using main). Click the Setup Project button to complete the process. You can view the builds from your dashboard.
There you have it!
Conclusion
In this tutorial, you built an Angular application from scratch. You wrote the basic tests for the main application component and the service created to retrieve the list of users from a third-party API. Finally, you automated the test using CircleCI.
Angular is one of the most popular frameworks for building single-page applications right now, and it will most likely be around for a while. Chances are, you and your team will be tasked with automating testing for an Angular app.
I hope you found this tutorial helpful. The complete source code can be found here on CIRCLECI-GWP/circleci-angular-demo.
Oluyemi is a tech enthusiast with a background in Telecommunication Engineering. With a keen interest in solving day-to-day problems encountered by users, he ventured into programming and has since directed his problem solving skills at building software for both web and mobile. A full stack software engineer with a passion for sharing knowledge, Oluyemi has published a good number of technical articles and blog posts on several blogs around the world. Being tech savvy, his hobbies include trying out new programming languages and frameworks.


