
When it comes to web applications in the digital age, data is essential for making well-informed decisions, particularly when it comes to marketing and user engagement. It is essential to have the proper tools in place in order to track and monitor data analytics efficiently. An open-source browser extension called Omnibug is one such tool that makes it easier to debug and uncover requests made through the use of digital marketing techniques. We’ll walk you through installing Omnibug for analytics testing using the Chrome browser step-by-step in this blog.
Why Use Omnibug for Analytics Testing?
We can see all types of metrics calls using the Omnibug extension. Omnibug is the most suitable tool for tracking the metrics calls or the analytics data of any web application. We can easily download and install Omnibug.
Omnibug is a powerful extension that helps you to track various types of metrics calls and analytics data for web applications, including popular platforms like Adobe Analytics, Google Analytics, and more. By using Omnibug, you can gain valuable insights into user interactions, page views, and referral exit calls, which are essential for optimizing your web application’s performance and user experience.
Purpose of Tracking the Analytics Data :
The goal of data tracking is to assist businesses in identifying trends and patterns that can improve customer satisfaction, business performance, and a host of other aspects.
The process of data tracking first involves determining which metrics and events should be monitored the most and then gathering and evaluating information about those metrics and occurrences.
To get started with Omnibug, you should follow these essential steps:
Steps to Install Omnibug:
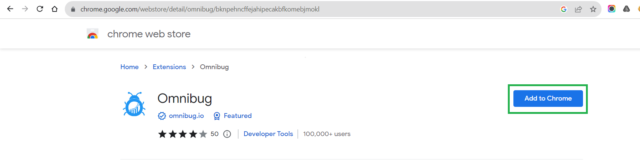
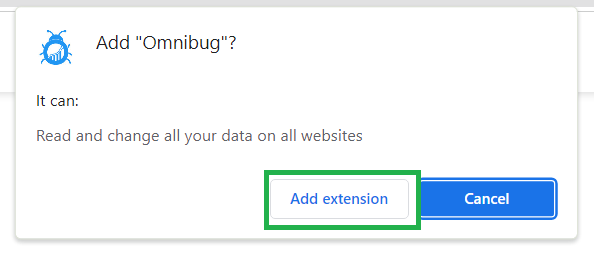
- Search for the Omnibug extension on Google and install the Omnibug extension in the Chrome browser by clicking the ‘Add To Chrome’ Call to Action (CTA). This will invoke the ‘Add Omnibug ?’ popup; click on the ‘Add Extension’ CTA, and Omnibug Extension has been added to Chrome.
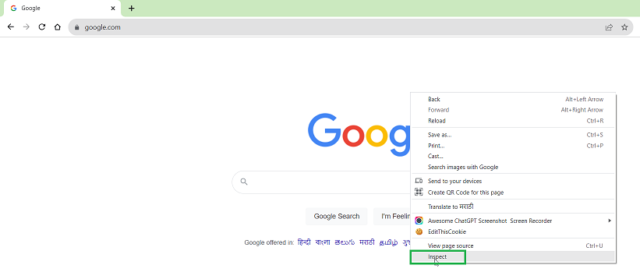
- And user will navigate to this URL chrome-extension://bknpehncffejahipecakbfkomebjmokl/pages/installed.html in a new chrome window. Now, open a browser. Right-click and click “Inspect”. The DevTool panel will open.
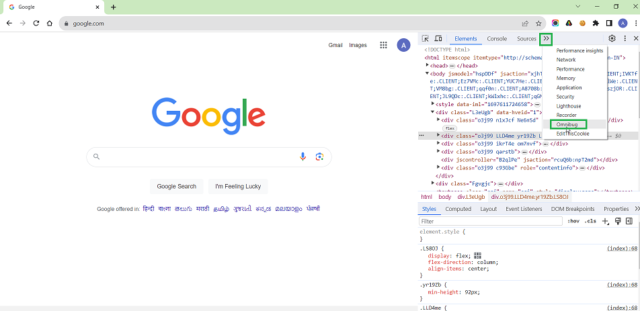
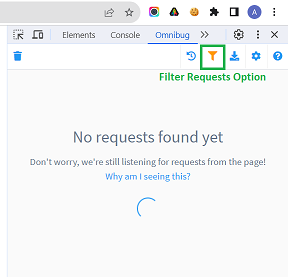
- Within the DevTools panel, look for an expand arrow (usually located at the top left or right corner) and click on it. You should see an option for “Omnibug.” Click on it to access the Omnibug interface.
- You can also adjust the filter so you will not get unrequired metrics calls while testing.
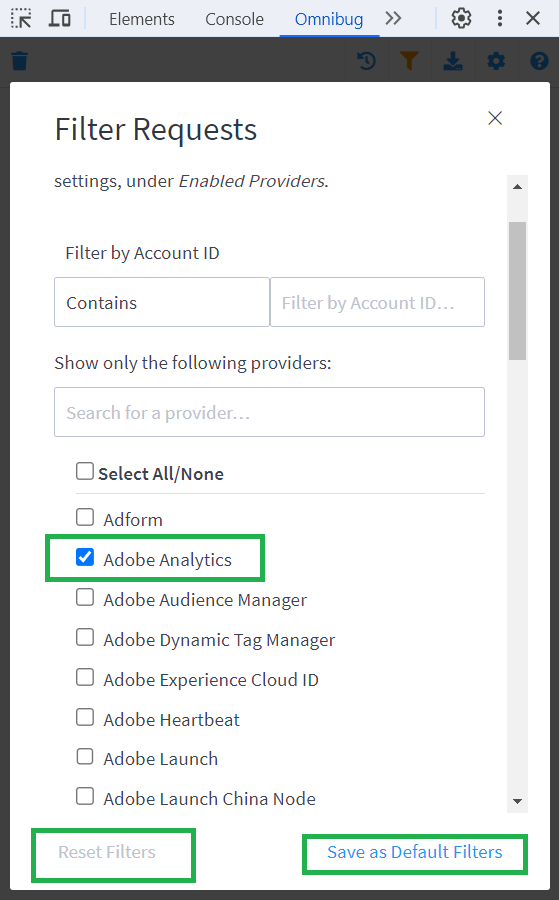
- You can configure filters within Omnibug to control which metrics calls you want to see during testing. For example, you can select “appropriate providers” such as Adobe Analytics or Google Analytics. Unchecking providers that are not relevant to your testing can help you focus on specific data. After configuring filters, click on the “Save as Default Filters” CTA at the bottom.
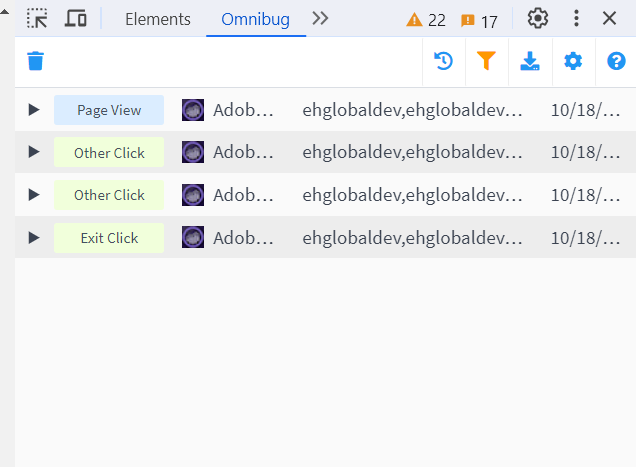
- You are good to see analytics calls in Omnibug now. Three types of metrics are generated to track the specific data referred to:
- Page view calls trigger whenever there is a page load on the site or the user navigates to the page.
- Other click calls or on-click calls trigger when any CTA or component is clicked that is available on the webpage.
- Referral exit calls or exit click calls trigger when it redirects to a different domain.
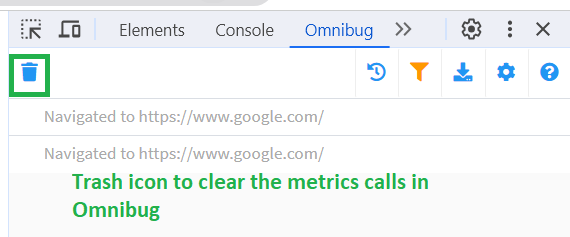
- You can clear the omnibug requests or metrics calls using the ‘Trash’ icon.
- If you need to test the mobile display of your website, you can use the keyboard shortcut Control + Shift + M or access the toggle device toolbar. To switch back to the desktop view, use the same keys once more. If you ever need to make changes to your filters, you can do so by clicking the “Reset Filters” button to reset and refine them as necessary.
Conclusion:
Omnibug, a sophisticated browser extension that is easy to install using Chrome, makes analytics testing for web applications much easier. You may enhance the efficiency and user engagement of your online application by optimizing it for user behavior, page views, and referral exit calls by precisely measuring metrics calls and analytics data. Cheers to testing and a successful, data-driven outcome for your analytics endeavors!

Nice Blog !!!
This blog is really informative and Thank you for sharing
Nice Information shared, keep it up.
Really a nice blog to understand the installation process of OmniBug in your browser. Great work!