Color Detection for Android Mobile Apps - A computer vision application. 

If you'd like to explore what are the Advantages and disadvantages of Computer Vision read this article here. 

The following information and code example was obtained from the following from http://opencv.org/. If you are not familiar with OpenCV and want to learn more, please visit the link. All steps were made using MAC OS 10.14.4

Color detection Tutorial using OpenCV in Android

This is one computer vision applications; you must already have installed and configured Android Developer Tools, and the Android NDK. Here's the list of steps and will dive deeper on each further down the tutorial.

  1. Download OpenCV Android Library
  2. Setup Android Project
  3. Import OpenCV Module
  4. Add the OpenCV Dependency
  5. Add Native Libraries
  6. Add Required Permission
  7. Update Gradle properties
  8. Setup our Android App 
  9. Test the App


 Let's begin with the tutorial.

Step 1: Download OpenCV Android Library

Go to the OpenCV Android Sourceforge page and download the latest OpenCV Android library. As at the time of writing this post, the latest available version was 4.1.0. When the download completes, you should extract the contents of the zip file into a folder. 

Open CV android SDK


Step 2: Setup Android Project

Create a new Android project using Android Studio only if you have not created one already for your computer vision project.


Create a new Android project using Android Studio


Note: Skip this step if you already have an Android project you want to use the OpenCV library in. 

Step 3: Import OpenCV Module

After successfully creating an Android project, it is time to import the OpenCV module into your Android project. Click on File -> New -> Import Module


import the OpenCV module into your Android project


It should bring up a popup like an image below where you can select the path to the module you want to import.


select the path to the module you want to import.

Browse to the folder where you extracted the OpenCV Android library zip file contents. Select the java folder inside of the SDK folder.


Select the java folder inside of the SDK folder.


After selecting the correct path and clicking OK, you should get a screen like an image below.

import module from source

Click on Next to go to the next screen. On the next screen (the image below) you should leave the default options checked and click on Finish to complete the module import.


Finish to complete the module import. 

Step 4: Add the OpenCV Dependency

To work with the OpenCV Android library, you have to add it to your app module as a dependency. To easily do this on Android Studio, open the app gradle paste this “implementation project(path: ':openCV')”, then click on Sync Now.

open the app gradle paste this “implementation project(path: ':openCV')” 

Step 5: Add Native Libraries

On your file explorer, navigate to the folder where you extracted the content of the OpenCV Android library zip file. Open the SDK folder and then the native folder (Use the image below as a guide).

Open the SDK folder and then the native folder  

Copy the libs folder in the native folder over to your project app module main folder (Usually ProjectName/app/src/main). 

Copy the libs folder in the native folder over to your project app module main folder


Rename the libs folder you just copied into your project to jniLibs.


computer vision library. color detection tutorial Rename the libs folder you just copied into your project to jniLibs.


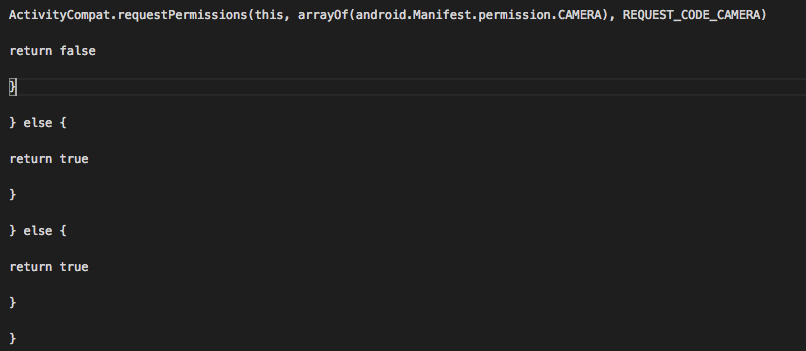
Step 6: Add Required Permission


To successfully use OpenCV, your app should have the camera permission added to its AndroidManifest.xml file. Tip: Don’t forget to request for the camera permission at runtime on Android 6 and above.

 Computer vision library Color tection tutorial image 1


Step 7: Update Gradle properties

computer vision library. Android tutorial color detection, update grdle


Step 8: Setup our Android App

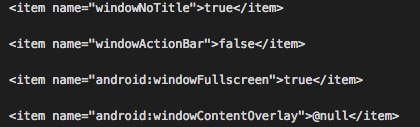
Add the following lines to the styles.xml to use the app on fullscreen mode.

Computer vision library Color tection tutorial image 2 

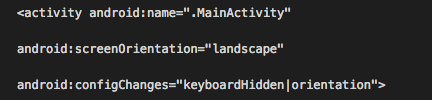
Update Manifest to initialize the app on landscape mode.

Computer vision library Color tection tutorial image 3 

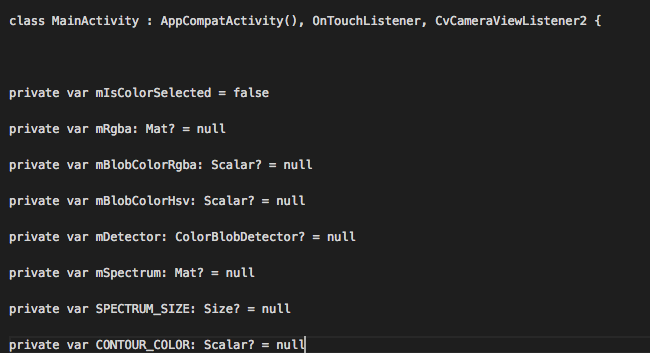
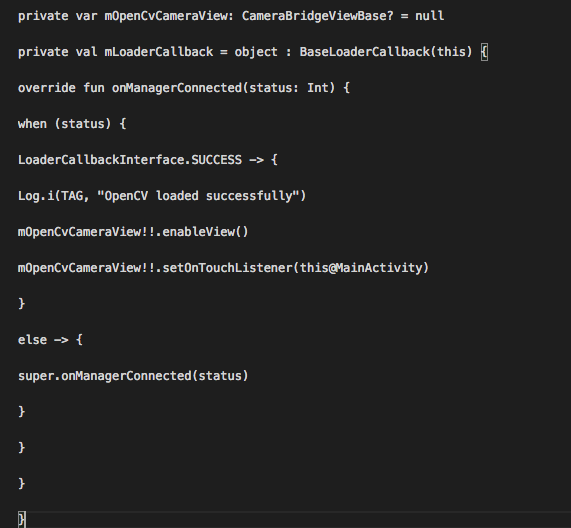
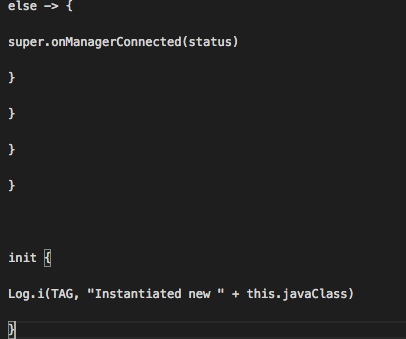
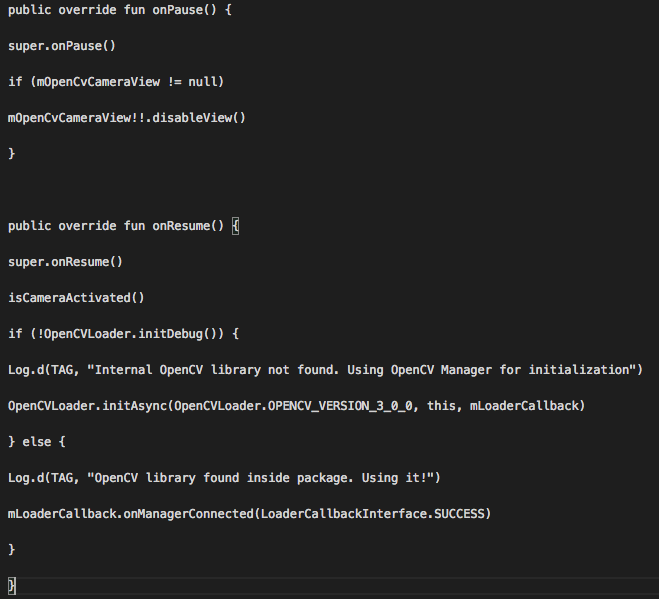
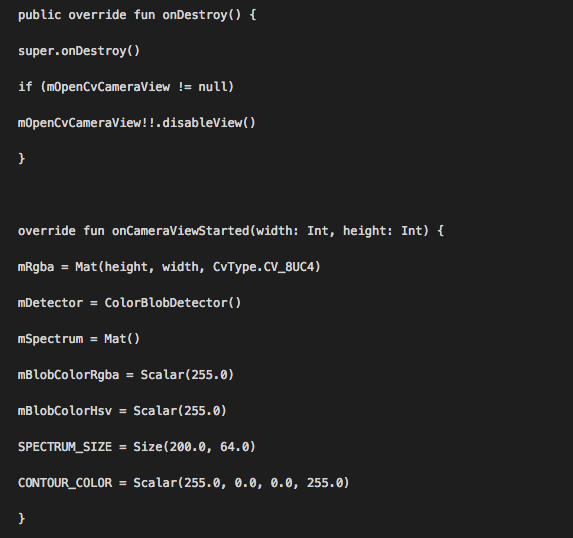
Quickly update your app main activity with the code below.

Computer vision library Color tection tutorial image 4


Computer vision library Color tection tutorial image 5Computer vision library Color tection tutorial image 6

Computer vision library Color detection tutorial image 7


Computer vision library Color detection tutorial image 8computer vision tutorial .- color detection in Android App


//No explanation needed, we can request the permissions.

Computer vision library Color detection tutorial image 9Computer vision library Color detection tutorial image 10Computer vision library Color detection tutorial image 11

 Computer Vision. color detection tutorial Android image 12

 Computer vision library color detection tutorial Android image 13

Computer vision library color detection image 14Computer vision library color detection image 15Computer vision library color detection image 16


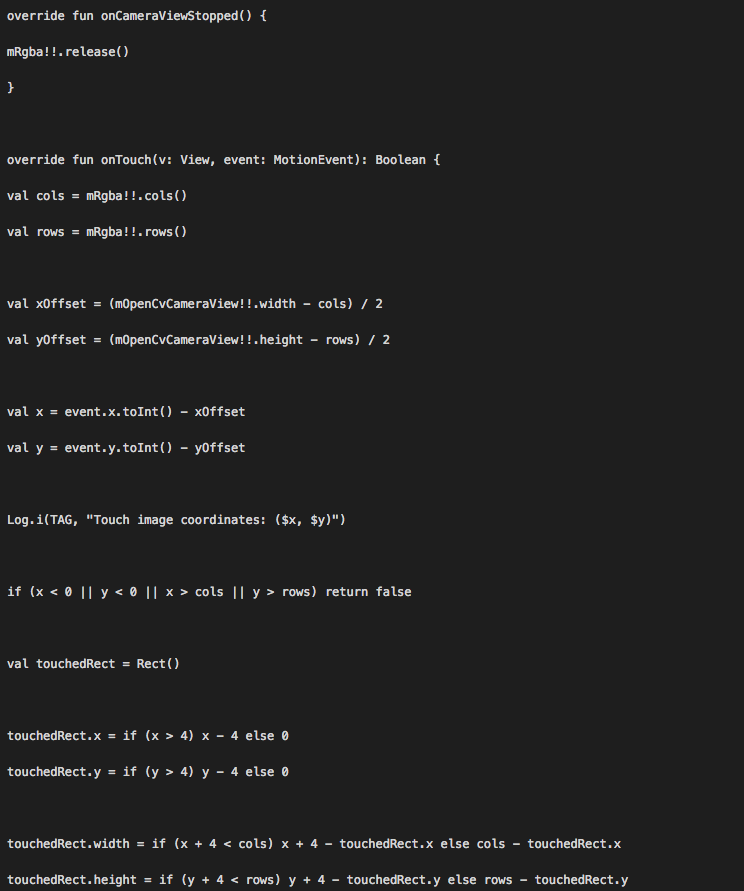
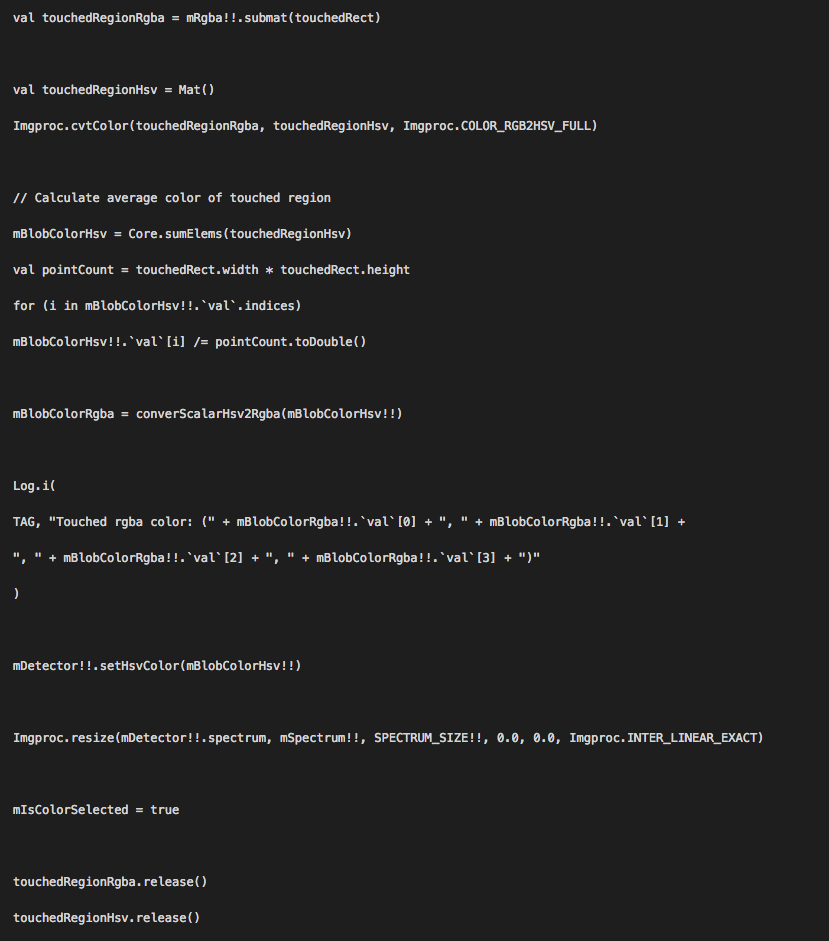
Then create a new class called ColorBlobDetector and copy the code below into it.

class ColorBlobDetector {
// Lower and Upper bounds for range checking in HSV color space
private val mLowerBound = Scalar(0.0)
private val mUpperBound = Scalar(0.0)
// Color radius for range checking in HSV color space
private var mColorRadius = Scalar(25.0, 50.0, 50.0, 0.0)
val spectrum = Mat()
private val mContours = ArrayList<MatOfPoint>()
 
// Cache
internal var mPyrDownMat = Mat()
internal var mHsvMat = Mat()
internal var mMask = Mat()
internal var mDilatedMask = Mat()
internal var mHierarchy = Mat()
 
val contours: List<MatOfPoint>
get() = mContours
 
fun setColorRadius(radius: Scalar) {
mColorRadius = radius
}
 
fun setHsvColor(hsvColor: Scalar) {
val minH: Double = if (hsvColor.`val`[0] >= mColorRadius.`val`[0]) hsvColor.`val`[0] - mColorRadius.`val`[0] else 0.0
val maxH: Double = if (hsvColor.`val`[0] + mColorRadius.`val`[0] <= 255) hsvColor.`val`[0] + mColorRadius.`val`[0] else 255.0
 
mLowerBound.`val`[0] = minH
mUpperBound.`val`[0] = maxH
 
mLowerBound.`val`[1] = hsvColor.`val`[1] - mColorRadius.`val`[1]
mUpperBound.`val`[1] = hsvColor.`val`[1] + mColorRadius.`val`[1]
 
mLowerBound.`val`[2] = hsvColor.`val`[2] - mColorRadius.`val`[2]
mUpperBound.`val`[2] = hsvColor.`val`[2] + mColorRadius.`val`[2]
 
mLowerBound.`val`[3] = 0.0
mUpperBound.`val`[3] = 255.0
 
val spectrumHsv = Mat(1, (maxH - minH).toInt(), CvType.CV_8UC3)
 
var j = 0
while (j < maxH - minH) {
val tmp = byteArrayOf((minH + j).toByte(), 255.toByte(), 255.toByte())
spectrumHsv.put(0, j, tmp)
j++
}
 
Imgproc.cvtColor(spectrumHsv, spectrum, Imgproc.COLOR_HSV2RGB_FULL, 4)
}
 
fun setMinContourArea(area: Double) {
mMinContourArea = area
}
 
fun process(rgbaImage: Mat) {
Imgproc.pyrDown(rgbaImage, mPyrDownMat)
Imgproc.pyrDown(mPyrDownMat, mPyrDownMat)
 
Imgproc.cvtColor(mPyrDownMat, mHsvMat, Imgproc.COLOR_RGB2HSV_FULL)
 
Core.inRange(mHsvMat, mLowerBound, mUpperBound, mMask)
Imgproc.dilate(mMask, mDilatedMask, Mat())
 
val contours = ArrayList<MatOfPoint>()
 
Imgproc.findContours(mDilatedMask, contours, mHierarchy, Imgproc.RETR_EXTERNAL, Imgproc.CHAIN_APPROX_SIMPLE)
 
// Find max contour area
var maxArea = 0.0
var each = contours.iterator()
while (each.hasNext()) {
val wrapper = each.next()
val area = Imgproc.contourArea(wrapper)
if (area > maxArea)
maxArea = area
}
 

// Filter contours by area and resize to fit the original image size

mContours.clear()
each = contours.iterator()
while (each.hasNext()) {
val contour = each.next()
if (Imgproc.contourArea(contour) > mMinContourArea * maxArea) {
Core.multiply(contour, Scalar(4.0, 4.0), contour)
mContours.add(contour)
}
}
}
 
companion object {
// Minimum contour area in percent for contours filtering
private var mMinContourArea = 0.1
}
}
ColorBlobDetector.kt
 

Finally, update your app main activity layout file with the layout code below.

<androidx.constraintlayout.widget.ConstraintLayout
xmlns:android="http://schemas.android.com/apk/res/android"
xmlns:tools="http://schemas.android.com/tools"
xmlns:app="http://schemas.android.com/apk/res-auto"
android:layout_width="match_parent"
android:layout_height="match_parent"
tools:context=".MainActivity">
<org.opencv.android.JavaCameraView
android:layout_width="match_parent"
android:layout_height="match_parent"
android:id="@+id/surface_view"
app:layout_constraintBottom_toBottomOf="parent"
app:layout_constraintLeft_toLeftOf="parent"
app:layout_constraintRight_toRightOf="parent"
app:layout_constraintTop_toTopOf="parent" />
</androidx.constraintlayout.widget.ConstraintLayout>
activity _main.xml

Step 9: Test the App

Android ComputerVision library tutorial.- Test result image


If you'd like to explore, find this project available on the iTexico GitLab


Download our Free Guide to Nearshore Software Development in Latin America 

What's the total cost of outsourcing software development in the top three IT regions in the United States, versus outsourcing to Latin America?
 
Explore the business environment in Latin America, plus software development rates, tangible and intangible costs of outsourcing to 5 top nearshore countries: Mexico, Brazil, Argentina, Colombia, and Chile.
 

ebook Download-04


You may also like:

Post Your Comment Here