A key advantage of Kubernetes for container management is its high scalability. Kubernetes nodes are directly involved in this, and they can make or break your efficiency, cost-effectiveness, and service availability.
This guide provides an in-depth look at Kubernetes nodes, including types of nodes and operational best practices.
Table Of Contents
- What Are Kubernetes Nodes?
- What Are The Two Types Of Kubernetes Nodes?
- Kubernetes Node Management: Node Status, Conditions, And Capacity
- What Are The Four Basic Operations Of Kubernetes Nodes?
- Best Practices For Working With Kubernetes Nodes
- How To Understand, Control, And Optimize Your Kubernetes Costs
What Are Kubernetes Nodes?
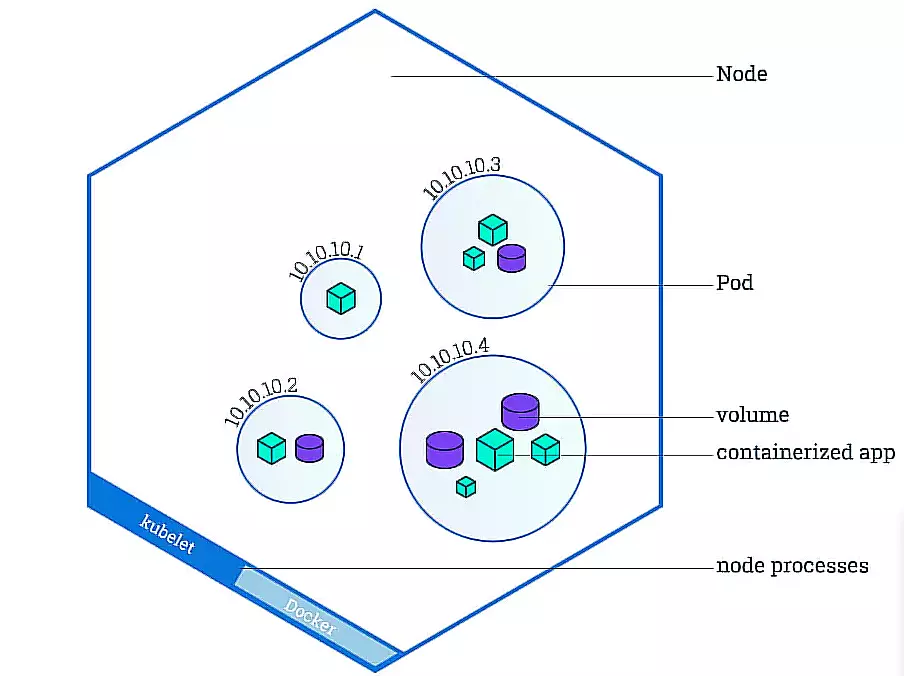
A node in Kubernetes is a single physical or virtual machine that provides the computing power to run your workloads. Multiple nodes make up a Kubernetes cluster and act together to ensure your Kubernetes workloads are well-balanced for efficiency across each node.
More Kubernetes nodes features include:
- You can host a node in the cloud or in a data center (on-premises).
- Nodes contain the Kubernetes control plane, pods, and the containerized application.
- A node can host a single or multiple pods.
- A K8s node delivers the CPU, memory, and networking capabilities in a Kubernetes cluster (internal and external communications).
- When one node in a cluster fails another takes over its work to ensure service continuity.
- Nodes in a cluster are interconnected to ensure efficient load balancing and working synchronously.
- There are two types of Kubernetes nodes; Master Node (Control plane node) and Worker Nodes. We’ll discuss these two in more detail a little later.
- The nodes in a Kubernetes cluster are managed by a control plane, which automatically deploys and schedules pods across the nodes.
Now, Here’s something else.
What’s the difference between Nodes and Pods in Kubernetes?
A node is a physical (bare metal) or virtual machine (VM) on which all Kubernetes workloads run, including the containerized application, pods, and other K8s components. The pod, on the other hand, is an abstraction of executable code, the smallest executable unit in Kubernetes, that actually contains the instructions for running containers.
See our snackable comparison to learn more about the differences between containers, pods, nodes, and clusters in Kubernetes here.

What Are The Two Types Of Kubernetes Nodes?
The two types of nodes in Kubernetes are the Master (Control plane node) and Worker nodes. A Kubernetes cluster usually has one or more master nodes and multiple worker nodes. Here’s more about each.
Kubernetes worker node
Kubernetes worker nodes are the machines that actually run containers or the user application. Yet, worker nodes also do run some control plane components.
Adding more Kubernetes worker nodes to a cluster enables you to scale the cluster, increasing your capacity to handle more workloads. Also, each node comprises several components, which, in turn, run and maintain pods and the K8s runtime environment for containers.
This image shows what a typical Kubernetes worker node looks like to give you an idea of its components.
Credit: Kubernetes node components – Kubernetes.io
Each component executes a specific function in a worker node:
Kubelet
This Kubernetes agent runs within each node to ensure containers run seamlessly within pods. The kubelet also ensures that pods run workloads according to their specifications (PodSpec). It doesn’t manage containers that Kubernetes did not create.
The Kubelet enables the control plane to monitor the node, detects what is running on that node, and delivers instructions to the container runtime. Ultimately, the kubelet ensures containers are running according to your declarative configuration.
Kube-proxy
This is the network proxy that manages networking rules within each node both between its pods and across the entire Kubernetes cluster. kube-proxy relies on the packet filtering layer of the operating system for this, that is if there is one that’s available. kube-proxy will forward the traffic itself otherwise.
You can run kube-proxy in three modes: iptables, ipvs, or userspace (a deprecated mode that’s no longer recommended).
The iptables mode is the default mode and works well for moderate-sized clusters. Note that it uses sequential network rules which may impact your routing performance. Because ipvs mode supports processing network rules in parallel, it is best suited for a large number of services.
Container runtime
This is software that runs containers. It manages individual containers, such as retrieving container images from repositories or registries, unpacking them, and running the application. Kubernetes supports container runtimes that support the Container Runtime Interface (CRI).
Here’s the thing. Current versions of Kubernetes no longer support Docker by default because Docker does not fully support the CRI standard. Instead, K8s seamlessly supports CRI-O and Containerd.
Master (Control plane node)
A control plane node is dedicated to cluster management functions, such as scheduling, detecting, and responding to events in the cluster. You can also run a single master in a cluster. Many engineers, however, prefer running more than one master, say, one node per availability zone, to ensure redundancy and resilience.
The control plane node has several components, each with a unique function:
- Kube-scheduler – Assesses and assigns a newly created pod to the most ideal node for it.
- Kubelet – As in a worker node, the kubelet ensures workloads are running as they should. In a control plane node, it has the added job of registering new nodes to a component of the Kubernetes control plane; the Kubernetes API Server, which serves as the front-end of the control plane.
- Kube-apiserver – This is the main implementation of the Kubernetes API Server, which exposes the Kubernetes API. It scales horizontally, meaning you add more instances to handle an increase in traffic load.
- Etcd – Is the key-value store that acts as the highly available backup for cluster data.
- Kube-controller-manager – Manages controller processes by compiling all controllers and their processes into a single binary process to boost efficiency and resilience. Some common controllers in K8s include the job controller, node controller, and EndpointSlice controller.
- Cloud-controller – This enables you to link your cluster to your cloud provider’s API. So, if you run your K8s cluster on-premises or on your own PC, your cluster won’t have this. Otherwise, this component works similarly to a Kube-controller-manager.
There are several other add-ons that work together to facilitate a node’s role. These include:
DNS
Each Kubernetes cluster should have a cluster DNS. This is a DNS server that serves DNS records for Kubernetes services alongside the other DNS servers in your environment. Any container Kubernetes starts will automatically have this DNS server in its DNS searches.
Cluster-level logging
This is the mechanism that saves container logs to a centralized log store with a search/browsing interface.
Web UI (Dashboard)
This is a general-purpose, web-based user interface for K8s clusters. You use it to troubleshoot and manage applications running in your cluster, in addition to the cluster itself.
Container Resource Monitoring
It stores general time-series data about containers in a central database. It also provides a UI for browsing those metrics.
That out of the way, we delve now into some of the crucial concepts to understand when operating Kubernetes nodes.
Kubernetes Node Management: Node Status, Conditions, And Capacity
A node status returns useful information such as a node’s addresses, conditions, capacity/allocatable, and system info. It also details information needed to help the Kubernetes scheduler map pods onto the most suitable nodes.
Yet, to maintain healthy nodes and optimal efficiency in a cluster, you’ll be working with three other Kubernetes tools; Kubectl, node controller, and kubelet.
Kubectl
Kubectl is a Kubernetes-native Command-Line Interface (CLI) that lets you run commands against a Kubernetes cluster via the control plane and Kubernetes API. The following are examples of what some common Kubectl commands do:
- List each node in the default namespace.
- Describe a node’s status by printing detailed information about the node.
- Start an interactive debugging procedure on a node.
- Show a node’s resource usage.
- Block pods from being scheduled on a particular node.
- Mark a node as unschedulable.
- Drain a node.
The node controller does something a little different — well, not so little.
Node controller
This control plane component has three main roles; assign CIDR addresses, update internal node lists, and monitor the node’s health. More about the role of the node controller in the next section.
And then there’s the kubelet.
Kubelet
As we covered earlier, kubelet is the Kubernetes agent that manages the pods within each node. It also passes information to and from the control plane.
Let’s take a look at what we need to know about Kubernetes nodes’ condition, status, and capacity. Knowing these operations will help you to better understand the four basic operations you execute on K8s nodes, which we’ll cover in the next section.
What are Kubernetes node status conditions?
Node conditions provide information about the health of several key node attributes and metrics. These include the amount of CPU, RAM, and pod capacity in use. You use the kubectl to do a node status check. Conditions also determine if a particular node should have pods scheduled for it. Yet, not all Kubernetes versions expose all node conditions.
For each condition, the status is either true, false, or unknown. Here are examples:
- Ready – If it reports an unhealthy status (‘false’), that node cannot accept new pods. It’ll display ‘true’ in a healthy node that is ready to accept pods. You’ll get an ‘Unknown’ status if the node controller hasn’t received any data about the node for over 40 seconds (node-monitor-grace-period). The node-controller evicts all pods assigned to a node if its status goes ‘false’ or ‘unknown’ beyond the pod-eviction timeout.
- OutOfDisk – If the status is unhealthy, there is not enough disk space to add new pods.
- MemoryPressure – If it shows unhealthy, the node’s memory is low.
- PIDPressure – If unhealthy, the node has too many processes running.
- DiskPressure – It is unhealthy when disk capacity is low.
- NetworkUnavailable – It is unhealthy when the node’s network is misconfigured.
- ConfigOK – If unhealthy, the node’s kubelet is misconfigured.
What is system info in a Kubernetes node status?
This provides essential information about the node’s hardware and software. The kubelet publishes the data into the Kubernetes API. The data includes:
- Kubelet and Kube-proxy version.
- Kernel version.
- Container runtime details.
- Operating system.
What are addresses in Kubernetes node management?
In this view, you can see details such as the node’s hostname and the external and internal IPs. A node’s address varies based on whether it is running on-premises or in the cloud. Here’s more:
- Hostname – This is the hostname displayed by the kernel of the node. If you want to override the name, use the command; kubelet <username-override> parameter.
- External IP – This is the node IP address that you can route from outside the cluster.
- Internal IP – This is the node IP address that you can only route internally.
What are Kubernetes node capacity and allocations?
This portion of a node status report describes a node’s available resources. This will usually include the CPU amount, memory, and the number of pods a node can accept.
Meanwhile, the capacity section shows all the resources of a node. The allocatable section indicates the amount of resources available for use. You can learn more about all-around Kubernetes monitoring here.
Now that we’ve covered the prerequisites, here are the primary Kubernetes node operations you’ll need to know – at the very least.
What Are The Four Basic Operations Of Kubernetes Nodes?
Here is a quick overview of the main Kubernetes node operations.
Add nodes to a cluster
There are two ways to add nodes to a K8s cluster here; manually or automatically by letting the node’s kubelet self-register to the control plane. The control plane validates the newly created node object after this.
In manual mode, you’ll need to set up node capacity, setting the stage for the Kubernetes scheduler to assign resources to all the node’s pods. In auto mode, new nodes register their CPU and memory capacities so that the scheduler can assign just enough requests.
Modify a node
Using kubectl, you can create or modify node objects manually. This overrides the settings specified in –register-node. Take Mark a node as unschedulable as an example. It blocks the scheduler from assigning additional pods to the node.
You might want to use this option prior to performing maintenance tasks like rebooting a node. To declare the node unschedulable, run the command: kubectl cordon $NODENAME.
Check a node’s status
As discussed a few moments ago, you’ll use the kubectl to check a node’s status. As an example, you can use the command kubectl describe nodes to see a node’s hostname or external IP address. Or, you can run the kubectl describe pods for information about that node’s pods, including container state, restart count, and log events.
Interpret the Node Controller
This control plane component manages three main aspects of a node’s lifecycle:
- Assign CIDR addresses – It assigns a Cross-Inter-Domain Routing (CIDR) block (if the CIDR assignment is active) after the node’s registration.
- Update internal node lists – It maintains an internal list of nodes. The list must be continually updated with the cloud provider’s list of available machines, ensuring capacity is met.
Node controllers check if a node’s host machine is available when that node is unhealthy. If not available, the node controller removes that node from the internal list. When running K8s in a public or private cloud, the node controller sends a request to generate a new node to keep up cluster capacity.
- Keep track of the nodes’ health – This includes inspecting the state of all nodes regularly, updating their NodeReady condition to ConditionUnknown (that is if the node is no longer reachable and the node controller isn’t receiving their heartbeats), and removing all pods from the nodes (If they remain unreachable for over 40 seconds, the node controller begins evicting the pods some five minutes later).
Last, but by no means least, here are some things to keep in mind when working with nodes.
Best Practices For Working With Kubernetes Nodes
By following these best practices, you’ll be able to better manage, secure, and streamline your Kubernetes node operations.
- Optimize resilience and performance by dedicating a machine, or several, to just the control plane components.
- If you want fine-grained control over workloads, consider using physical (bare metal) machines.
- To scale more easily and quickly, choose to run virtual machine based nodes in the cloud.
- Before running workloads, conduct node conformance tests to ensure that your nodes are configured correctly.
- Use node autoscaling to boost efficiency and save costs.
- To ensure security, regularly update your kubelet version and deploy the latest patches. This will continually discover any vulnerabilities in the kubelet.
- Also note that Kubelet access is not authenticated by default, so you’ll want to set up robust authentication safeguards to restrict access.
- Run sensitive workloads on dedicated machines to minimize the impact of a security breach. By isolating workloads, an attacker cannot access sensitive workloads via lower-priority services you have running on the same host.
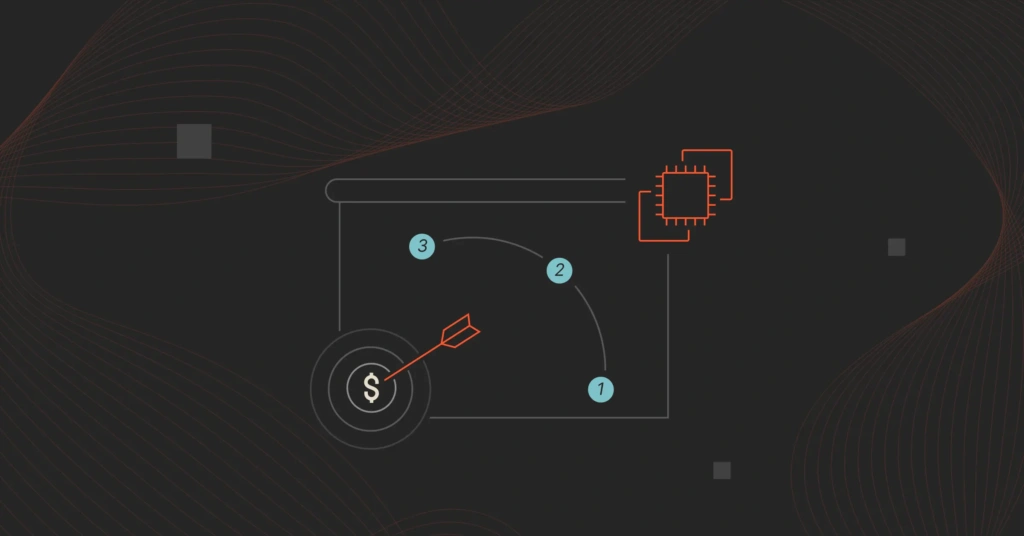
- Track, control, and optimize your Kubernetes node costs with a robust tool.
How To Understand, Control, And Optimize Your Kubernetes Costs
Although Kubernetes is highly available and scalable, it has multiple blindspots for cost visibility. For example, Kubernetes can be so complex that it can be difficult to pinpoint and track the people, processes, and products that drive your costs.
That means that you’d be missing out on knowing exactly who, what, and why your Kubernetes costs are accelerating instead of decreasing. You may have trouble telling if you are plain overspending (and eating into your margins), or if the costs are in line with your revenue growth.
CloudZero can help. With CloudZero’s Kubernetes Cost Analysis approach, you can:
- View cost per cluster, node, pod, namespace, service, and more — down to the hour.

- Rather than just totals and averages, get immediately actionable cost intelligence with unit costs such as cost per customer, per product feature, per team, per environment, per deployment, per project, etc.
- To get a complete picture of your costs, see the costs of your tagged, untagged, untaggable, and shared Kubernetes resources.
- Make cost decisions faster by understanding your Kubernetes costs in the context of your business.
- Keep costs under control by detecting anomalies in real-time.

- Get timely, noise-free alerts to help you prevent cost surprises.
We are proud of our work, but we don’t want you to take our word for it. Innovative companies like Remitly, Malwarebytes, and Drift are already saving millions per year with CloudZero — and using their new cost per unit metrics to price their services more profitably.
 to experience CloudZero for yourself. It’s free!


The Cloud Cost Playbook
The step-by-step guide to cost maturity