An explicit approval process can help reduce production issues, provide an audit trail, and give your organization confidence that your engineering teams are deploying the right code.
In this article, we’ll go into detail about how to set up an approval job in your continuous integration pipeline so your developers must request approval before the CI pipeline deploys to production.
How does it work?
A request-approval job is added to your pipeline, making use of the xMatters orb, which passes a workflow’s details to xMatters. xMatters then sends out the notifications across a range of devices to reach the current on-call approval resource. Using the response options, the approver can then choose to approve or reject the request. On approval, a request is made to CircleCI’s approve a job API endpoint.
Let’s walk through how to set up your approval requests so that you can maintain oversight of any changes to your production code before they happen.
Prerequisites
To begin, you’ll need the following:
The approval process we’ll be discussing uses the approve a job API call to approve the job. The process for doing this is similar for a variety of tools but this post will focus on using xMatters.
Configuring CircleCI
At a high level, we need to update the .circleci/config.yml file, set the XM_URL value, and then store the personal token in xMatters. Let’s get started.
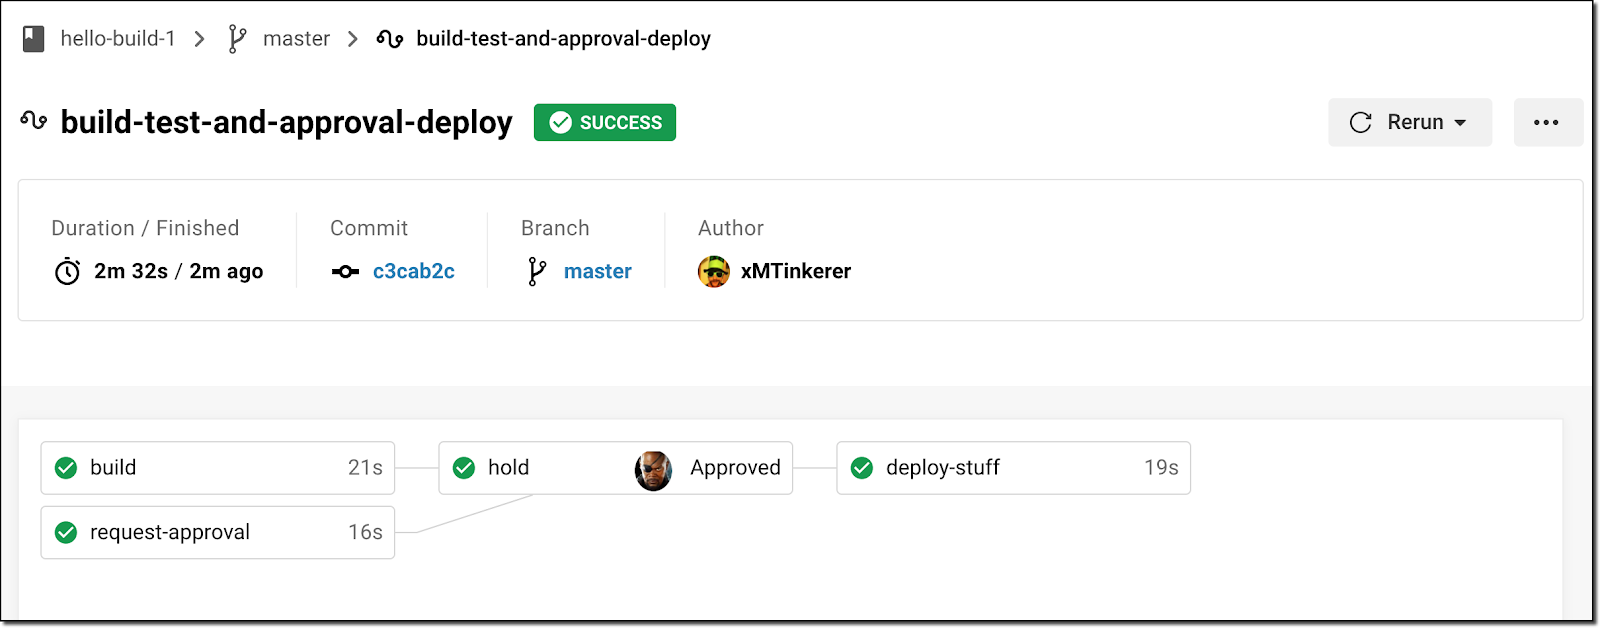
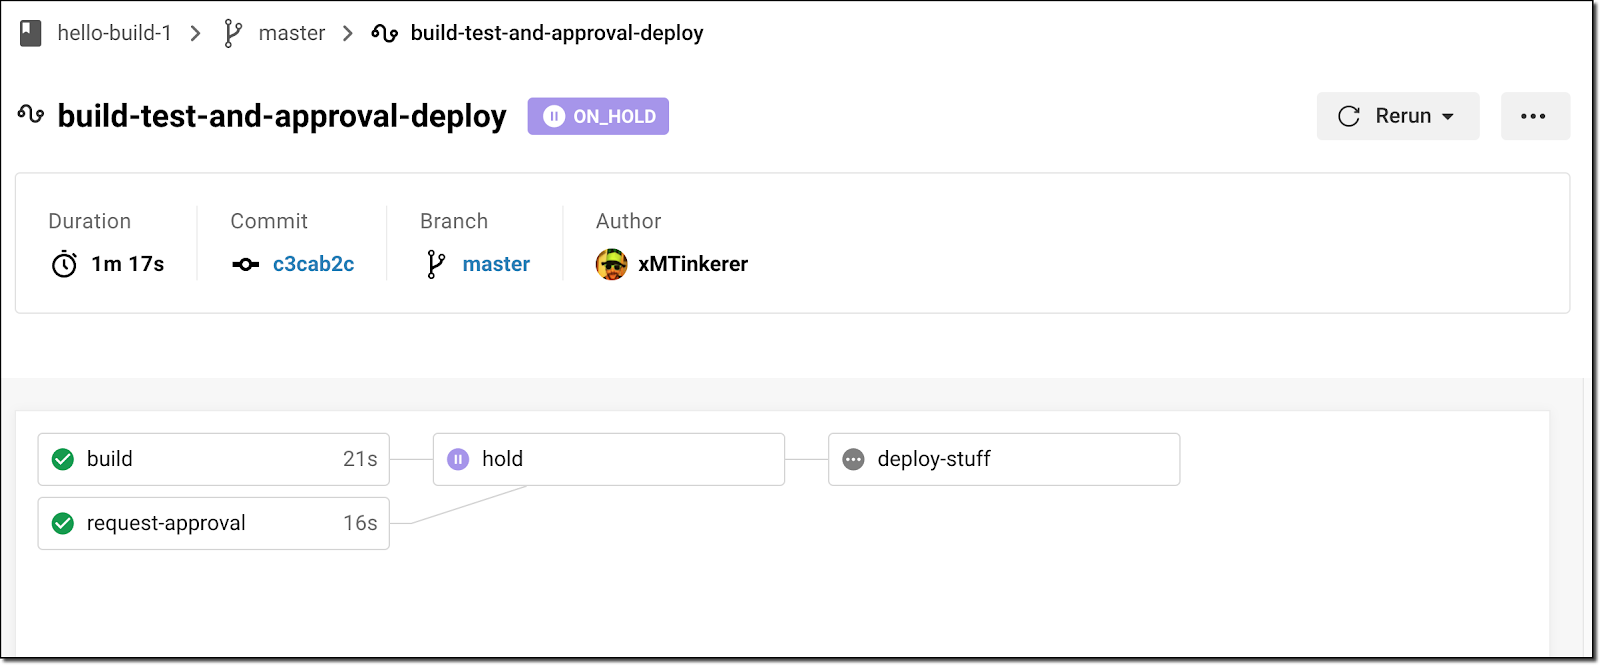
This is a simple build, hold, request approval, and deploy configuration file.
version: 2.1

orbs:
  xmatters: xmatters/xmatters-orb@1.0.4

jobs:
  build:
    docker:
      - image: circleci/node:4.8.2
    steps:
      - run: echo "Building building building!"

  request-approval:
    docker:
      - image: circleci/node:4.8.2
    steps:
      - xmatters/notify:
          recipients: Engineering Managers

  deploy-stuff:
    docker:
      - image: circleci/node:4.8.2
    steps:
      - run: echo "Deploy stuff here"

workflows:
  build-test-and-approval-deploy:
    jobs:
      - build
      - request-approval
      - hold:
          type: approval
          requires:
            - build
            - request-approval
      - deploy-stuff:
          requires:
            - hold
The items to note here are the hold and request-approval jobs. You can see in the workflows section that the hold job, marked as type approval, is dependent on the successful execution of the build and request-approval jobs. The deploy-stuff job is then dependent on approval of the hold job. This means that the hold can be approved only once the app is built successfully and the request-approval job, which uses the xMatters orb, is executed. Approval jobs have no steps to execute or run, they are a workflow construct only.
We’re targeting the Engineering Management group so that the current on-call engineering manager can approve (or reject!) the pipeline. Once the hold job is approved, the pipeline continues with the deploy-stuff job, and the code is deployed to production.
We need to set the XM_URL value in the project settings in CircleCI. Before that, we will grab a personal API token so that xMatters can properly authenticate. Head over to your account settings and select the Personal API Tokens tab.
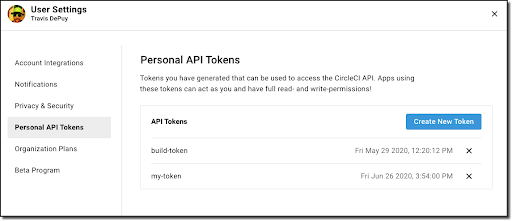
Click Create New Token and copy the value to a text file until we’re ready to use it.
Configuring xMatters
Next, head over to your xMatters instance and navigate to the Workflows screen. Click Import Workflow and find the CircleCI.zip file. This file can be downloaded from the repo, here. Once imported, click into the workflow and navigate to the Flows tab. There will be two canvases listed. In this case, we want Approval Request, which has the logic to deal with most responses.
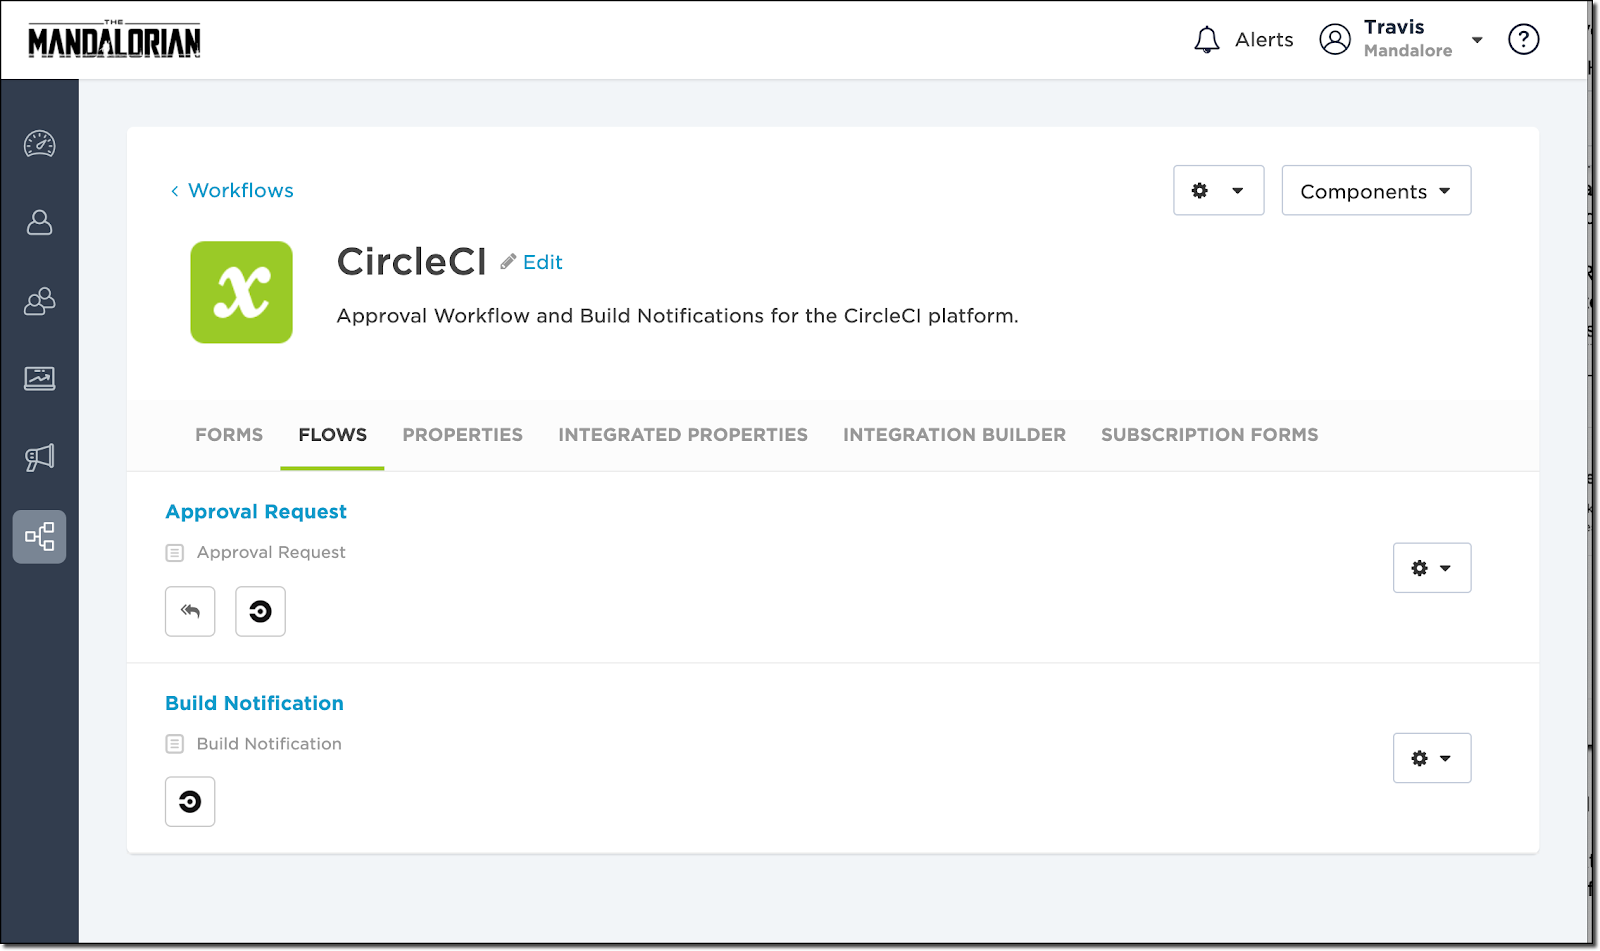
Clicking into the canvas shows the steps laid out with the step palette on the right side.
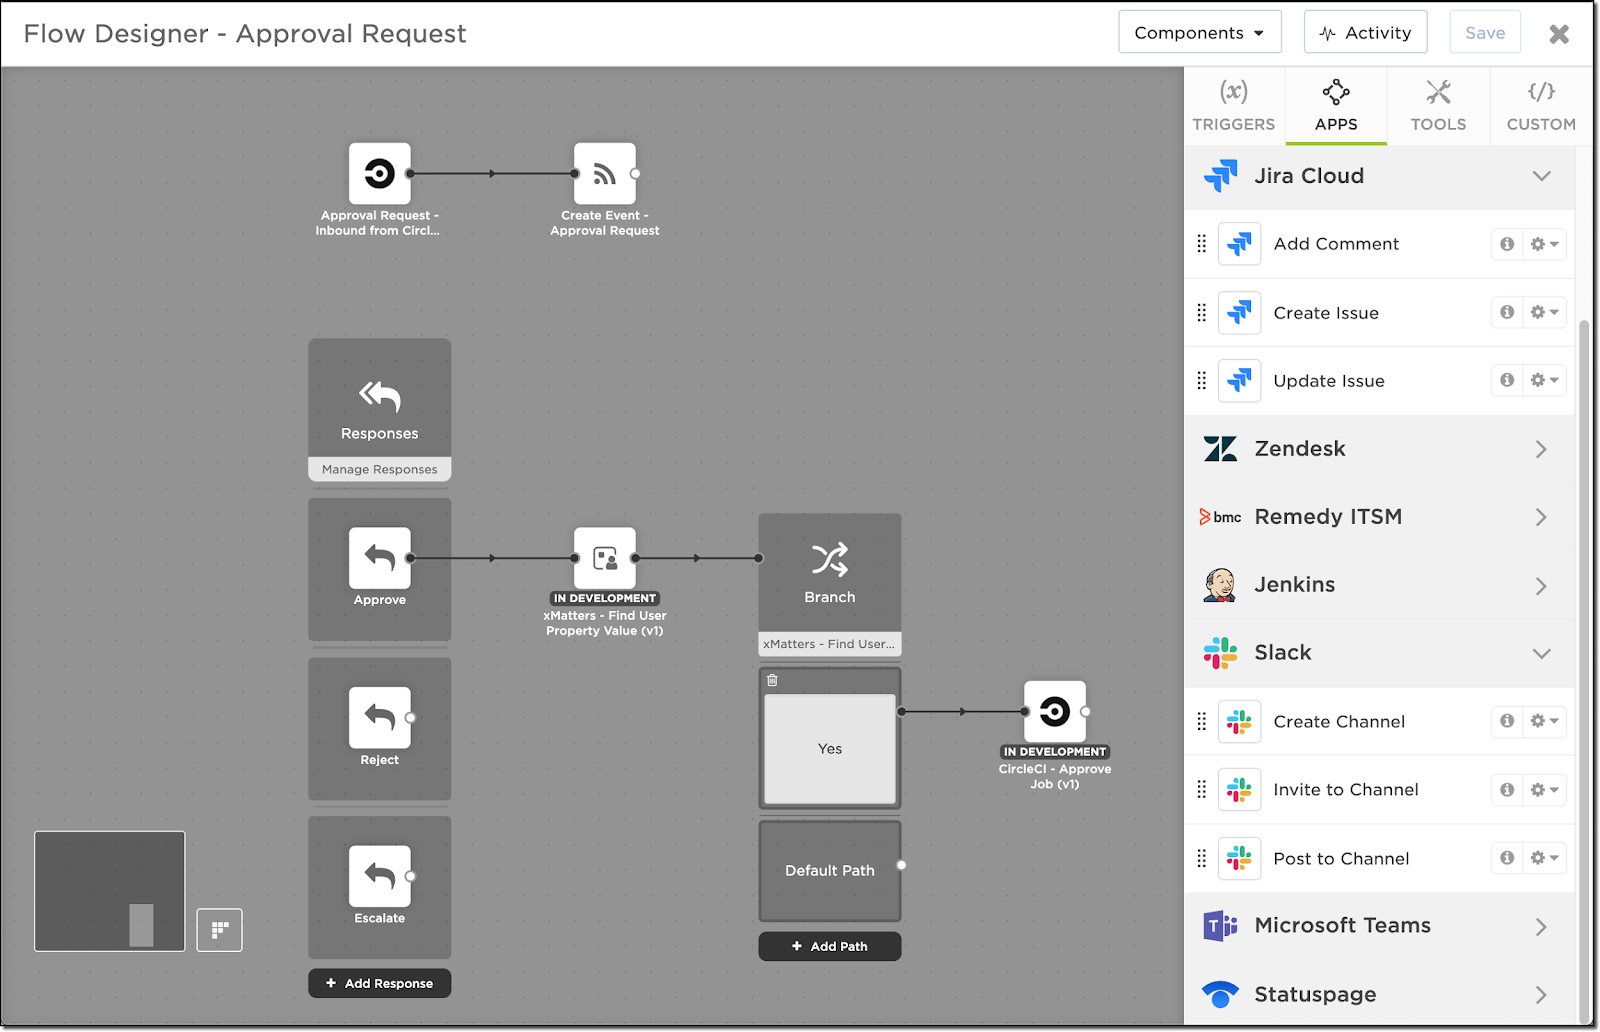
We are here to get the inbound URL, so double click on the Approval Request - Inbound from CircleCI step in the upper left corner. This will display HTTP Trigger dialog with our inbound URL. Copy this value and keep it handy for later.

Exit that window and navigate back to Workflows. Click the Admin gear at the bottom of the navigation menu and click Custom Fields. These fields are metadata tied to a user. It is where we will store the access token.
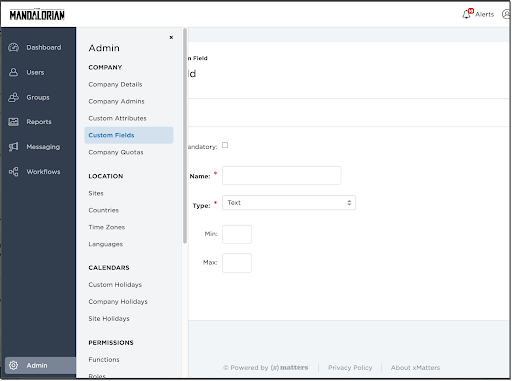
Click Add Field and give it the name “CircleCI Token Plain”.
Note: It is important that you use this name, as it is used in the “Find User Property Value” step back on the flow designer canvas. If you use a different name here, make sure to change the name there as well.
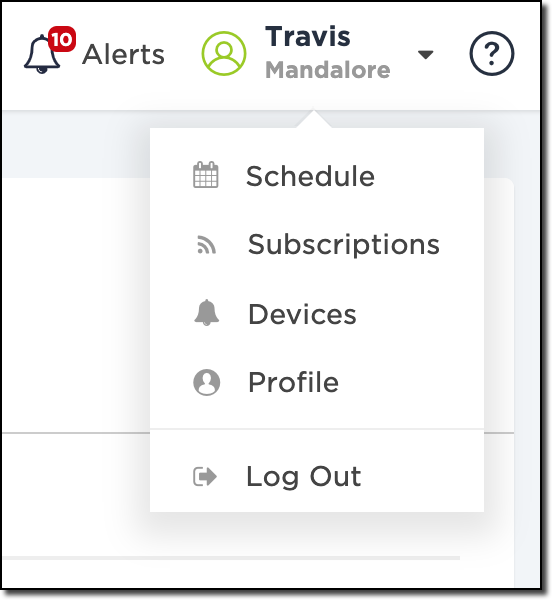
Set the type as Text. Click Save. We will then add the token to the user. If it is your token, click your username on the top right and click Profile.
Dig out the personal token we copied from CircleCI and paste it into the field we just created.
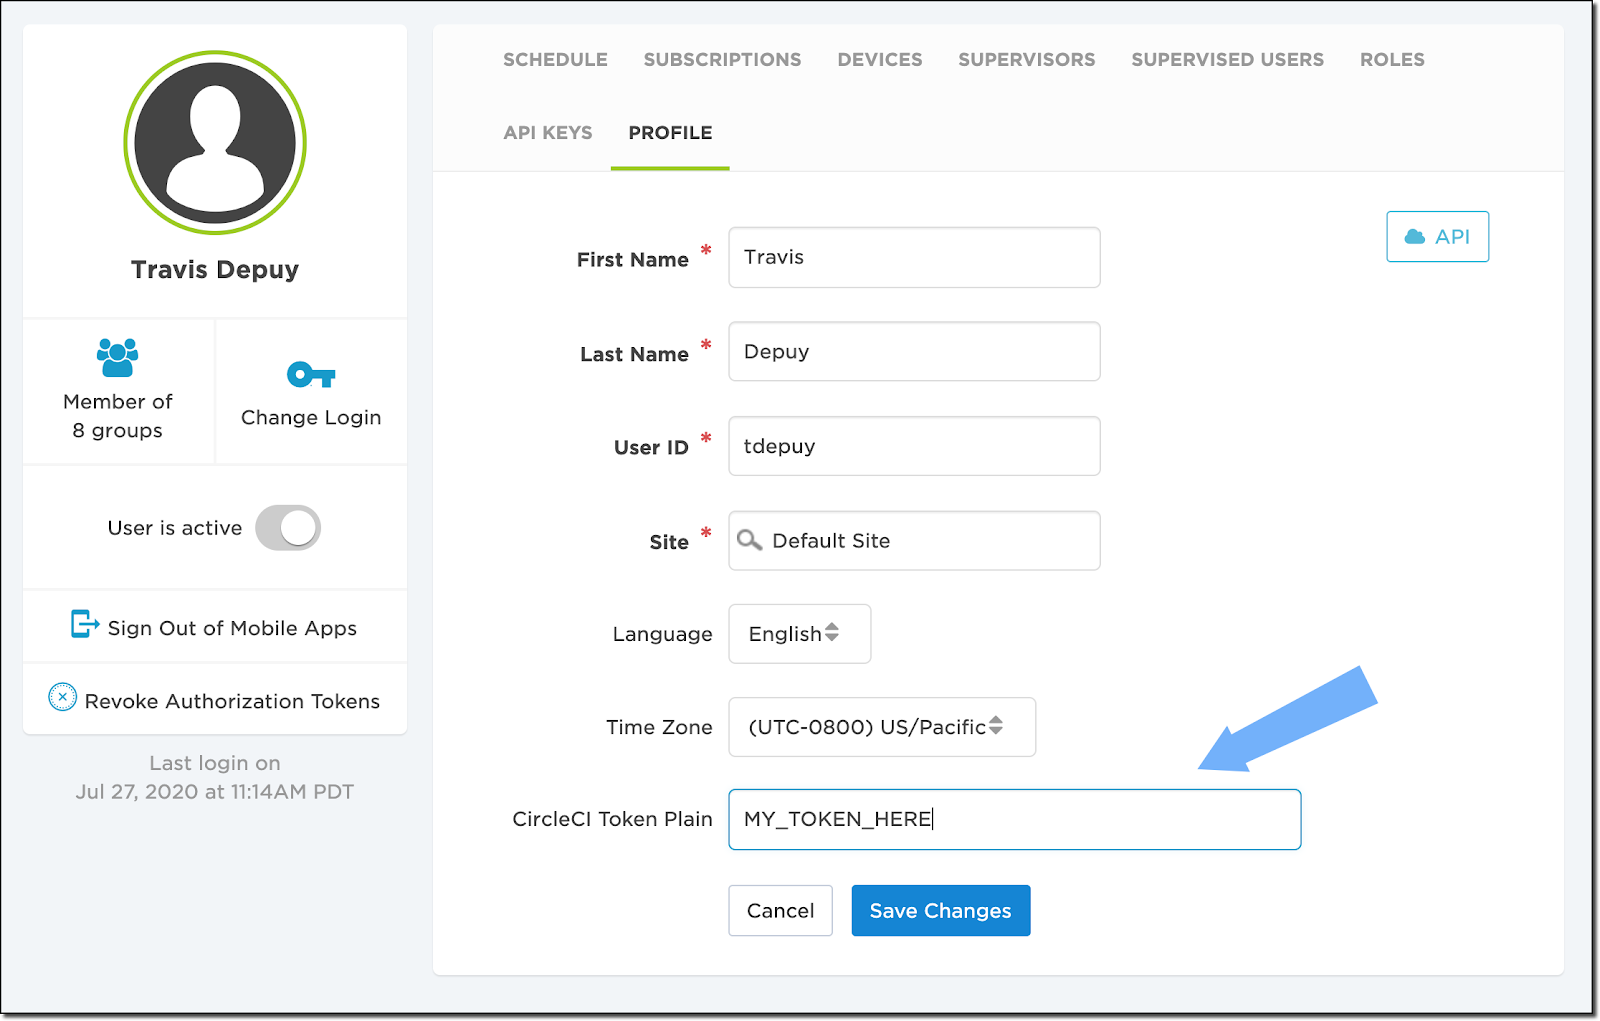
Note: This token is stored in plain text, but only you and your supervisor have access to view this value. We are evaluating other methods of storing this token, so keep an eye out for changes in this space!
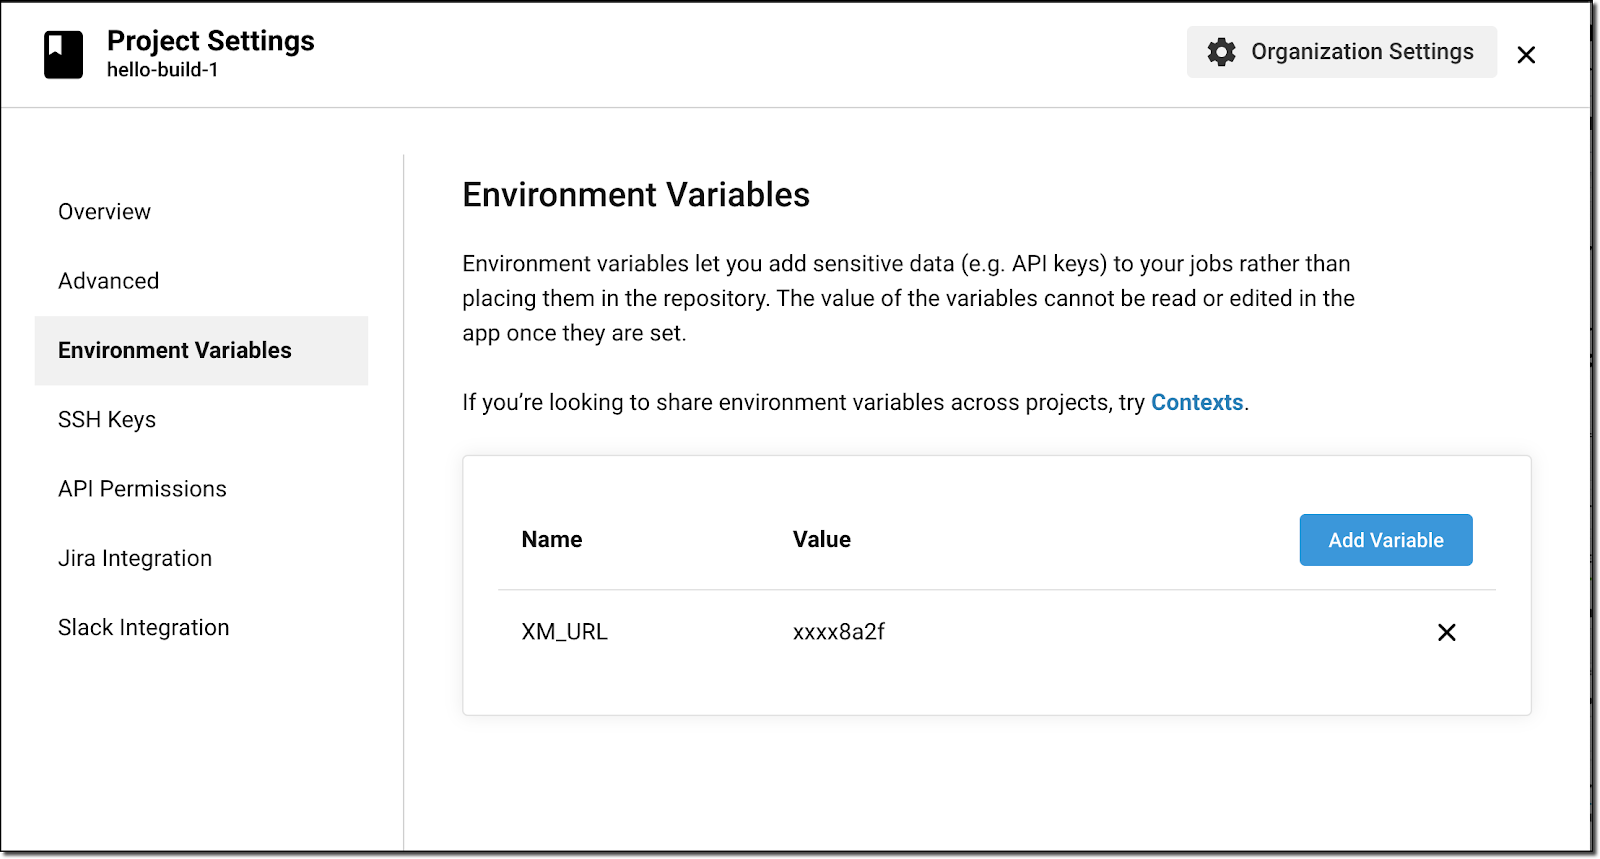
Finally, head back over to CircleCI and navigate to the project that needs approvals. Make sure to select the project in the list of pipelines as this will enable the Project Settings button in the upper right corner. Clicking this button displays the settings for the project. We’re going to add the XM_URL value as a new environment variable.
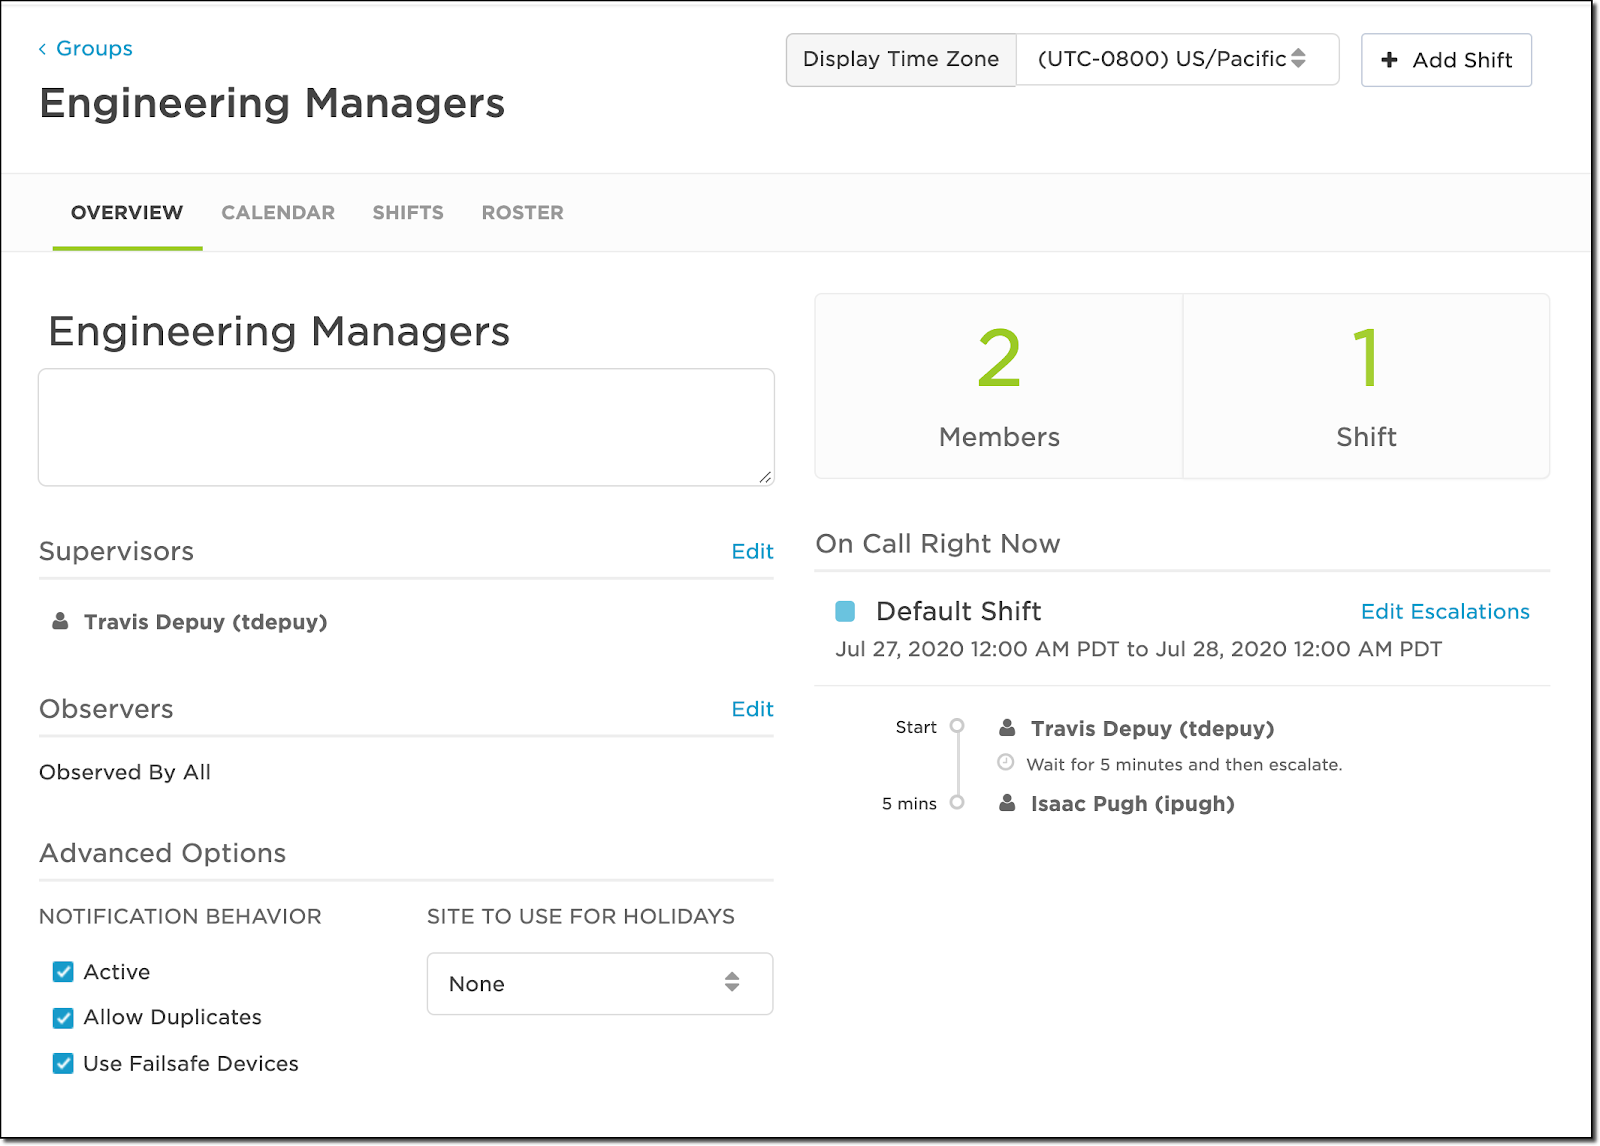
The final step entails recipient set up. If you’re targeting a group, navigate to the Groups section, create a new group, and add the appropriate users.
Note: You will need to have your own token populated in the profile.
Testing and approving
That’s it! When the pipeline gets triggered, it will be on hold at the hold step we configured in the .circleci/config.yml file.
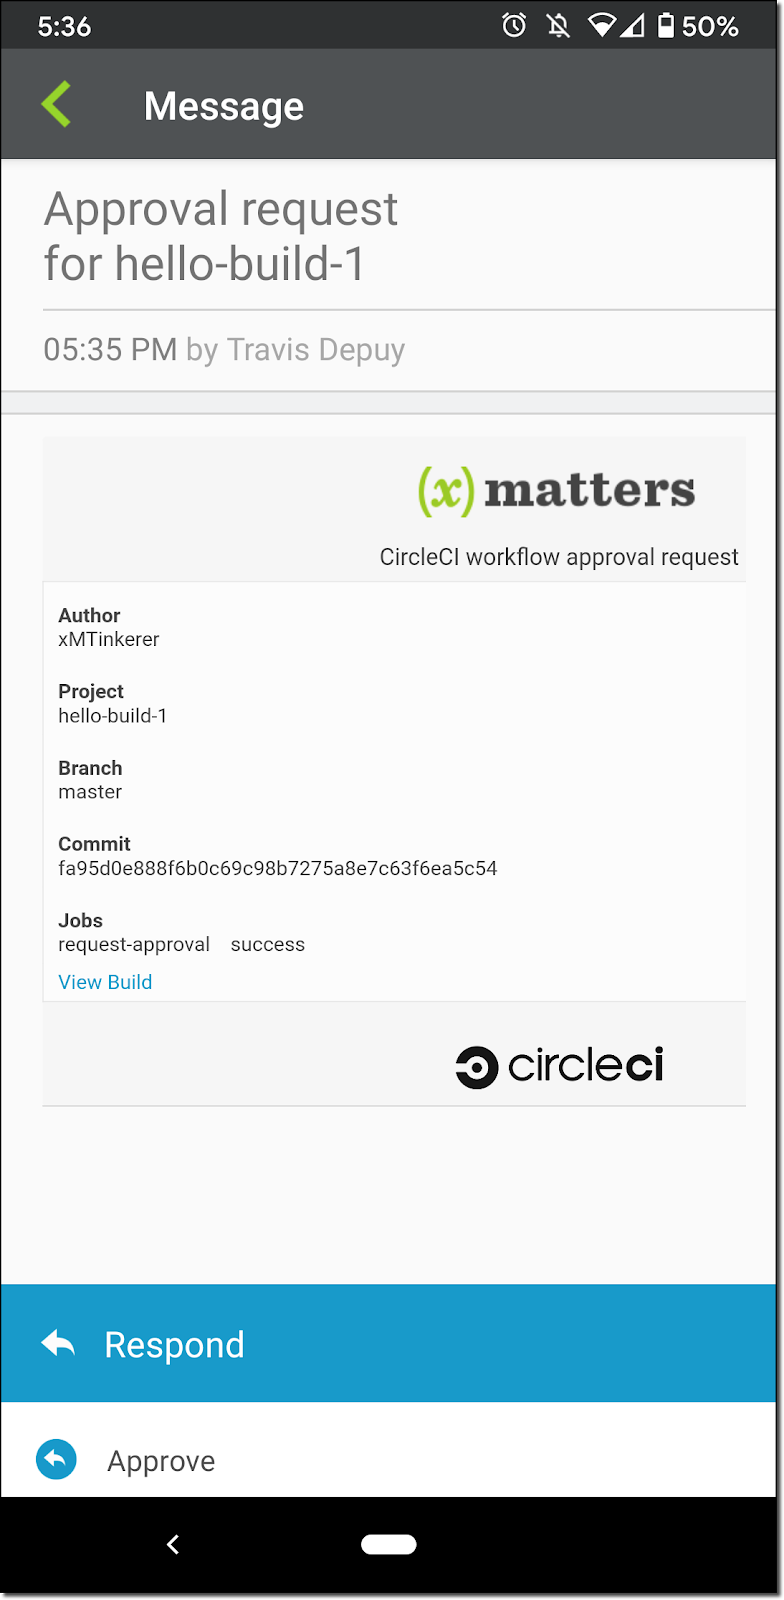
This will trigger a notification to the user we defined above in the Create xMatters Event step. The designated recipient will get a notification with pipeline details as well as the necessary response options. This is how it will look on the xMatters mobile app, but the email is very similar. The image on the right is with the responses drawer open, showing the available responses.
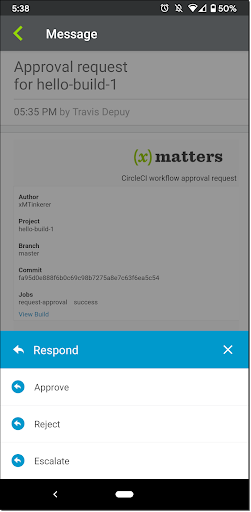
Just like that, selecting Approve makes the API call back to CircleCI to approve the pipeline and deploy your code to production.