
What if you could host a development AEM instance on a single-board, low-cost, high-performance computer that consumes very little power with hardware that you pay for once? That’s the question I set out to answer with my minimalist AEM experiment.
 Leading a team of AEM developers who support an on-prem implementation, I’m tasked with trying to make local environment setups as painless as possible. This is often complicated by variations in hardware and resources among the team members. Hosting AEM on the same machine as your IDE (Integrated Development Environment) is not always optimal due to these resource constraints. And using another machine or cloud service has associated costs and energy consumption challenges. This is where Raspberry Pi comes in.
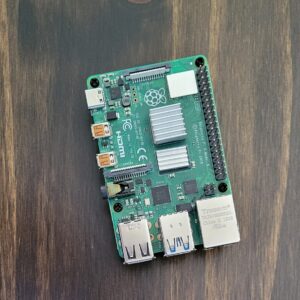
That’s right, I wanted to get AEM working on a Raspberry Pi single-board computer. This started as an experiment, but the results were surprisingly decent.
I tested this on the 8GB variation of the Pi 4. Assuming the Pi’s only purpose is to host AEM and sshd, you can safely allocate up to 7GB to the JVM heap, which should be more than enough for a local environment in most situations. When it’s set up, the AEM instance is accessible on my local LAN, easy to access and deploy to.
If you’re interested in building your own minimalist AEM or simply curious about how I did it, check out the following steps.
Minimalist AEM Server Build Instructions
System Setup
STEP 1: Install Rasbpian on a micro-SD card (a UHS-1 class card with ~100MB/s read or better).
STEP 2: On the new Raspbian instance, install Java 11.
STEP 3: In Rasbpian, run sudo raspi-config to configure the following
expand filesystem
enable ssh
enable Wi-Fi and connect to your network
STEP 4: Optionally configure a static IP by editing /etc/dhcpcd.conf and adding the following lines.
interface wlan0
static ip_address=x.x.x.x/24
static routers=x.x.x.x
static domain_name_servers=x.x.x.x
Where static ip_address is the address of this host, within the address range of your local network (this range is typically 192.168.1.2 – 192.168.1.254, bear in mind the address chosen should not conflict with other device addresses in your network). Static routers is the address of your router, and static domain_name_servers is your DNS server address (usually the same address as your router unless you use a custom DNS service).
STEP 5: Reboot after editing is complete.
AEM 6.5 Setup
STEP 1: Create a folder named aem, and put your AEM jar file and license.properties file within it.
STEP 2: Ensure your AEM jar file is renamed to cq-author-p4502.jar.
STEP 3: Unpack the jar file via this command: java -XX:MaxPermSize=256m -Xmx3500M -jar cq-author-p4502.jar
STEP 4: Provide your admin credentials.
STEP 5: Leave AEM alone to bake for 1 hour. (I’m not kidding, let AEM register services, initialize indexes, and complete its first-time setup of the JCR.)
STEP 6: Stop AEM via the CTRL+C keystroke.
STEP 7: Open the start script under crx-quickstart/bin/start and change the CQ_JVM_OPTS variable’s Xmx property value to 7144m, also add the following JVM parameters to this variable:
-XX:+UseParallelGC -Dnashorn.args=–no-deprecation-warning –add-opens=java.desktop/com.sun.imageio.plugins.jpeg=ALL-UNNAMED –add-opens=java.desktop/com.sun.media.imageio.plugins.tiff=ALL-UNNAMED –add-opens=java.base/sun.net.www.protocol.jrt=ALL-UNNAMED –add-opens=java.naming/javax.naming.spi=ALL-UNNAMED –add-opens=java.xml/com.sun.org.apache.xerces.internal.dom=ALL-UNNAMED –add-opens=java.base/java.lang=ALL-UNNAMED –add-opens=java.base/jdk.internal.loader=ALL-UNNAMED –add-opens=java.base/java.net=ALL-UNNAMED
STEP 8: Start AEM by running the start script you edited in step 7.
STEP 9: Once the crx-quickstart/logs/stdout.log file prints “Startup Completed”, install the latest service pack via package manager.
STEP 10: Wait another hour and then restart.
STEP 11: Optionally, update your code project parent POMs, setting the aem.host value to match the IP address of your new AEM server. You will also want to add these POM.xml files to a .gitignore file (you can still push them whenever necessary via git push –force).
After taking the steps above, you’ll have your own low-cost, minimal energy-consuming AEM server.
There are clear pros and cons to this setup. You have a server you can store anywhere, isolated from your development machine. You also have the challenge of having to back-up the SD card (though you can run dd to create a compressed backup image without much trouble).
Performance Considerations
When I first started using AEM Sites on my Pi server, I noticed latency in initial page loads. Subsequent requests, however, were completed within an acceptable 3-4 seconds range. I attribute this to the building of the client libraries cache. After making several page requests throughout the content tree, I gathered stats of Request Performance under /libs/granite/operations/content/healthreports/healthreport.html/system/sling/monitoring/mbeans/org/apache/sling/healthcheck/HealthCheck/requestsStatus. The result for the 95th percentile was ~1000ms (about 1 second), not bad.
To optimize performance, I looked at the slowest JCR queries and then used the Oak Index Definition Generator to define custom indexes. This can improve request processing when the page is composed of the typical MVC pattern, with a Sling Model and HTL templates. Defining indexes for the specific query criteria involved in rendering component data can speed up the response to those queries.
Regarding AEM Assets, the interface did take a few seconds to load the response for the first request, but after that each folder I visited completed full load in ~1 second. Asset details took several seconds the first time, but after that each image tested was fully loaded in ~3 seconds. Again, the caching of client libraries has a noticeable impact here.
Overall, I was taken aback by how feasible it is to deploy projects to a Pi server running AEM. It is exciting to see how well the framework operates on such low-powered hardware. I recommend you give it a try!
Check out more Adobe blogs here.