
In this blog, our focus will be on creating a Maven project in IntelliJ and launching multiple browsers using the Selenium WebDriver.
What is Selenium and WebDriver?
Selenium is a web UI automation testing suite that is used to automate web applications for testing purposes. Selenium supports automation across different browsers (Google Chrome, Microsoft Edge, Mozilla Firefox), platforms (Windows, Linux, Solaris), and programming languages (C#, Java, Perl, PHP, Python). Basically, it is a framework where scripts are written to run a WebDriver, which in turn controls the browser.
WebDriver is an API that drives the web browser by using libraries and commands.
- To configure Selenium in IntelliJ, the user should have JDK installed on the OS.
Steps to Download and Install JDK
- Download the JDK based on system specifications: https://www.oracle.com/java/technologies/downloads/#jdk18-windows
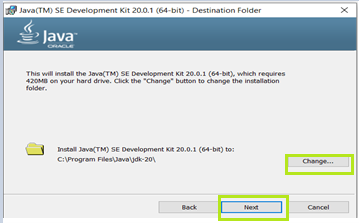
- Open the downloaded file and click on Next.

- Give the path where you want JDK to be installed.
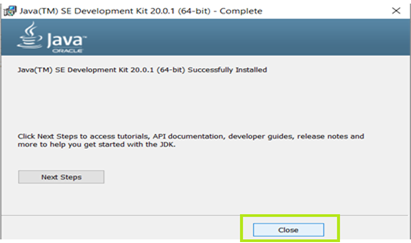
- Once it gets installed on your device, a dialogue box will appear as shown below.
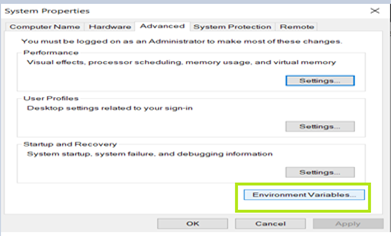
- The next step is to configure environment variables and to set the environment variables, search for Environment Variables in the Task Bar and open the same.
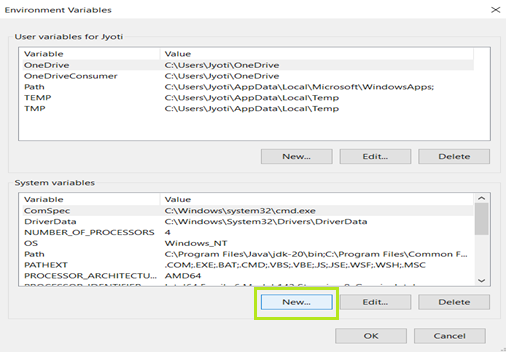
- Click on Environment Variables as shown below.
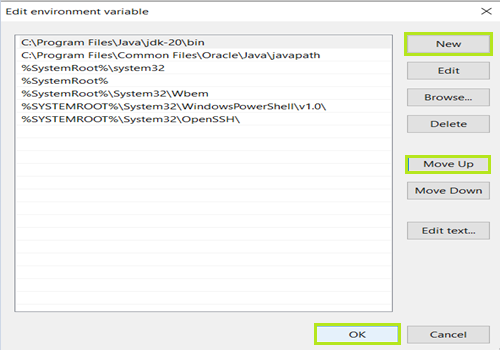
- Select the Path and click on Edit.
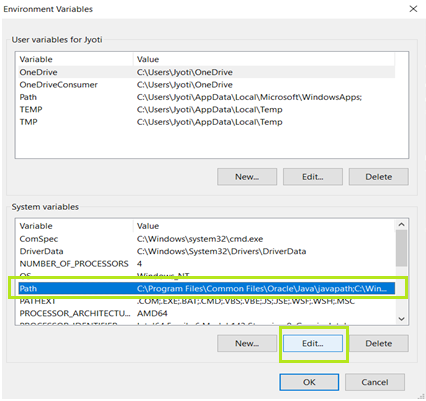
- Click on New and enter the Path address i.e. C:\Program Files\Java\jdk-20\bin.
- Click on OK.
- Under System Variables, click on New.
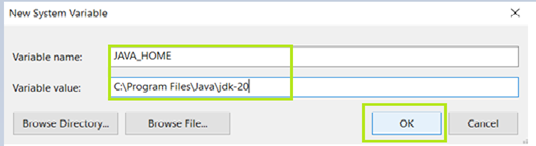
- Give the Variable name JAVA_HOME and the Variable value C:\Program Files\Java\jdk-20 (The variable value is the path where JDK is installed).
- Click on OK.
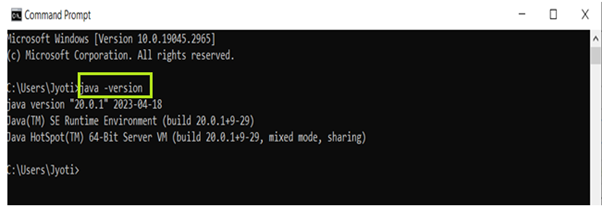
- To check whether the process has been completed successfully or not, open the Command Prompt, enter the command java -version, and check the status as shown below.
Steps to Download and Install IntelliJ
- To download IntelliJ, go to the site: https://www.jetbrains.com/idea/download/ and select the .exe file of the community version. The file should start downloading.
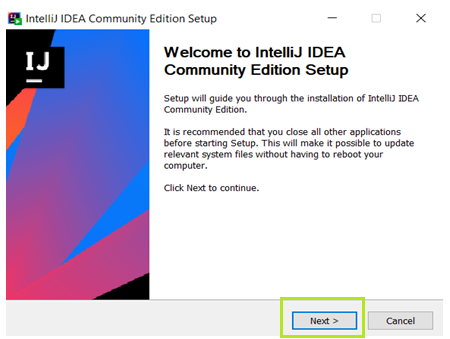
- Once the download is complete, open the.exe file and you should see a pop-up window as shown below. Click on Next.
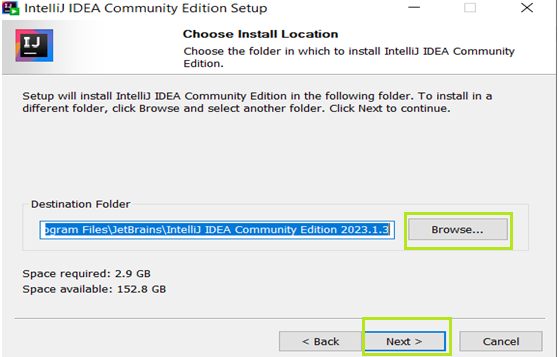
- Select the destination folder where you want IntelliJ to get installed, and then again click on Next.
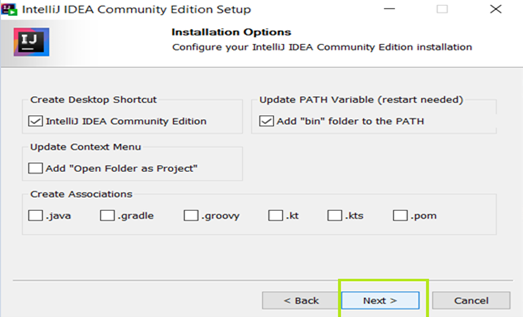
- Select the checkbox as per the requirements, and then click on Next.
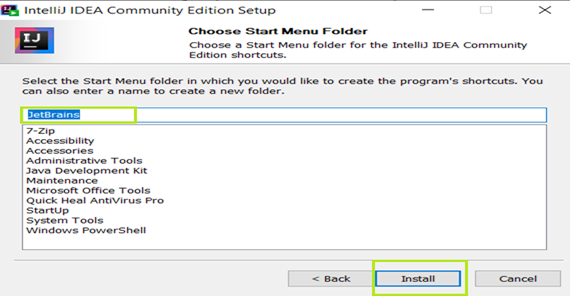
- Choose the start menu folder, or by default, it is set to JetBrains. Click on Install, and you will observe that IntelliJ will get installed in the destination folder.
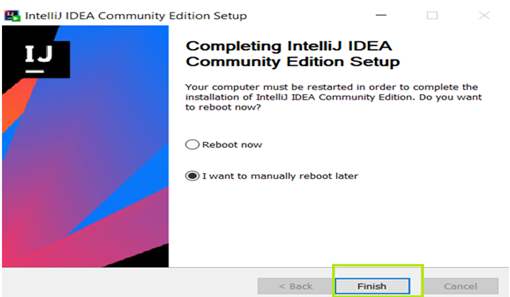
- Click on Finish.
How to Create a Maven project in IntelliJ
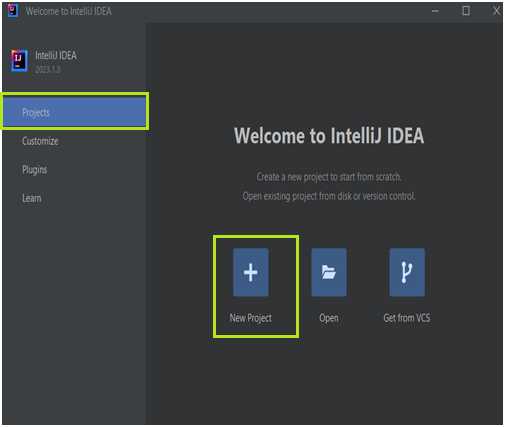
- Open IntelliJ IDEA and select New Project.
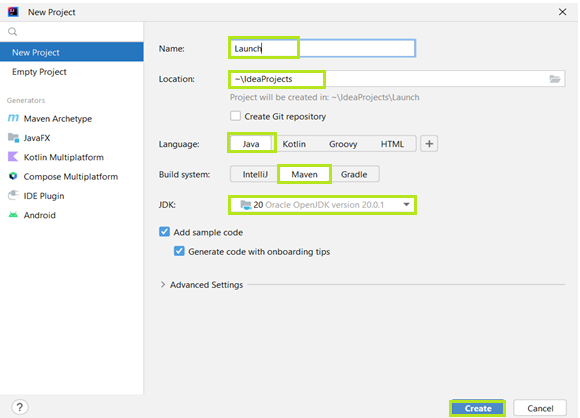
- Give the project name, location, language (Java), Build system (Maven), and JDK version, and then click on Create.
 A Maven project should be created with the project structure shown below.
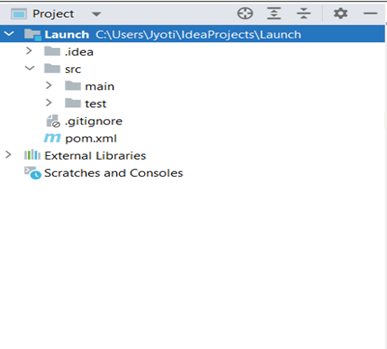
How to Launch Multiple Browsers using the Selenium WebDriver

In Selenium, different webdrivers are used for different browsers: FirefoxDriver for the Firefox browser, ChromeDriver for Google Chrome, and InternetExplorerDriver for Internet Explorer.
Let’s consider the example of launching the Chrome browser.
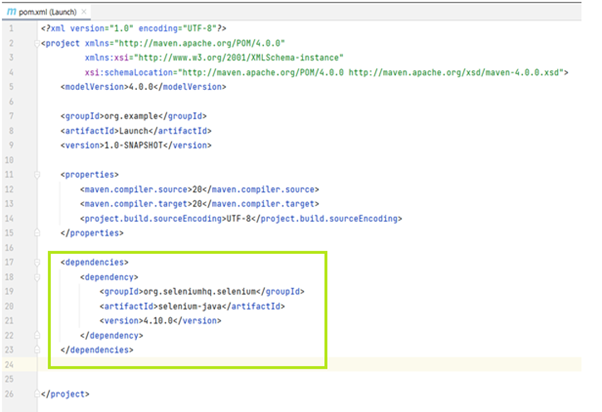
- The very first step is to add the selenium dependency to the pom.xml file. You can get the latest selenium version dependency from: https://mvnrepository.com/artifact/org.seleniumhq.selenium/selenium-java
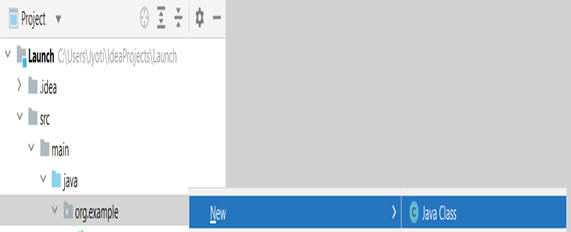
- Now create a Java Class inside the src=>main=>java folder.
- After the Java class gets created, start writing code as mentioned below:

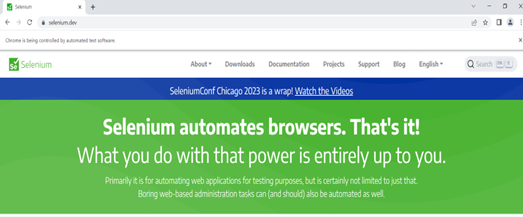
- After writing the code, when you run the Java class, the Chrome browser will launch as shown below.
- To launch the Chrome browser, you need to download the chromedriver.exe file. (https://chromedriver.chromium.org/downloads)
- System.setProperty is used to set webdriver.chrome.driver to the chromedriver.exe location (path where chromedriver.exe file is stored)
- WebDriver driver = new ChromeDriver(): WebDriver is an interface, and driver is a reference variable instantiated using the ChromeDriver class.
- driver.get(URL) will launch the Chrome browser and navigate the browser to the URL.
- driver.manage().window().maximize() will maximize the launched browser window.
- driver.close() will close the launched browser.
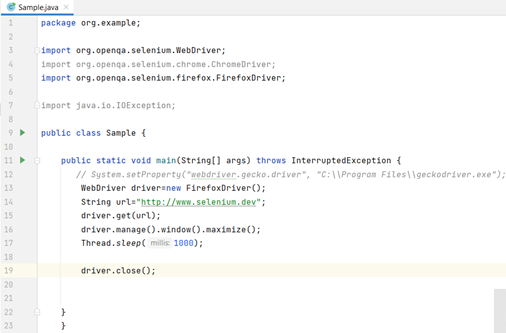
Similarly, you can Launch the Firefox Browser, the Only Change to the Code will be:
- You need to download the geckodriver.exe file: System.setProperty(“webdriver.gecko.driver”, “C:\\Program Files\\geckodriver.exe”);
- WebDriver driver = new FirefoxDriver();
Conclusion
By following the above steps, you will be able to successfully install JDK and IntelliJ on your device and can use the concept of Selenium WebDriver to automate test cases in different browsers.